Events
Mar 12, 2023
Herman Miller Chair 3D Modeling: Rhino 3D & Grasshopper Free Tutorial

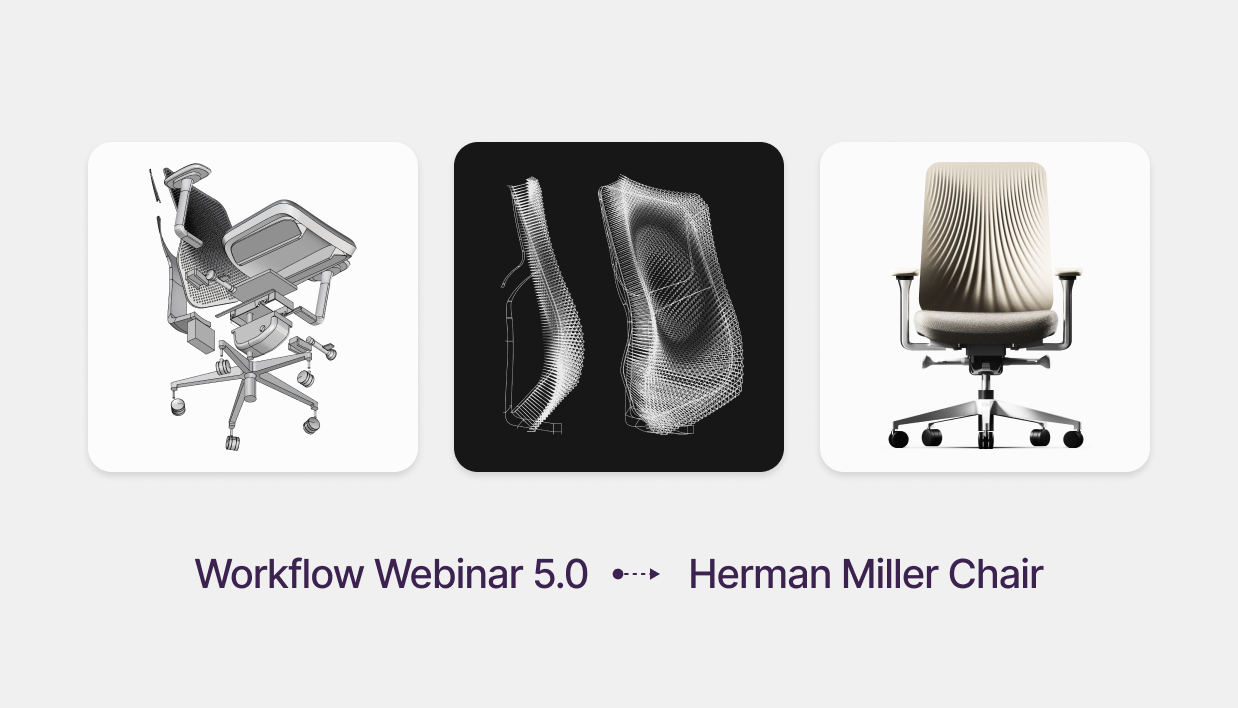
Ergonomic Furniture Design: Modeling a Task Chair with Rhino & Grasshopper
Free Rhino 3D & Grasshopper Course | Workflow Webinar 5.0
Welcome to the fifth module of our free Rhino 3D and Grasshopper course. In this 1.5-hour session, we take on the ultimate furniture design challenge: modeling a Herman Miller-style ergonomic chair. This lesson covers everything from structural NURBS surfacing to mechanical assembly and complex parametric mesh texturing using the Lunchbox plugin.
Download Files: cademy.xyz/webinar5
What’s included in this lesson:
- Full Video Tutorial: Follow along with our 1.5-hour step-by-step recording.
- Project Files: Download the exact Rhino and Grasshopper files to practice.
- Portfolio Piece: A high-quality assembly project perfect for students and professional portfolios.
What you will learn in this module:
- Complex Assembly Modeling: How to manage multiple components including frames, cushions, and mechanical adjustment systems.
- Advanced NURBS Continuity: Using NetworkSrf and BlendSrf to create organic, breathable surfaces that meet industrial design standards.
- Lunchbox Plugin for Grasshopper: Leveraging computational design tools to create staggered, dynamic mesh patterns for back support.
- Attractor-Based Perforation: Using Pull Point logic and Tween Curves to create a custom "breathable" texture that varies across the surface.
- Manufacturing Preparation: Exporting watertight STL files for SLA and FDM 3D printing.
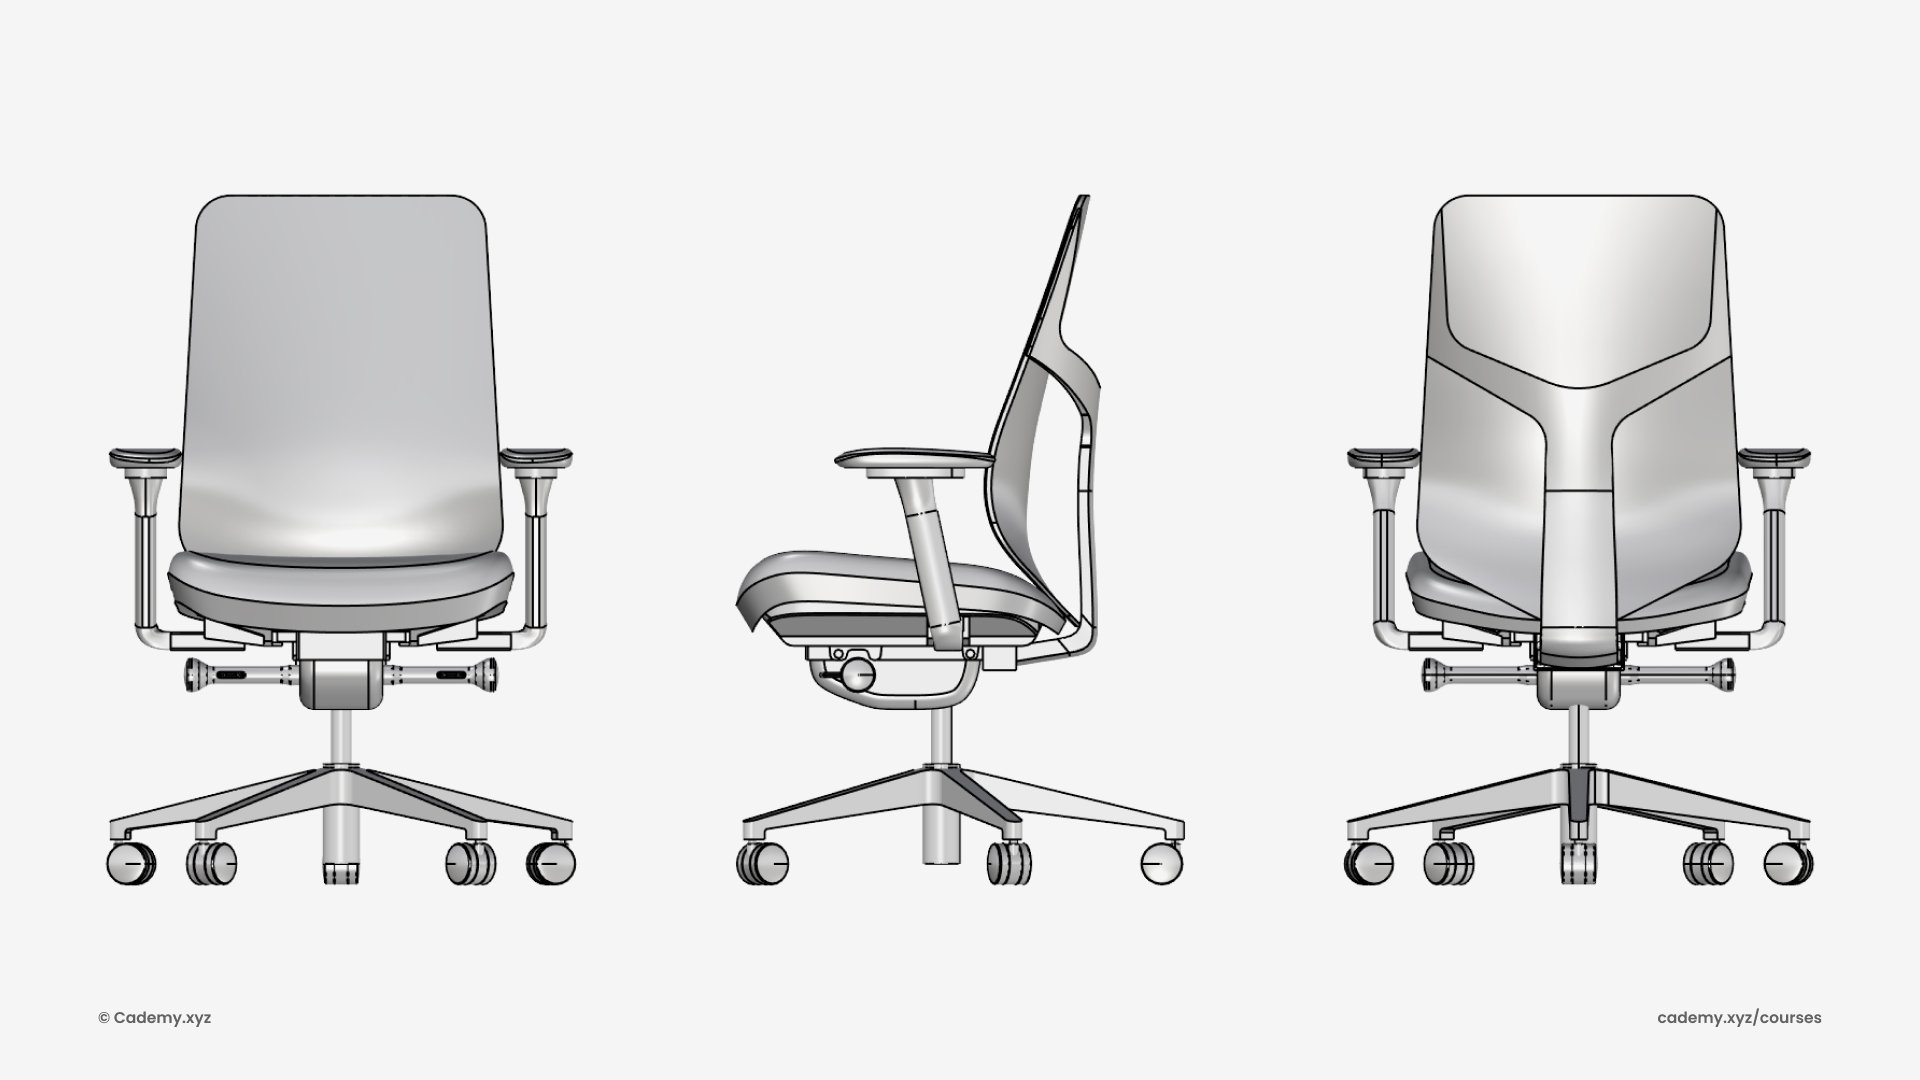
Step 1: Base Structure
- Create a side profile using the Project command.
- Use Loft to generate the primary surface for the back support.
- Add guiding curves and refine the back profile.

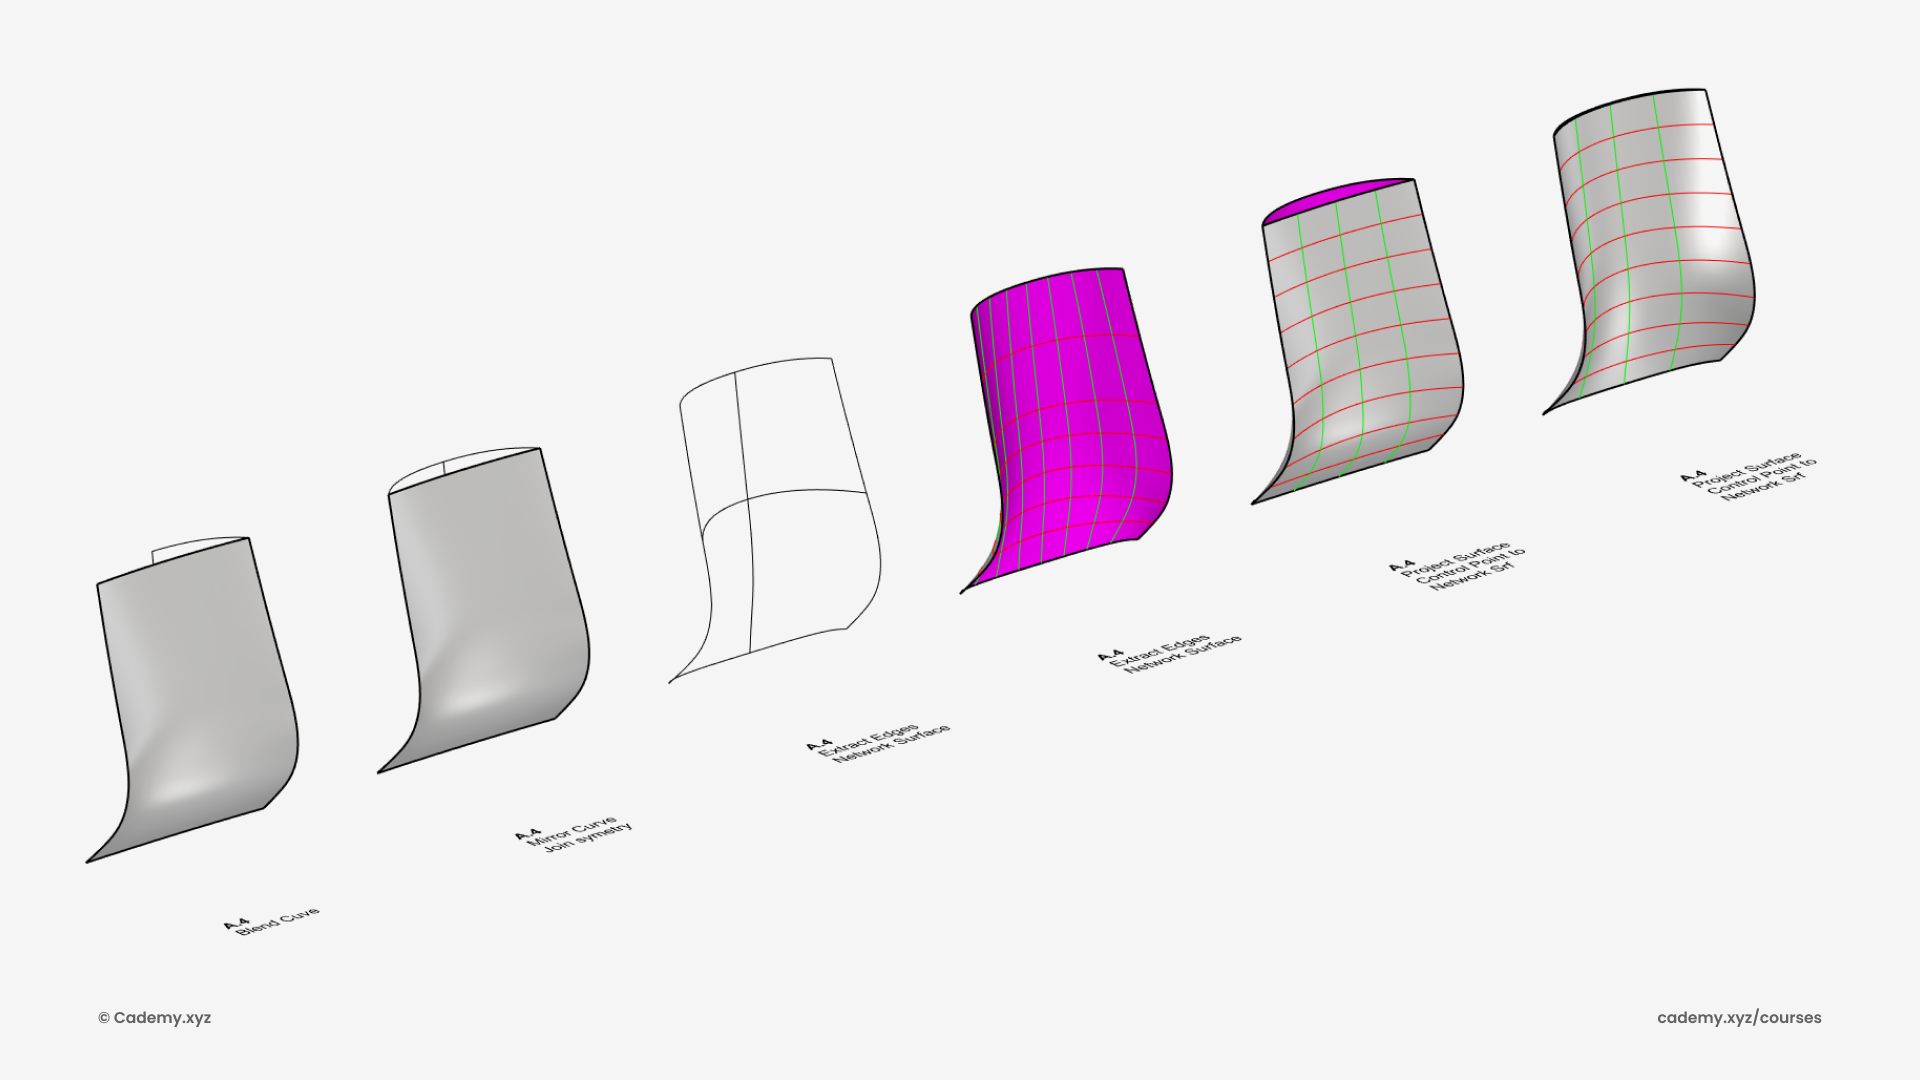
Step 2: Surface Creation
- Use BlendCrv for smooth curve connections (G0 and G1 continuity).
- Generate a surface using NetworkSrf from U and V curves.
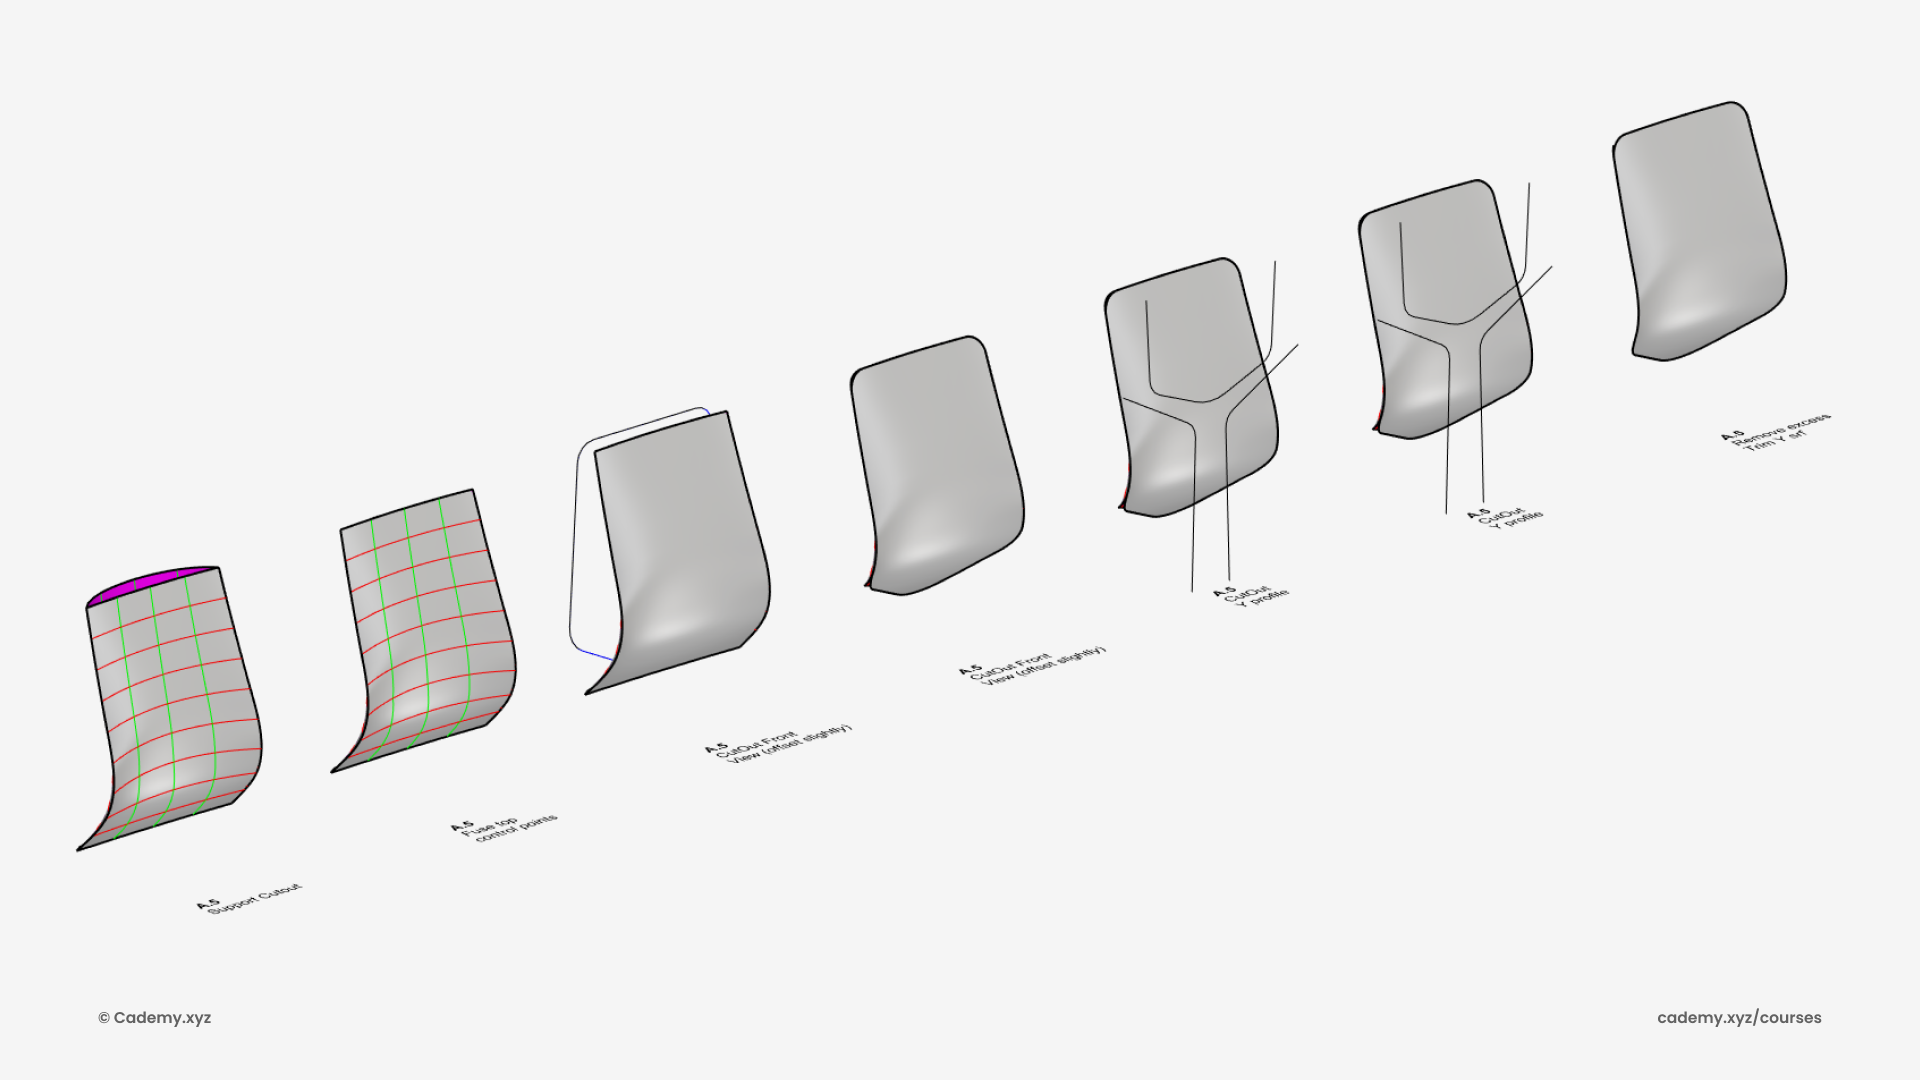
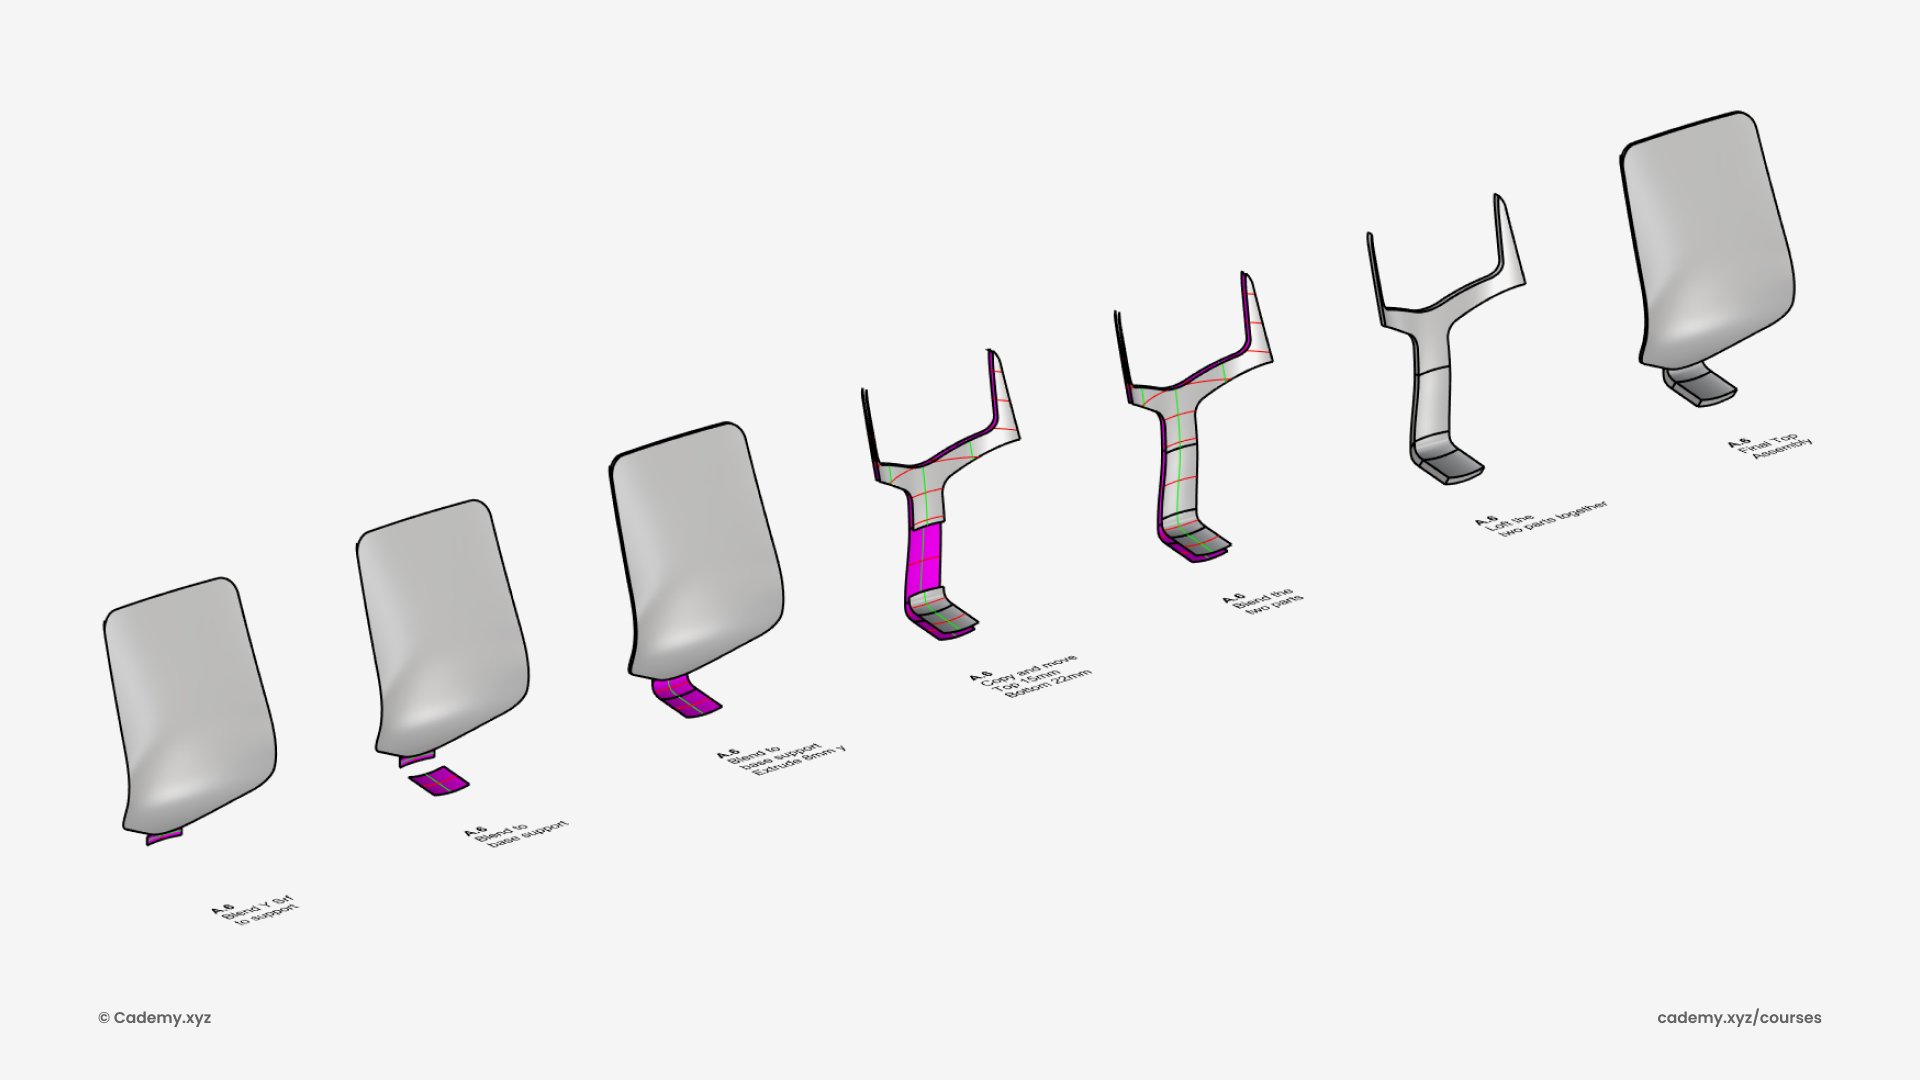
Step 3: Cut-Outs & Refinement
- Draw outer and Y-shaped cut-out profiles.
- Trim surfaces using these profiles to refine the chair’s structure.
Step 4: Seat & Frame Integration
- Connect the Y cutout to the seat frame with BlendSrf.
- Add thickness by scaling the PolySurface and connecting with Loft.
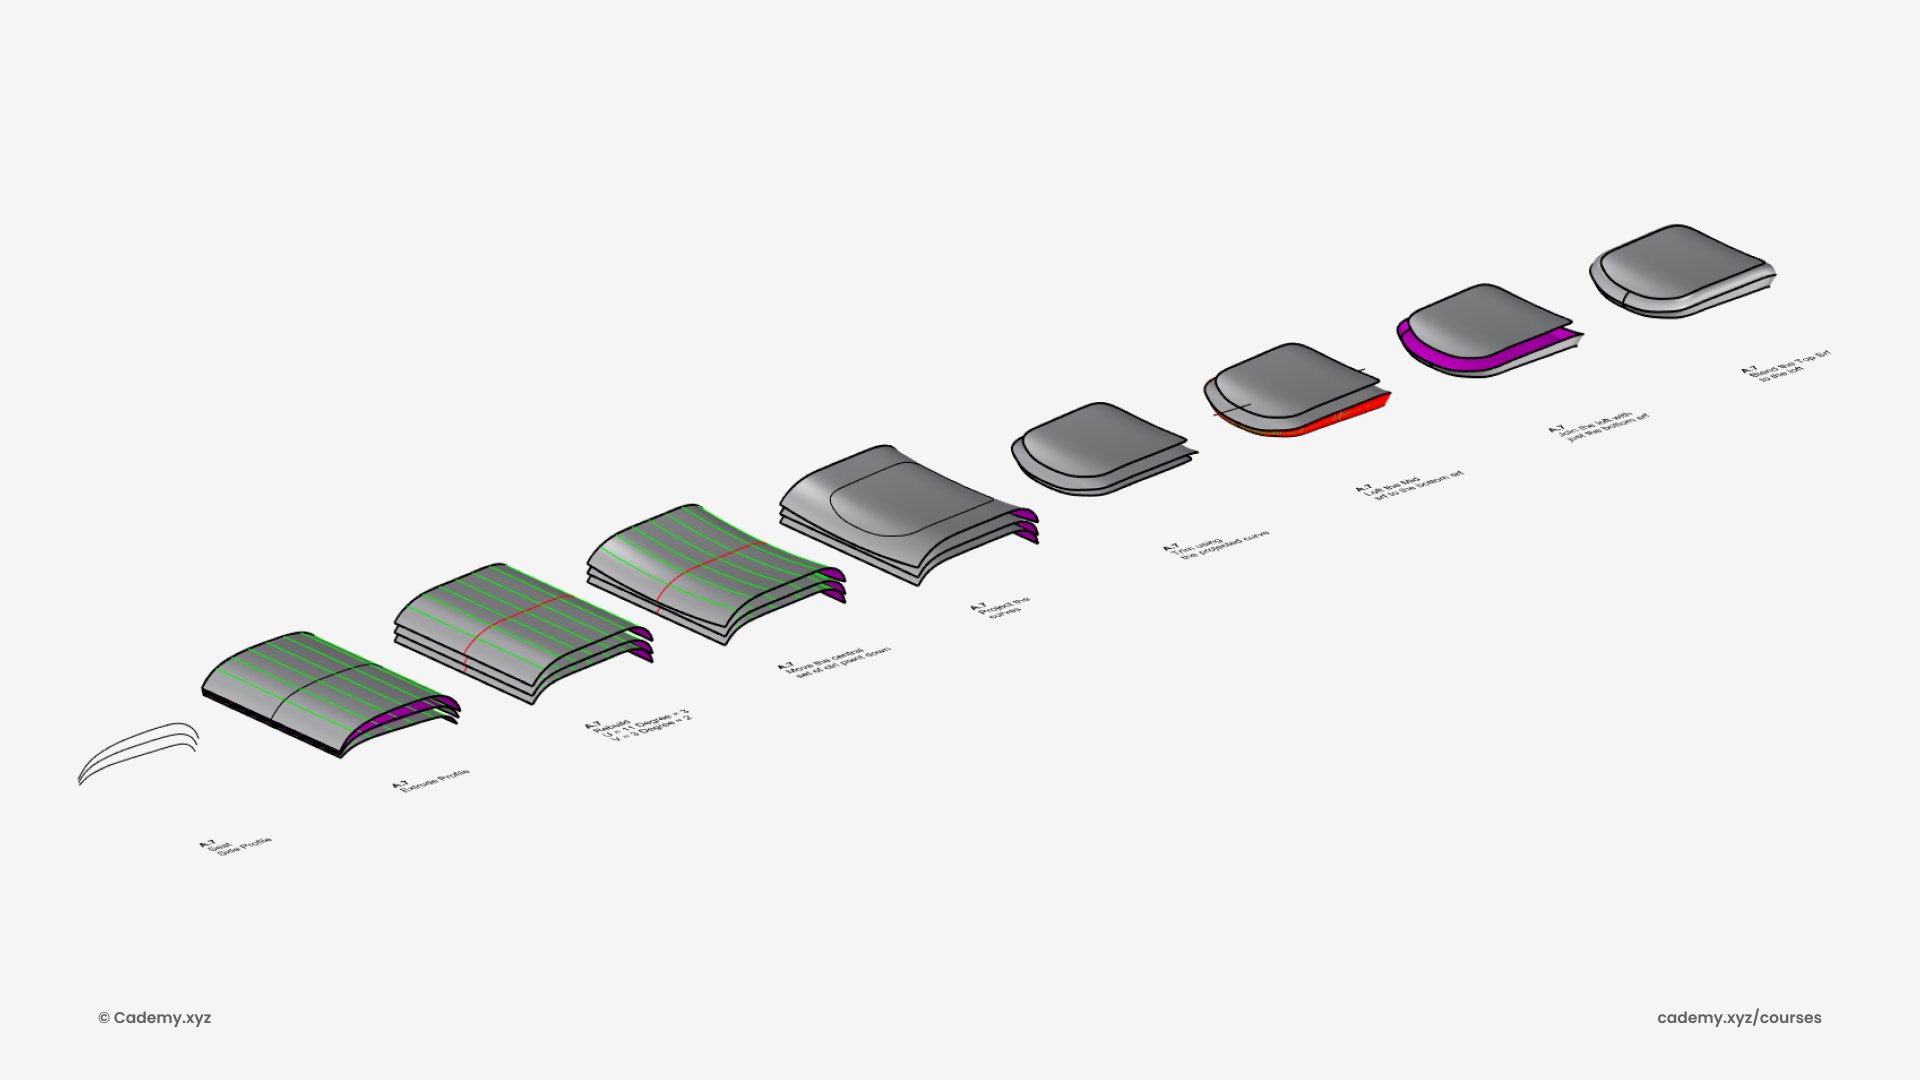
Step 5: Cushion Modeling
- Create three profiles for the cushion.
- Use Extrude, Rebuild, and BlendSrf for realistic organic shaping.
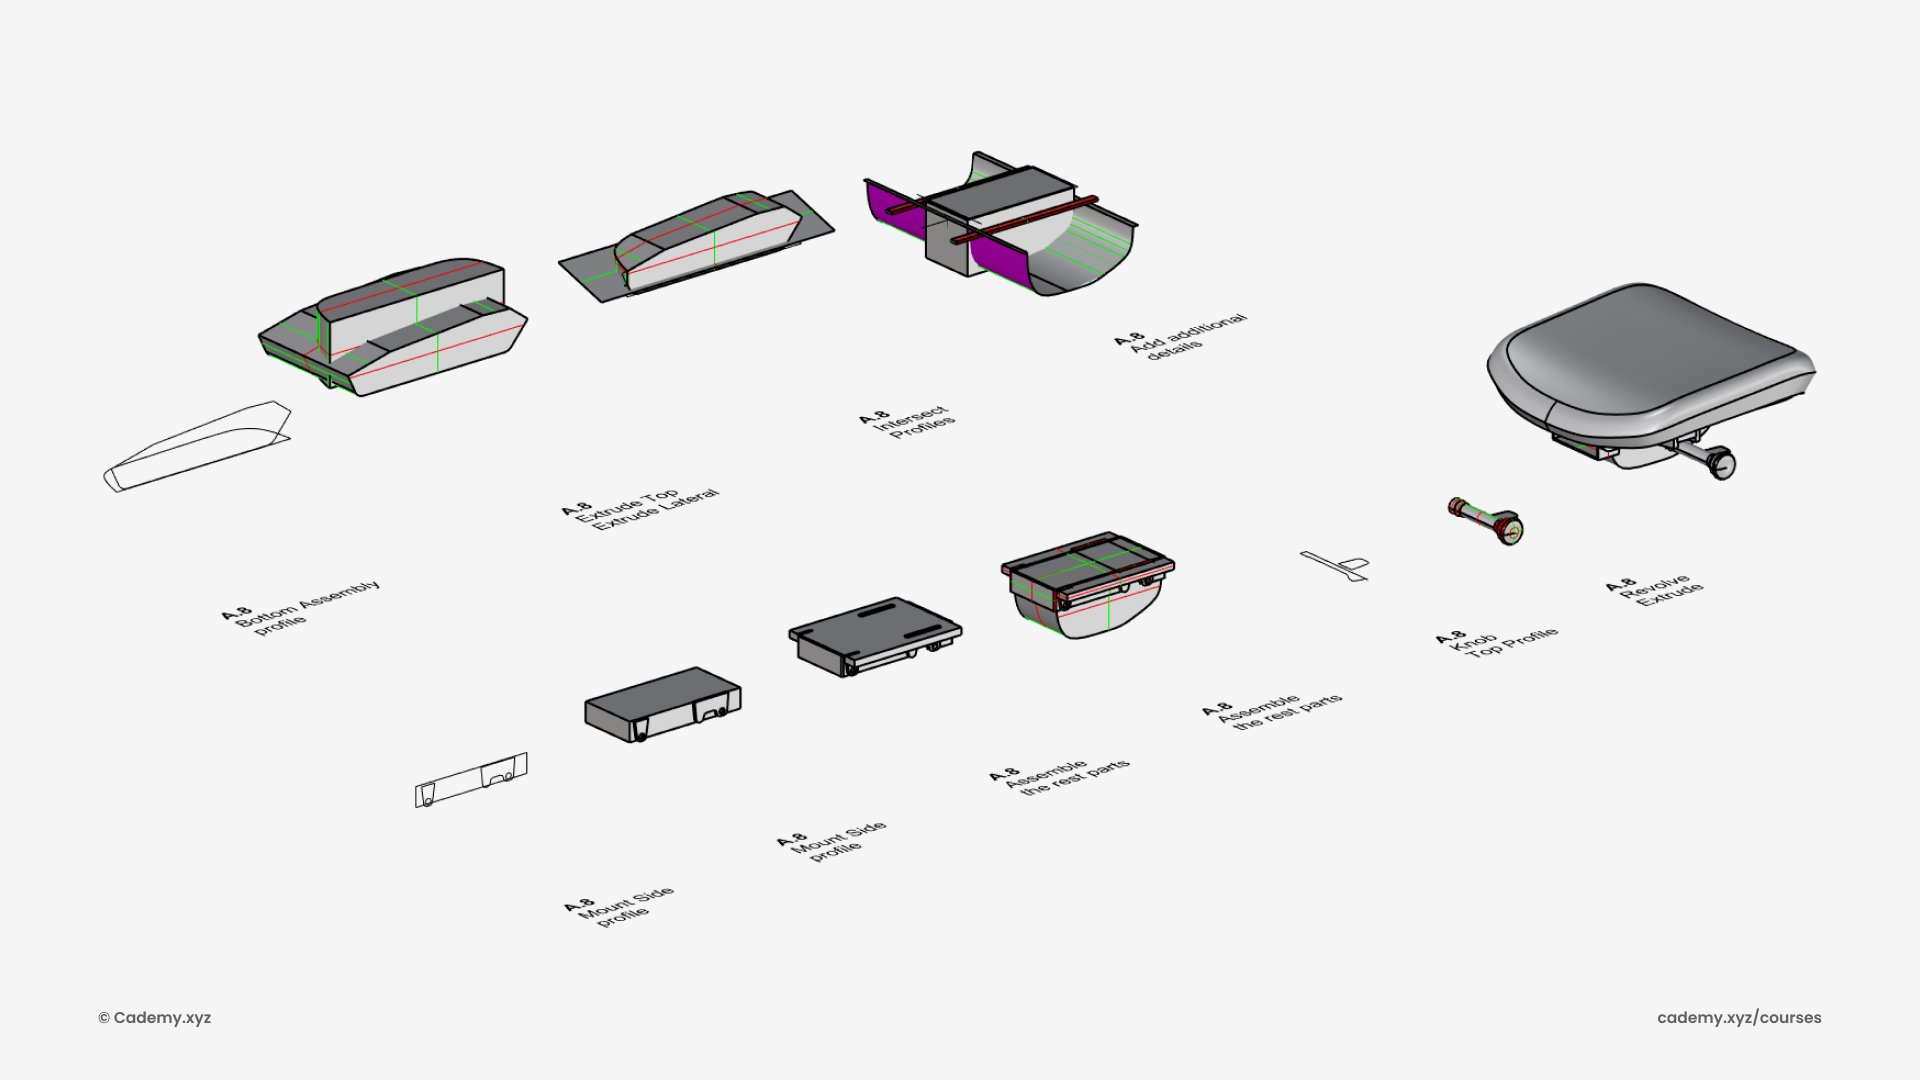
Step 6: Mechanical Assembly
- Extrude profiles for the chair’s height and angle adjustment system.
- Use Boolean Intersection to refine mechanical components.
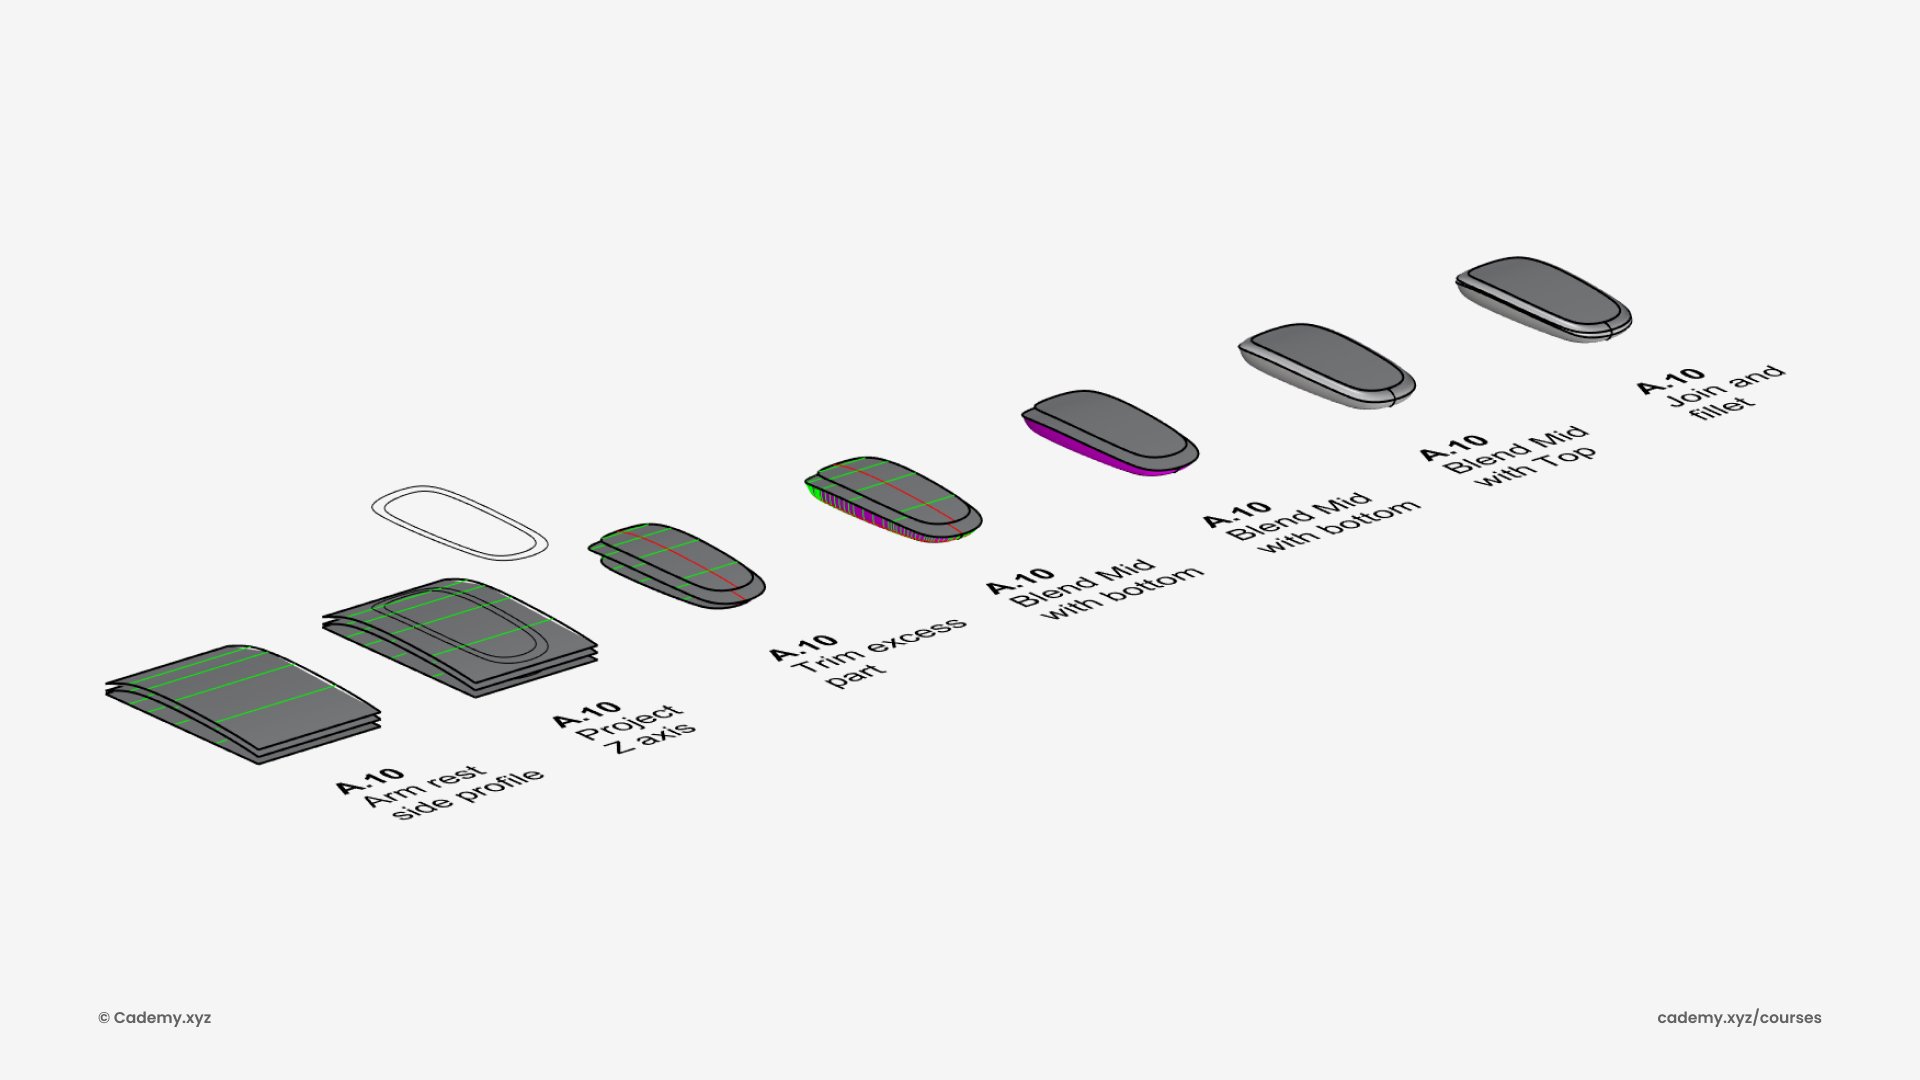
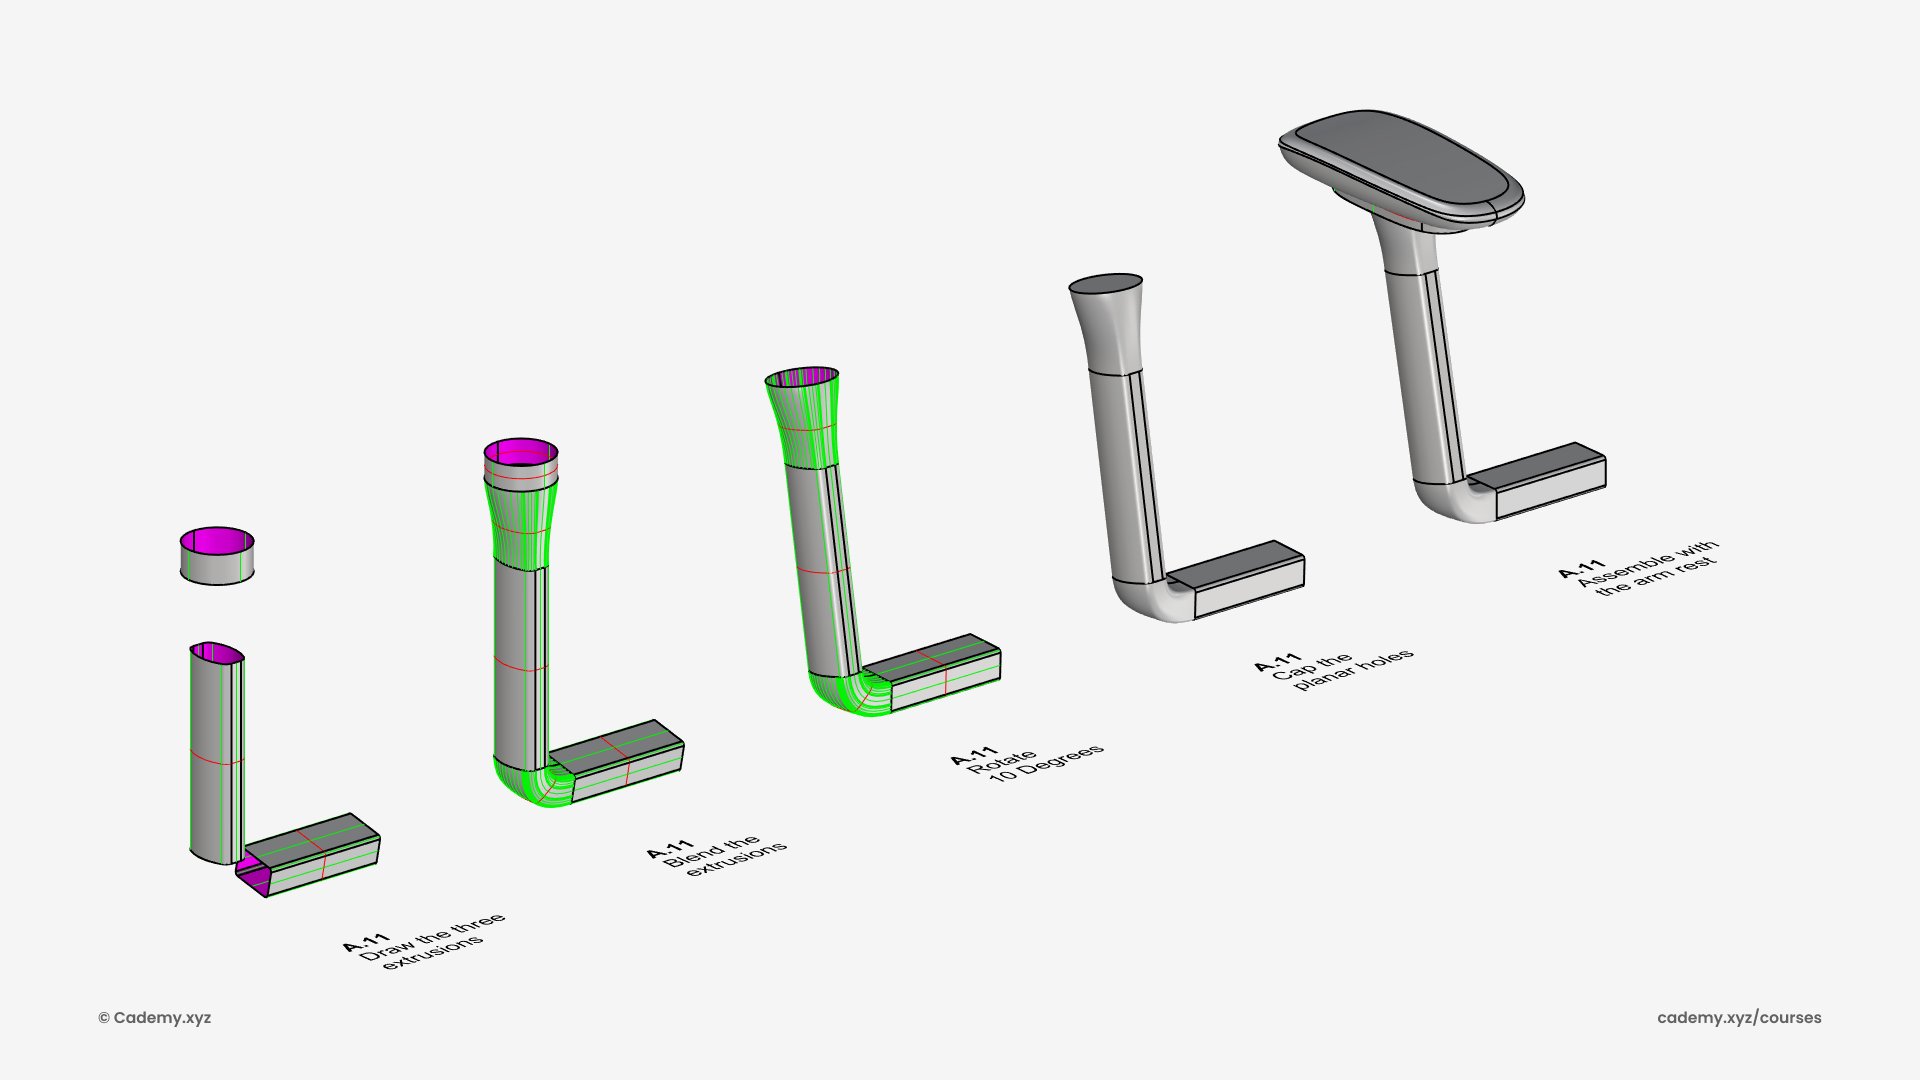
Step 7: Armrest Construction
- Extrude profiles, split excess surfaces, and use BlendSrf.
- Apply Fillet for smooth ergonomic transitions.
Step 8: Arm Support
- Structure created with extrusions and BlendSrf.
- Rotate 35º for ergonomic inclination.
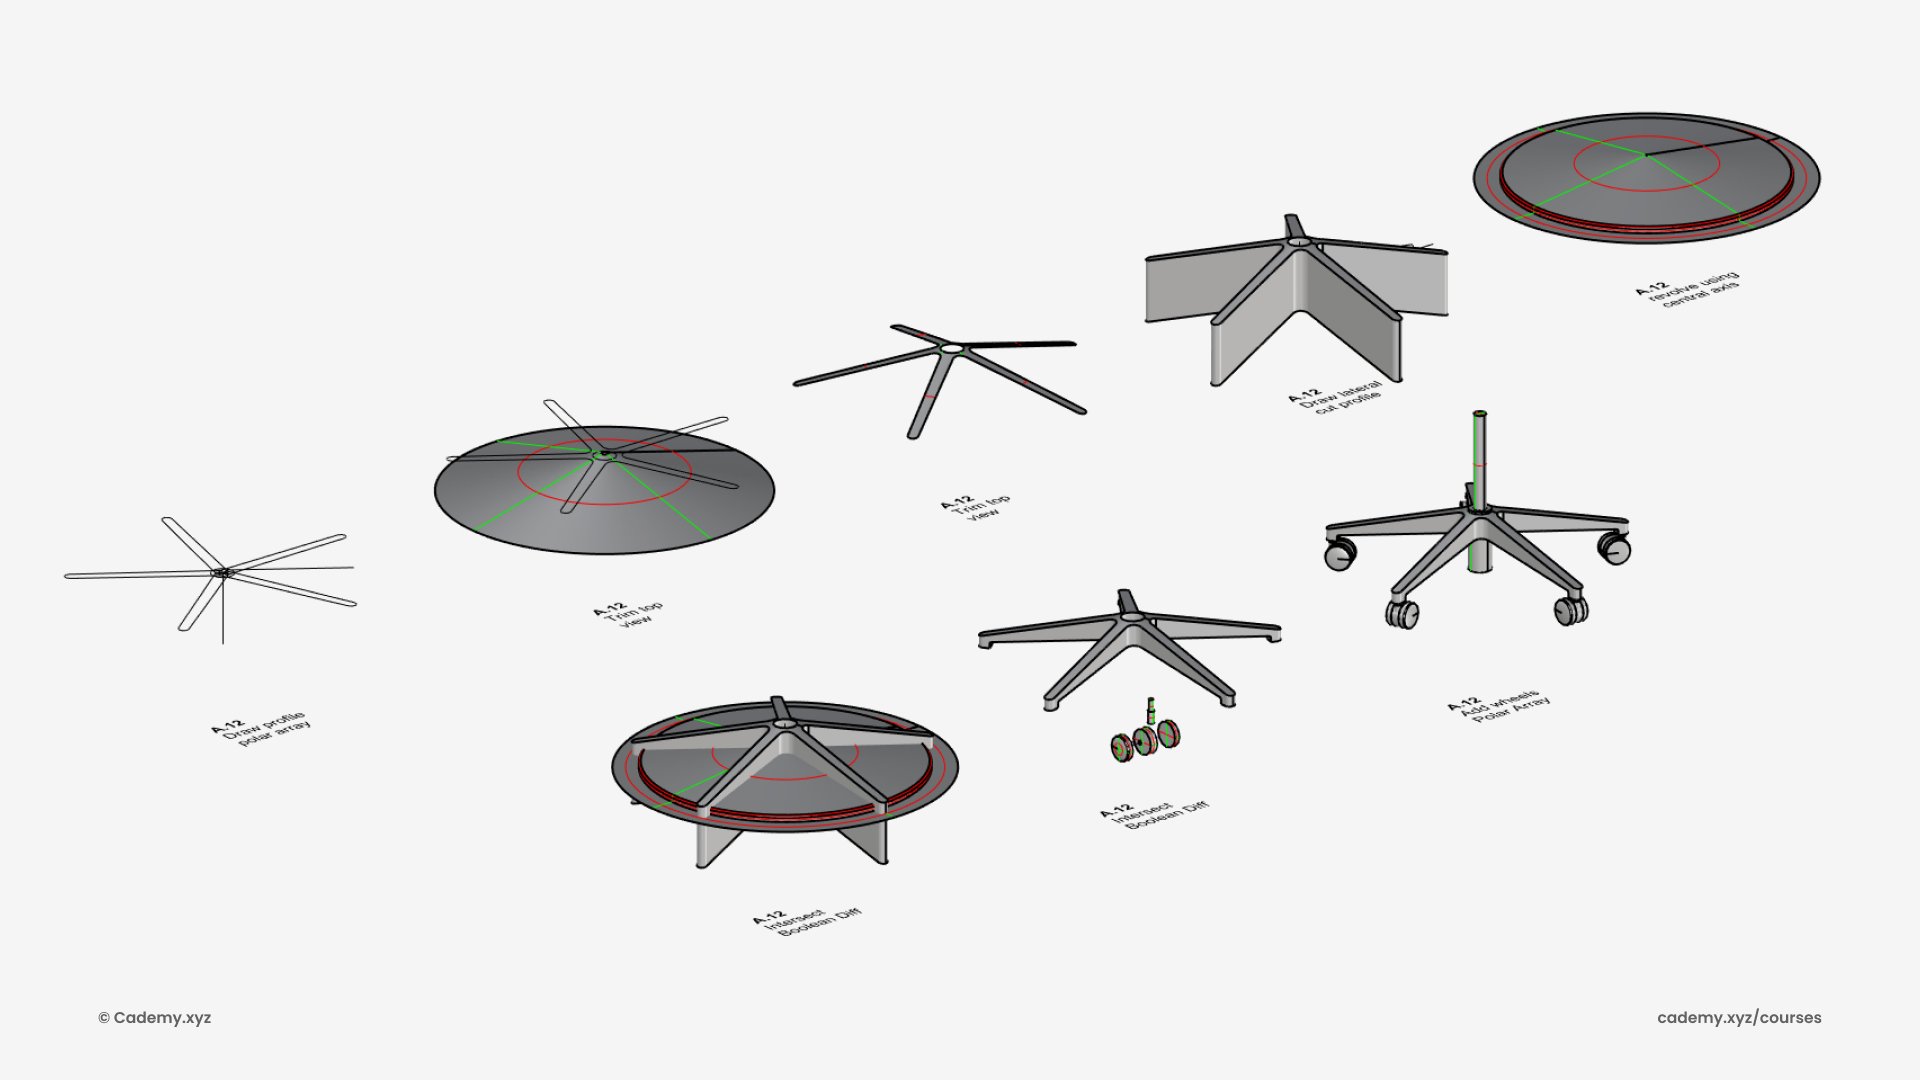
Step 9: Wheel Assembly
- Use Polar Array for five evenly spaced wheels.
- Apply Revolve and Boolean operations for support frames.
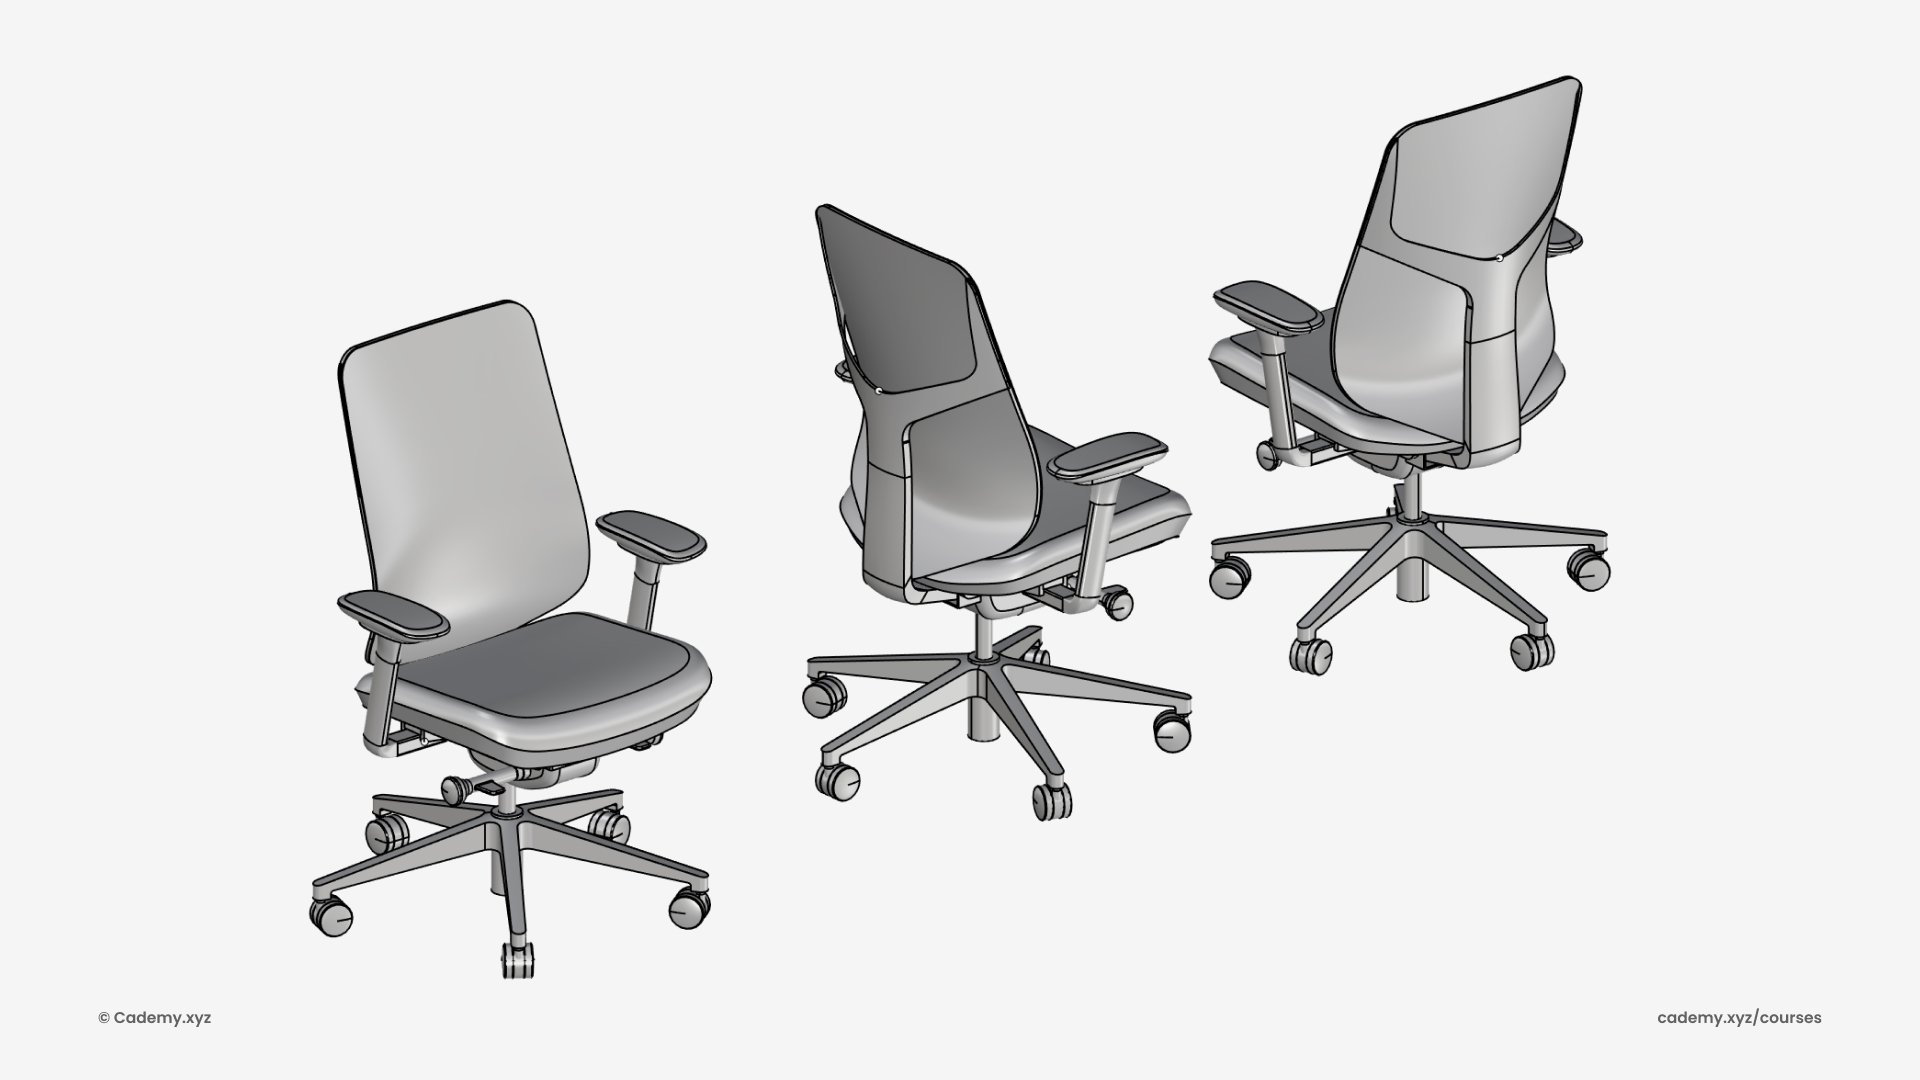
Step 10: Final Assembly
- Position and align all chair components.
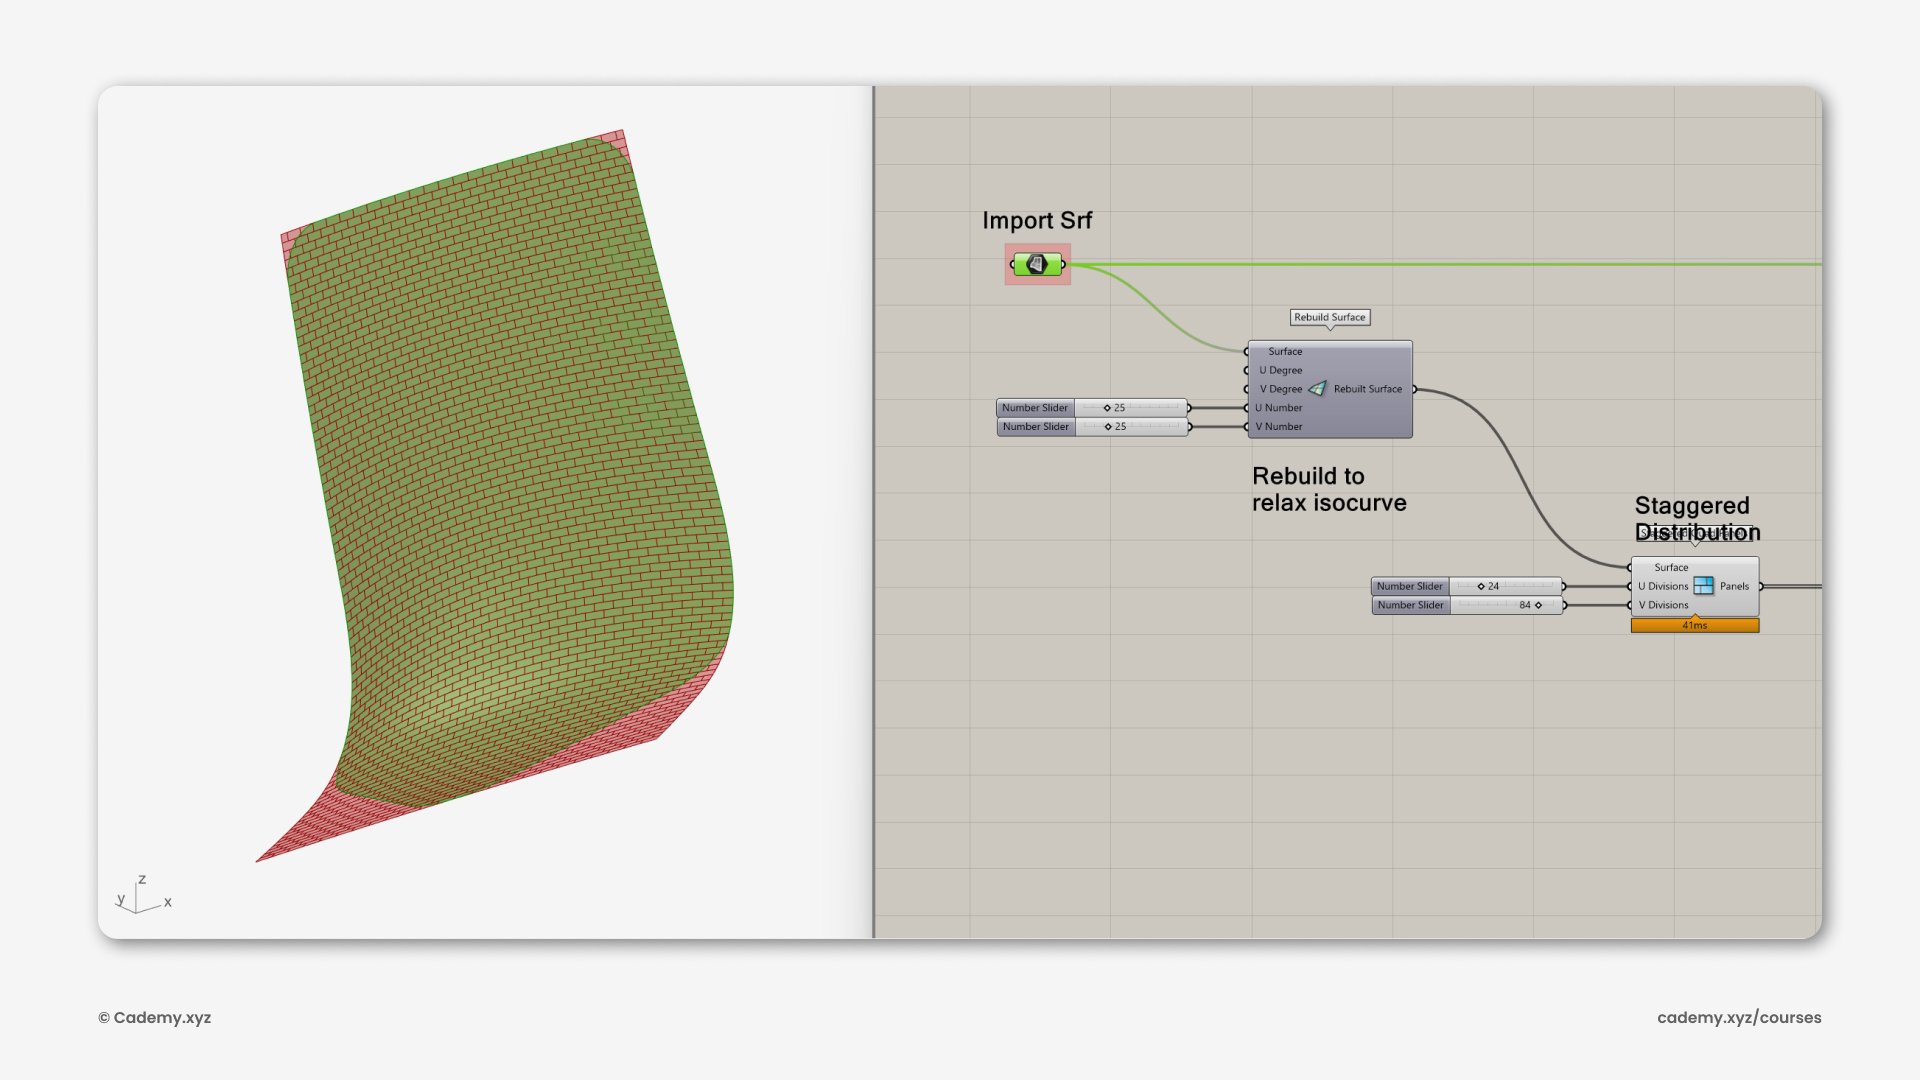
Step 11: Mesh Texturing (Grasshopper 3D)
- Extract the back support surface.
- Use the Lunchbox plugin to refine the isocurves.
- Apply the staggered panel component for a dynamic, modern texture.
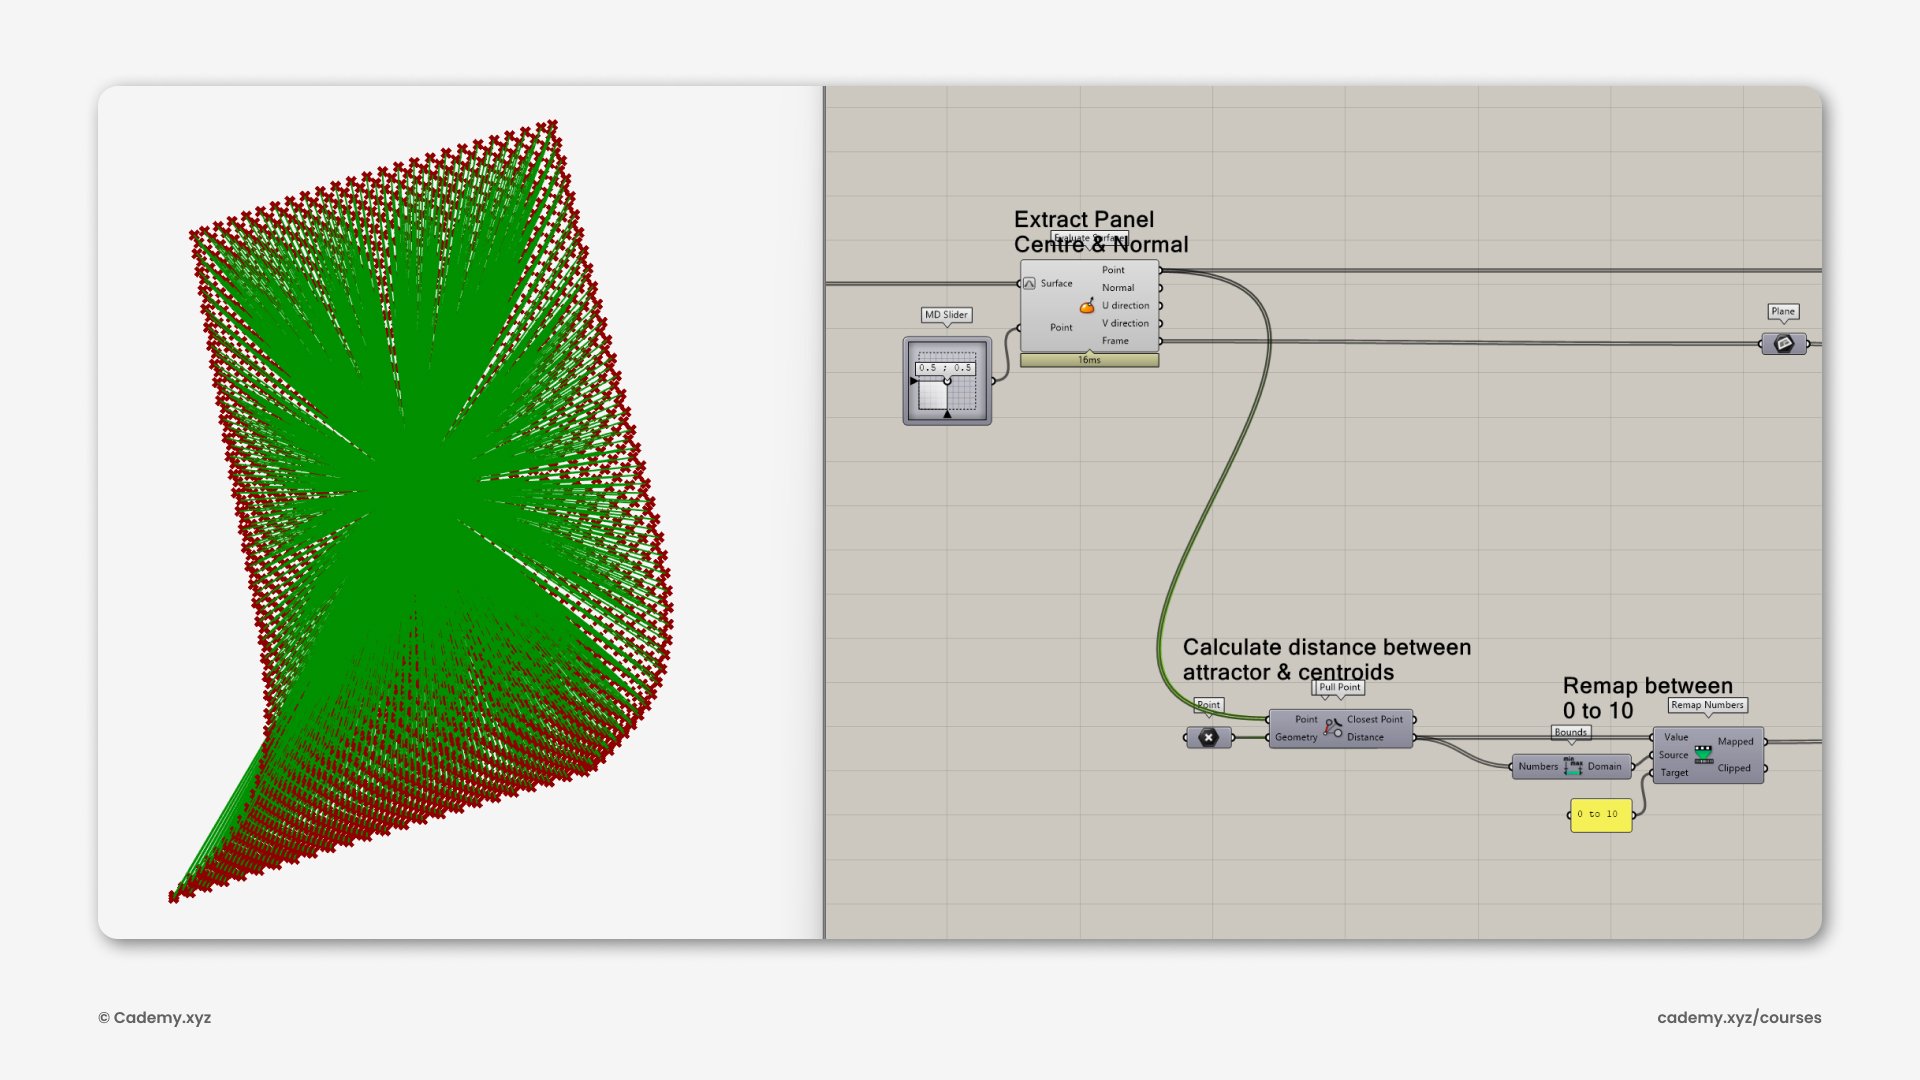
Step 12: Attractor Influence
- Extract surface center and normal using Evaluate Surface.
- Reparameterize the surface and apply an attractor geometry with Pull Point.
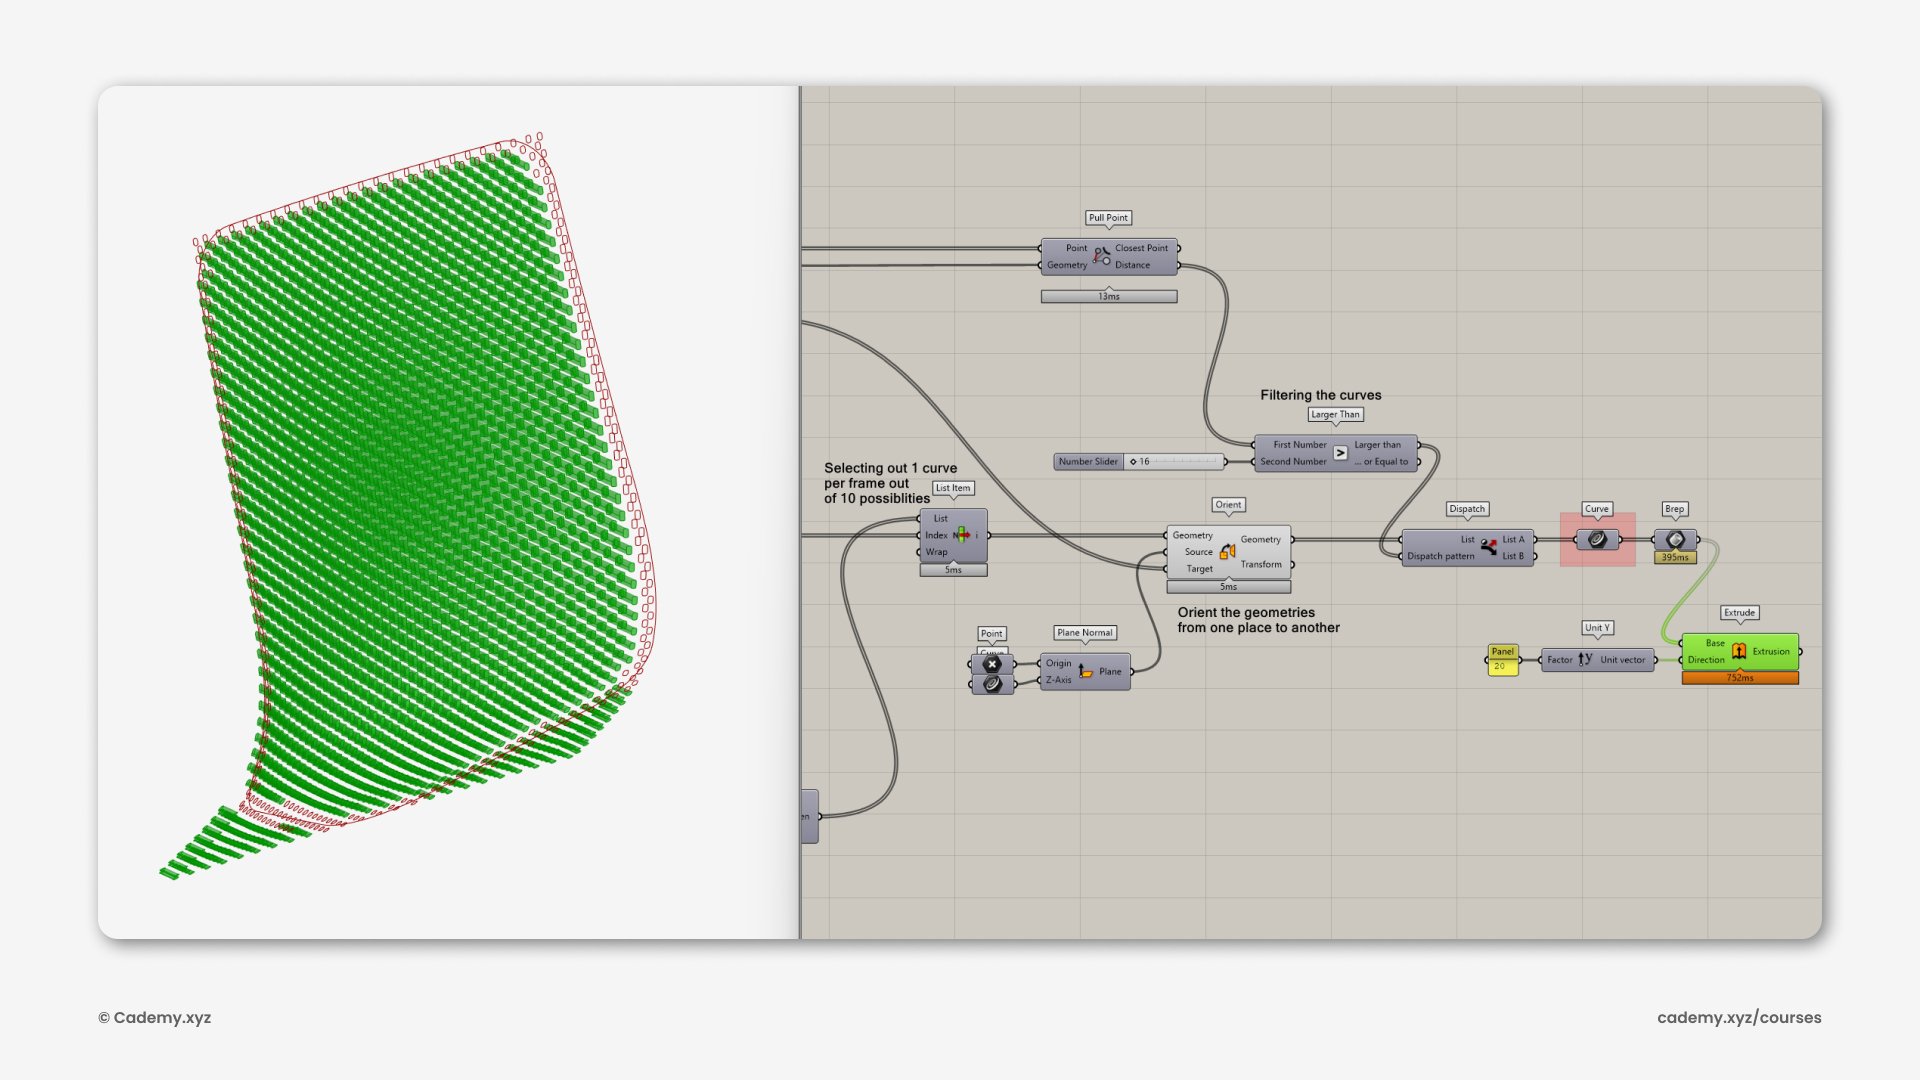
Step 13: Patterned Perforation
- Use Tween Curves to interpolate between two profiles.
- Assign curves dynamically using List Item based on the attractor field.
- Extrude and perform Boolean Difference for the final perforation texture.
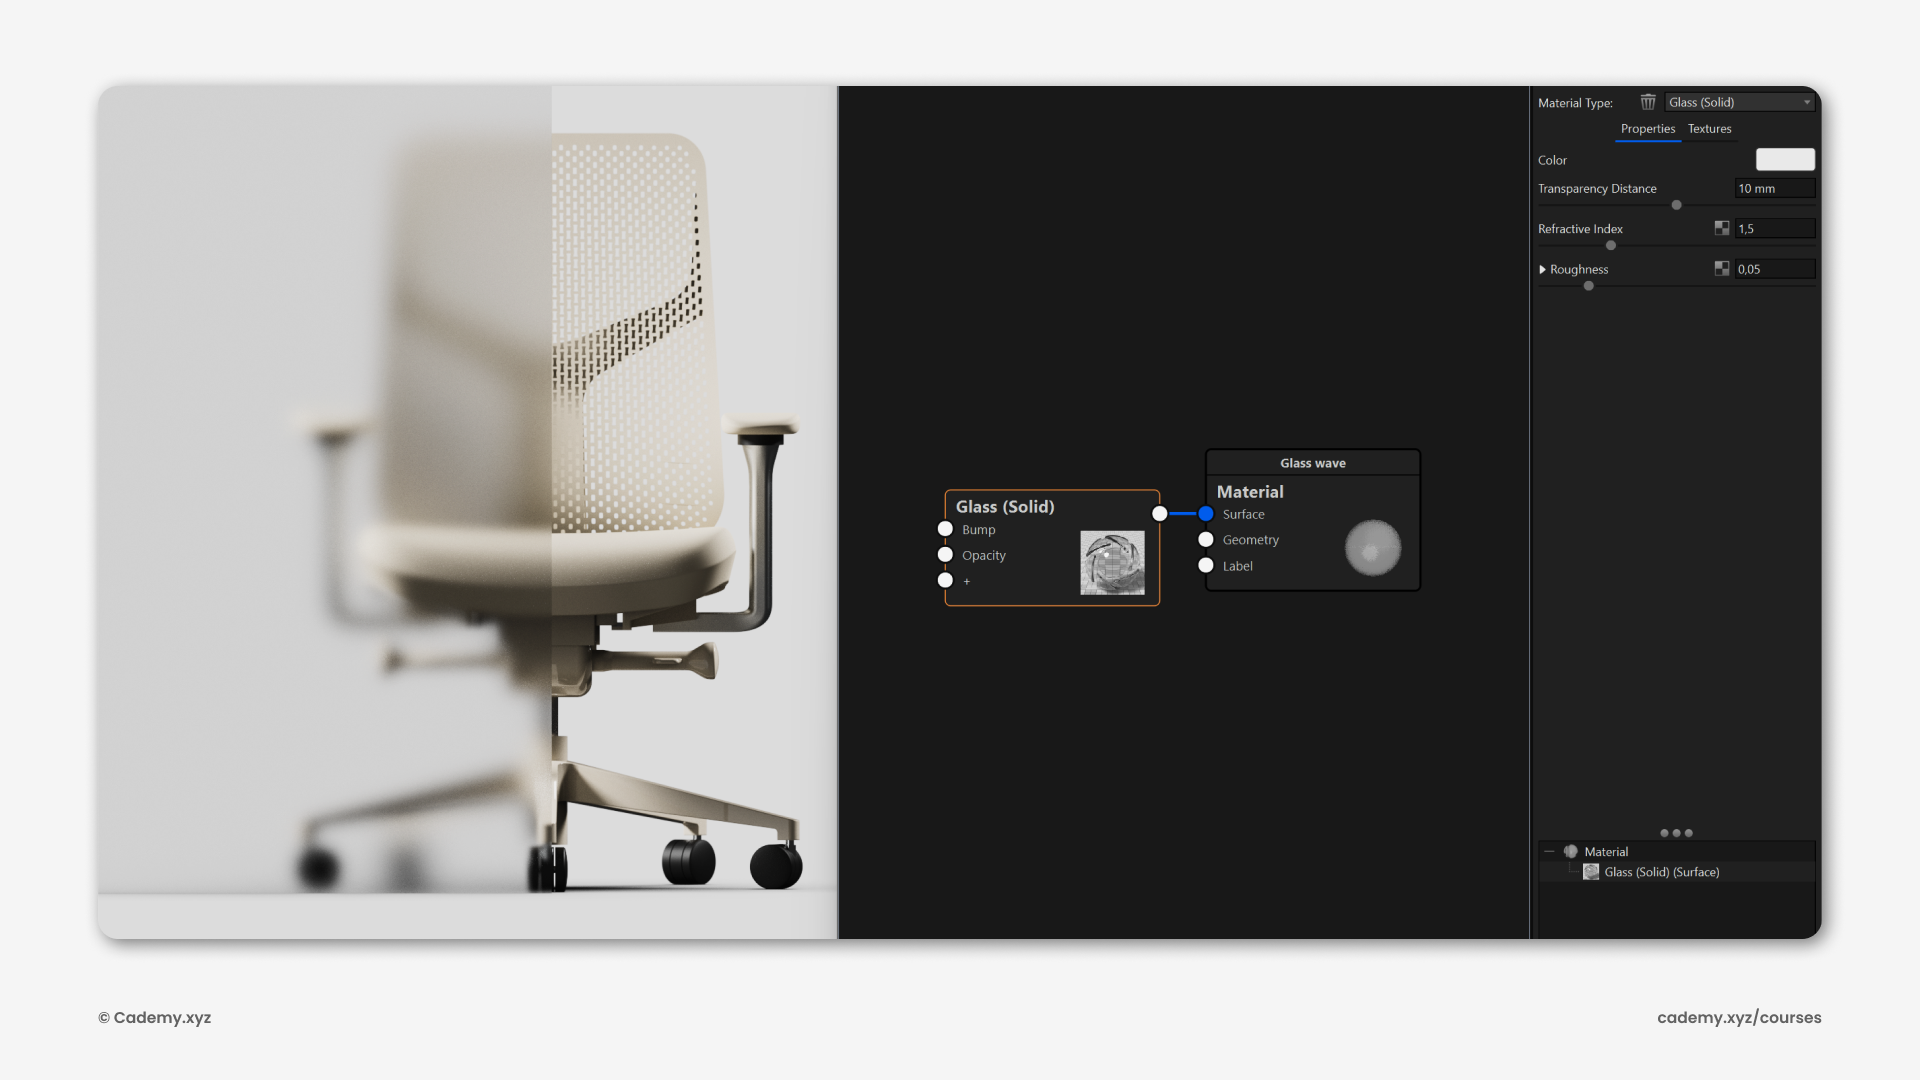
Step 14: Import & Material Setup (KeyShot)
- Open the .3dm file in KeyShot.
- Apply Solid Glass material with 90% white color.
- Adjust roughness (0.05) for a professional frosted effect.
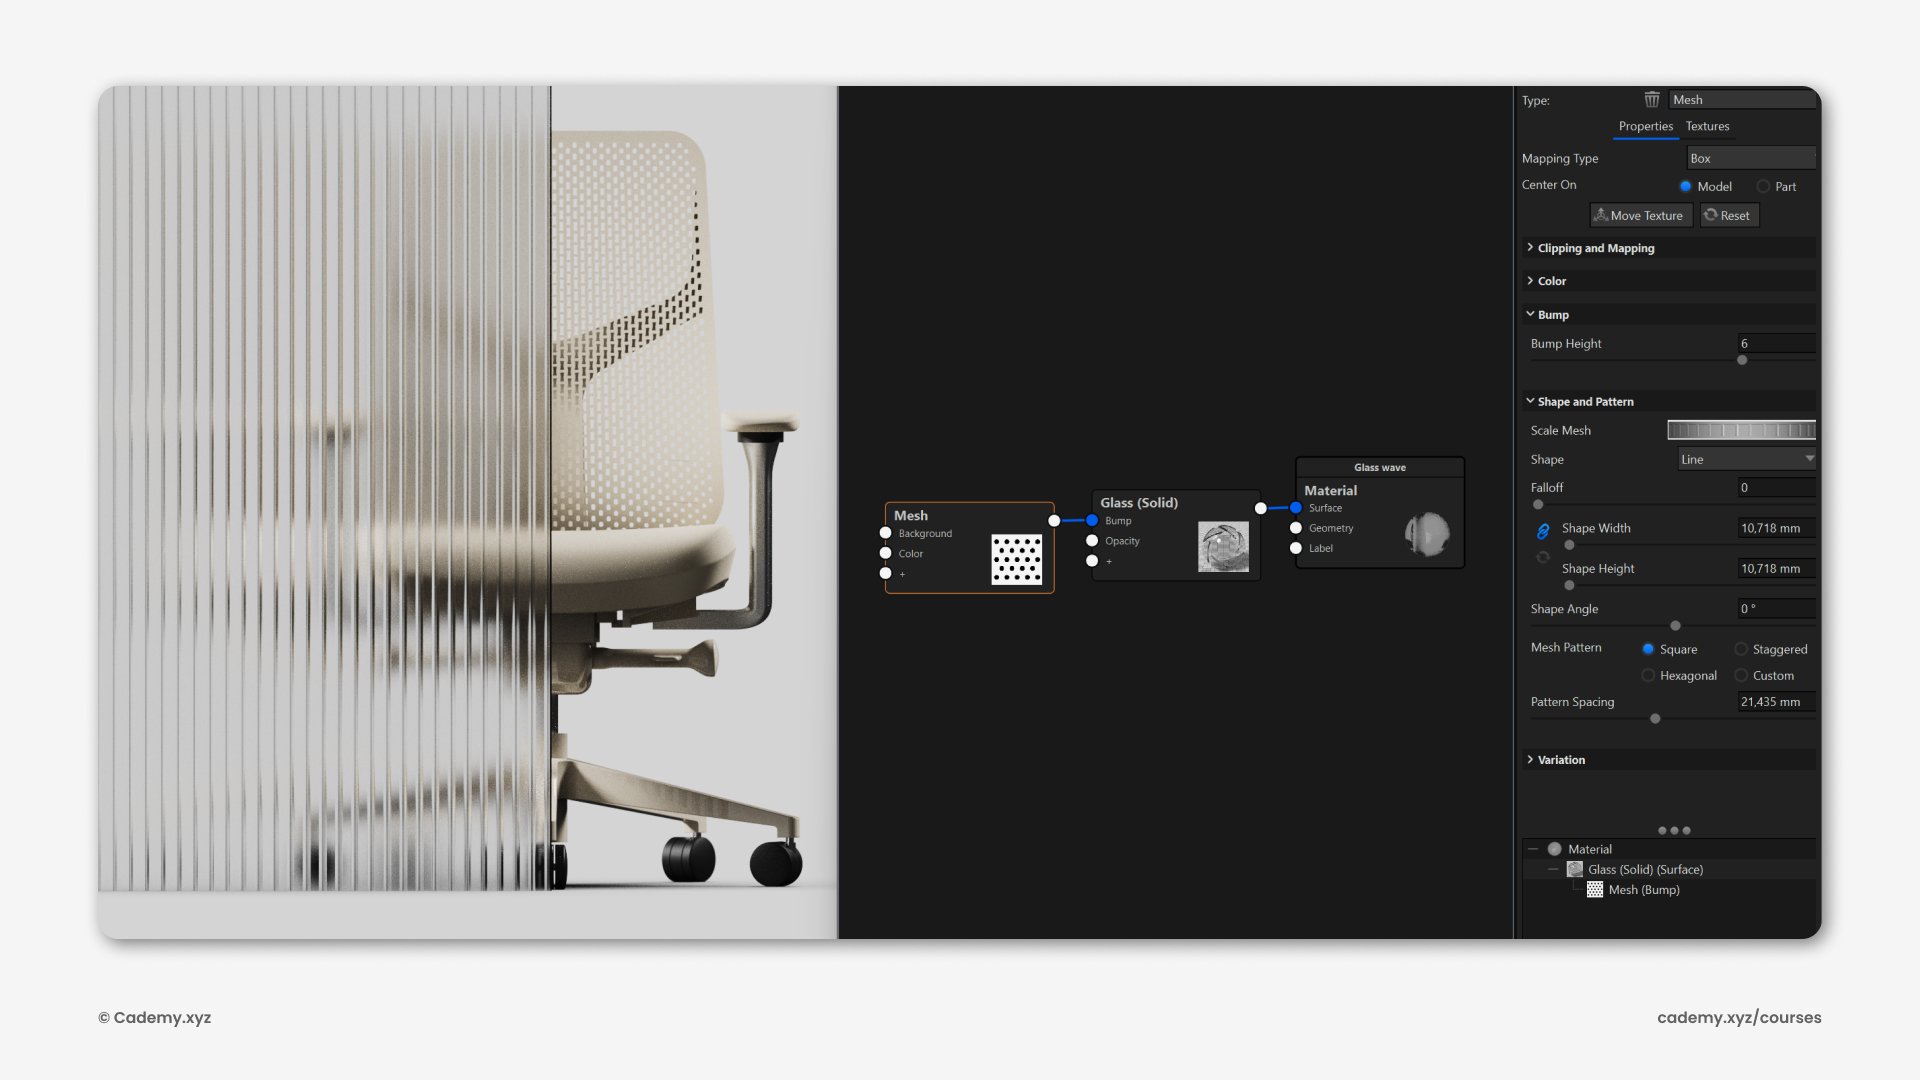
Step 15: Advanced Texturing
- Use the Mesh procedural node for vertical line effects.
- Control spacing and thickness, applying the texture as a Bump parameter for realism.
Software & Manufacturing
- Software: Rhinoceros 3D, Grasshopper 3D, KeyShot, ChituBox.
- 3D Printing: Export high-quality STL files for SLA + FDM techniques.
Thank you for reading ❤️
