Parametric Disc Texture: Free Rhino 3D & Grasshopper Tutorial

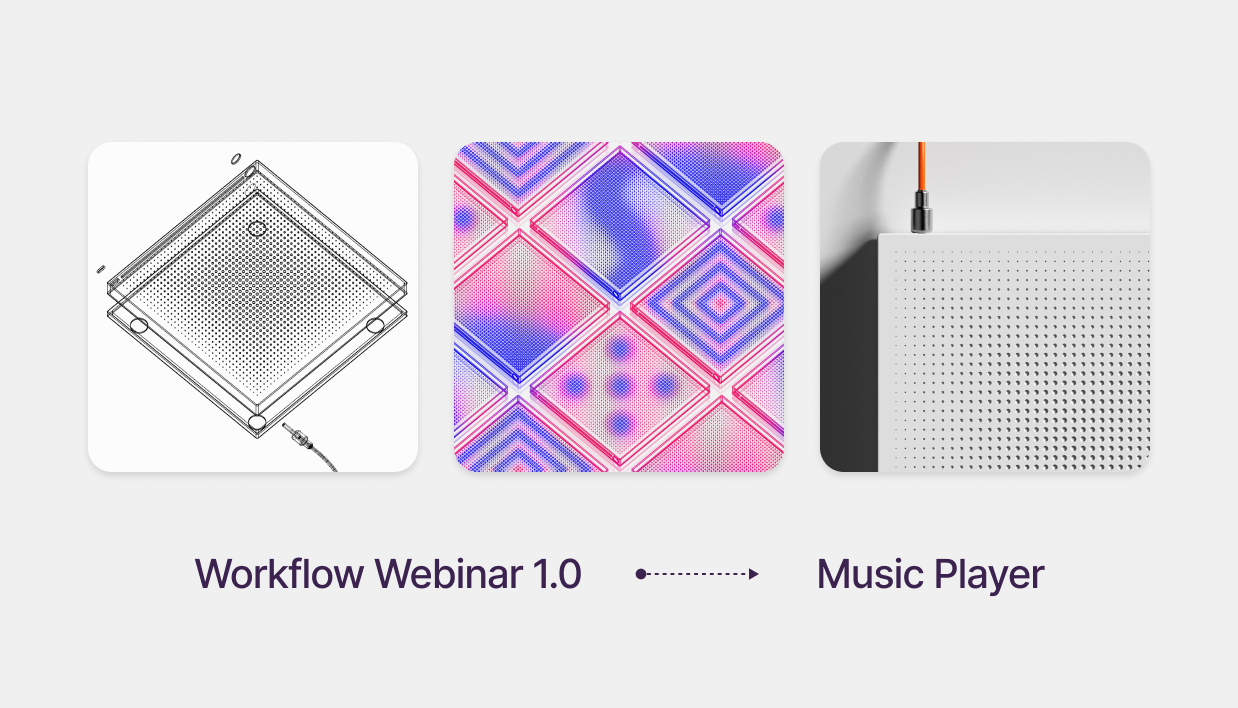
Master Parametric Design: Free Rhino 3D & Grasshopper Webinar
Join our expert-led session and transform your design process. In this free webinar, we break down the creation of a modern Disc Player, focusing on the technical transition from hard-surface modeling in Rhino 3D to algorithmic surface texturing in Grasshopper.
Download Files: cademy.xyz/webinar
What you’ll achieve:
- Rhino 3D: Build production-ready NURBS geometry with precise dimensions.
- Grasshopper: Create dynamic, fading perforation patterns using Attractor Point logic.
- KeyShot: Produce studio-quality visuals using advanced 3-point lighting.
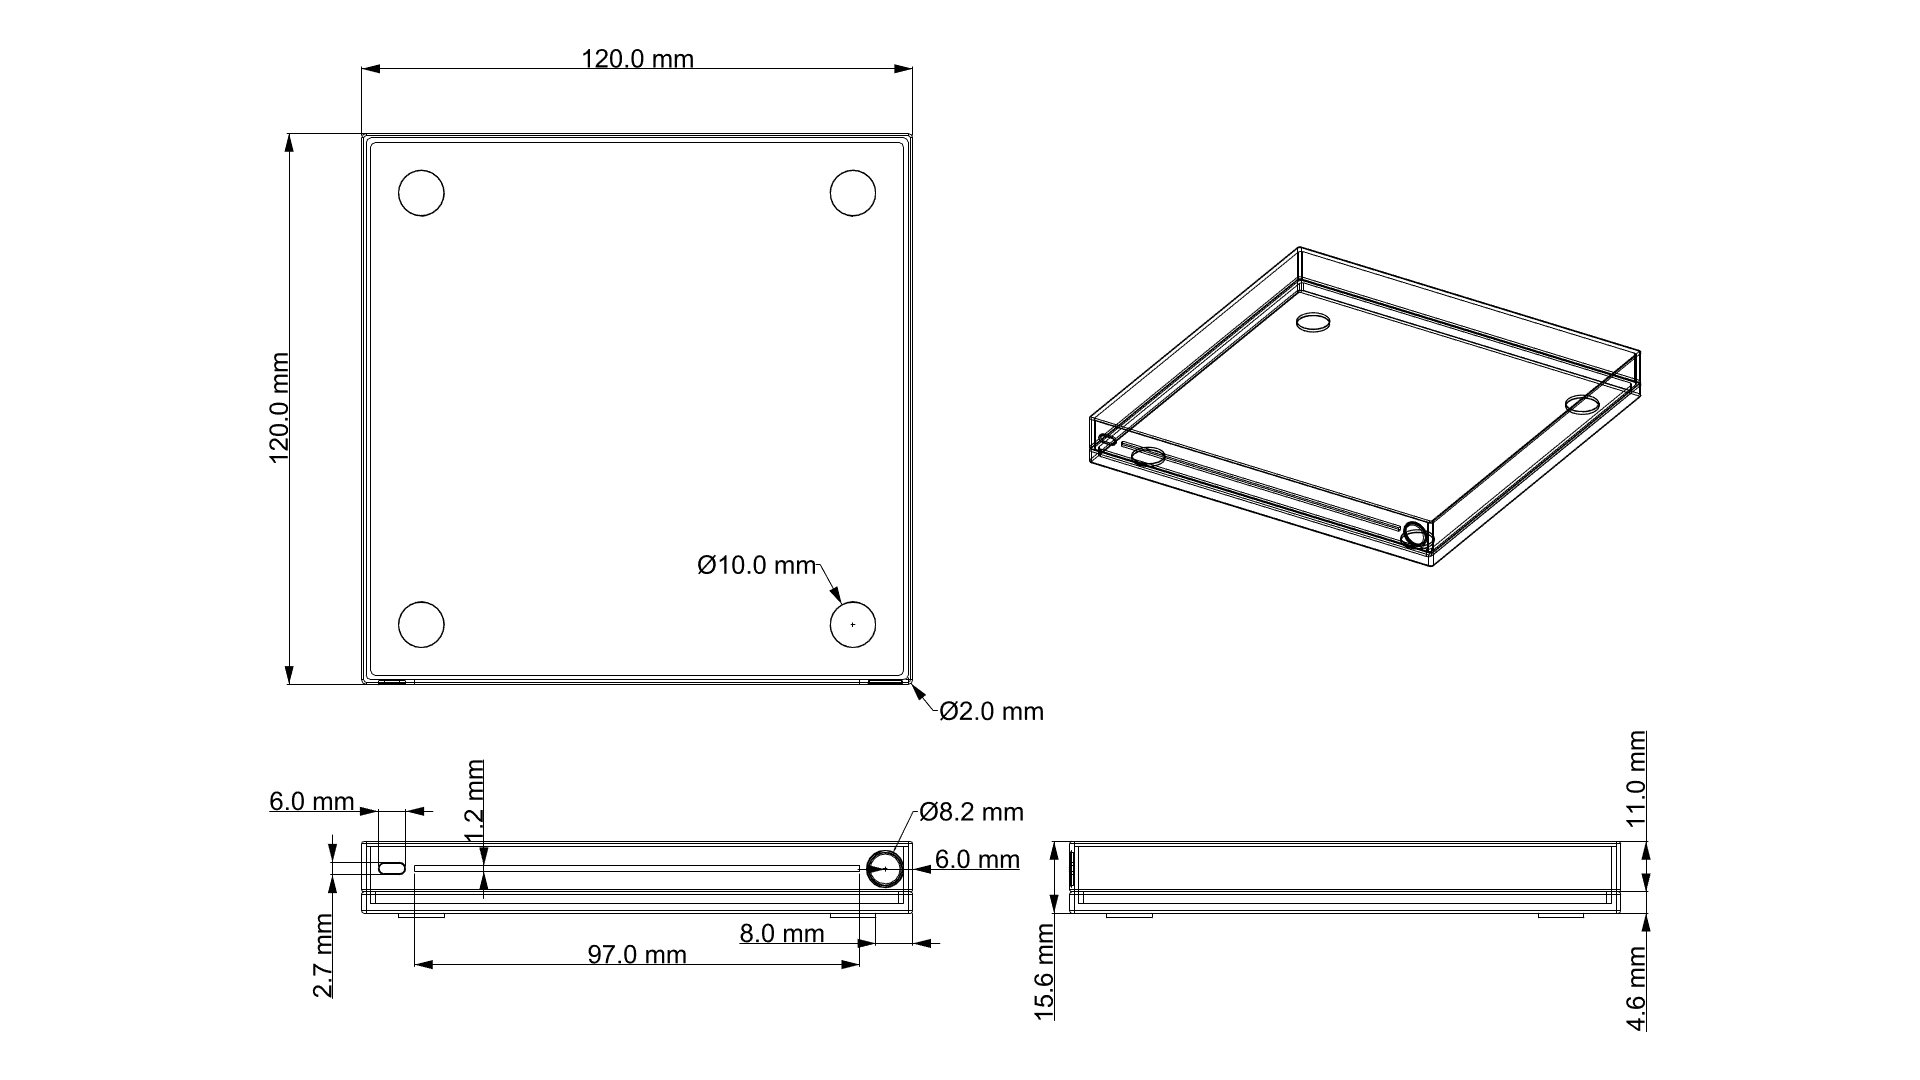
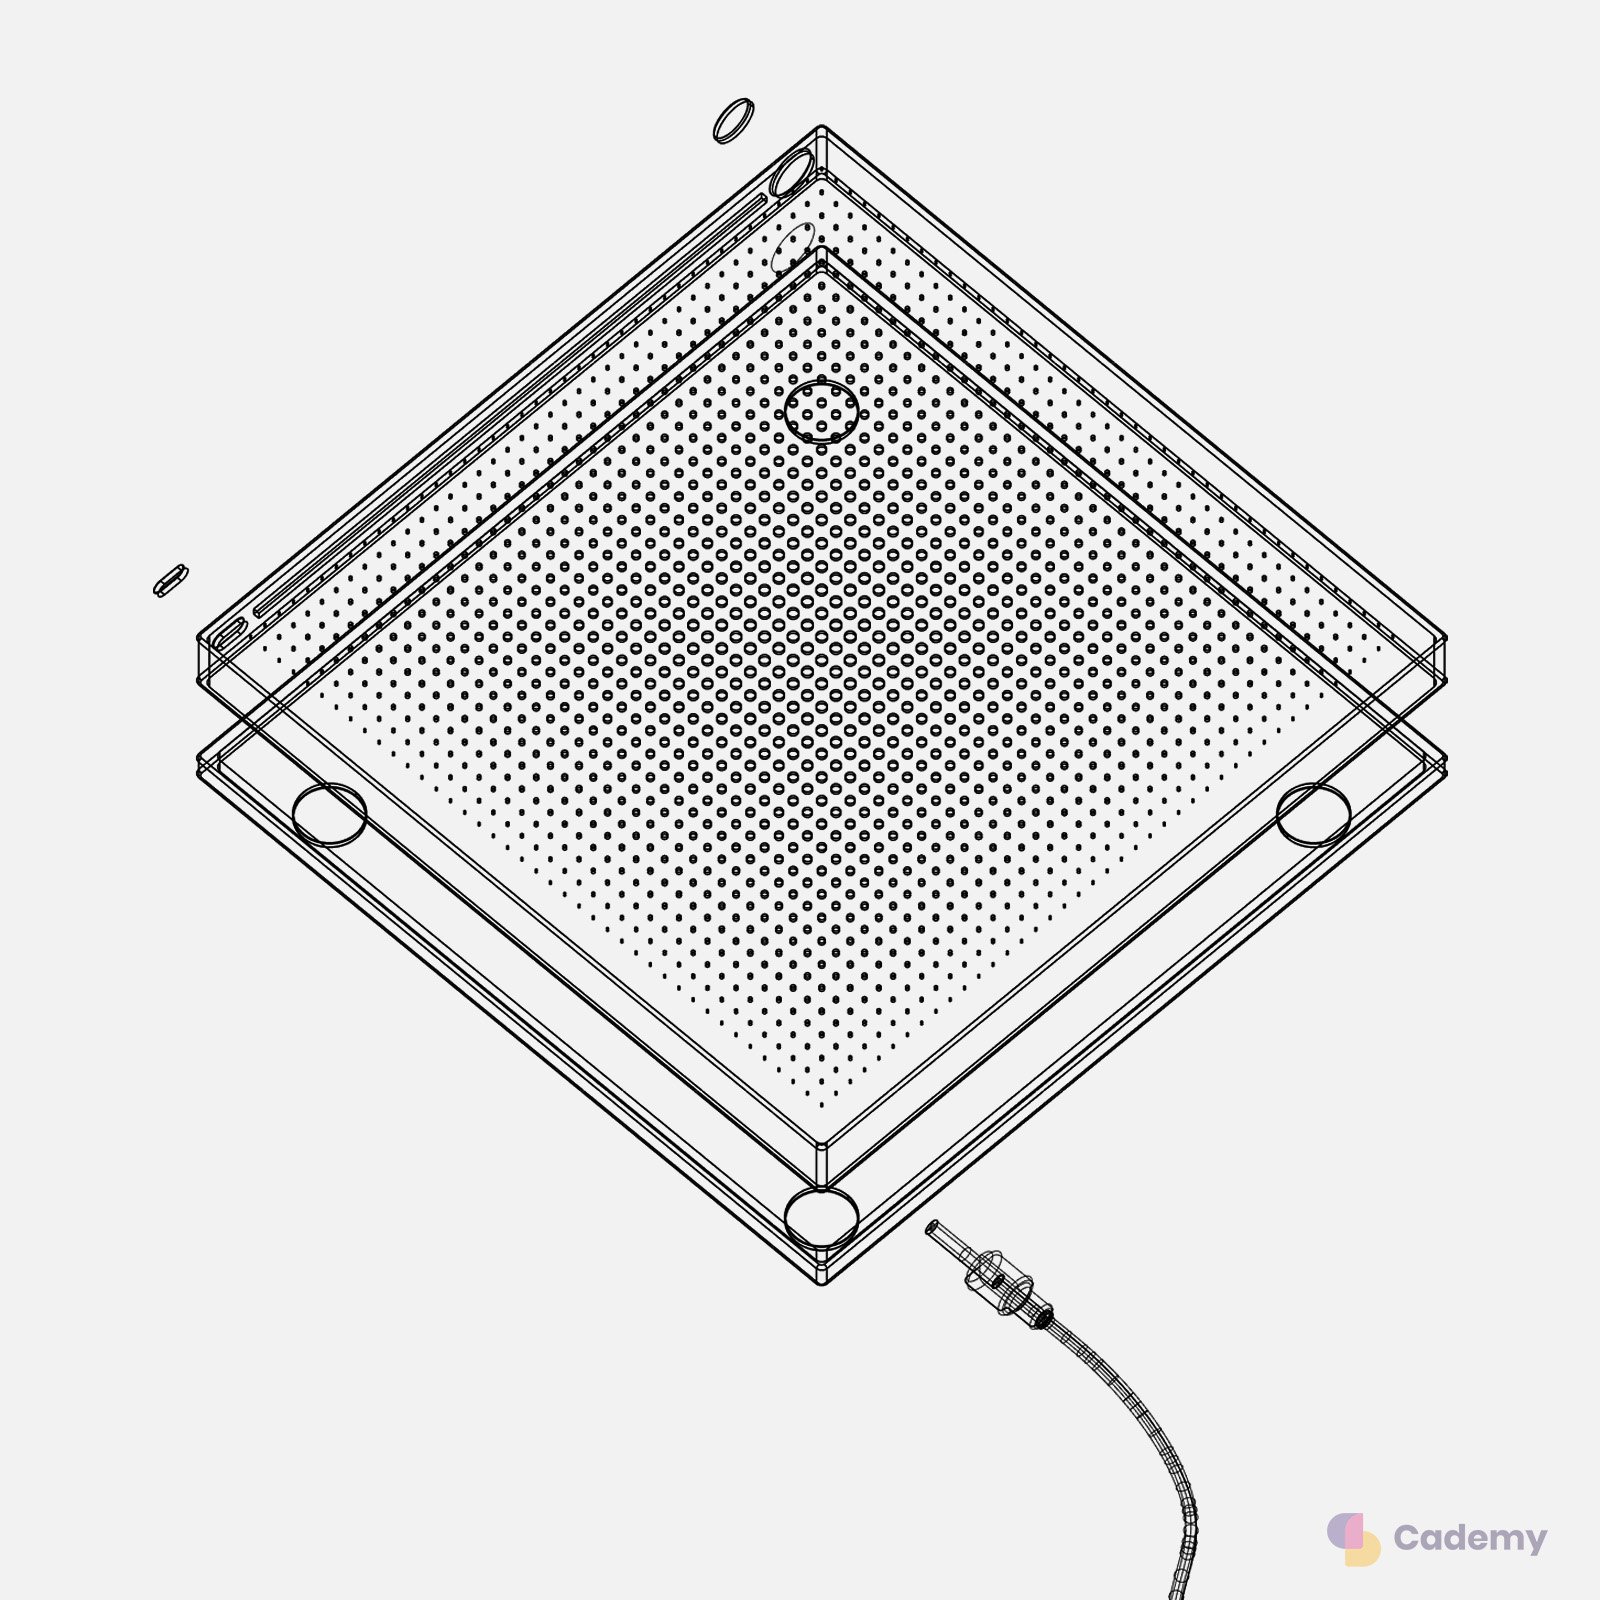
Step 1: Precision Modeling in Rhinoceros 3D
We start by establishing a clean, production-ready base geometry using professional NURBS modeling techniques:
- Base Volumes: Utilize precise rectangular extrusions based on technical dimensions.
- Shelling: Apply the Shell command to create a consistent wall thickness for the internal components.
- Refining Details: Use Boolean operations to integrate buttons and interface ports.
- Cable Modeling: Use the Pipe command on Degree 3 NURBS curves to create fluid, realistic wiring.
Step 2: Parametric Texturing with Grasshopper
Grasshopper allows us to create complex surface patterns that would be impossible to model manually. We will focus on an Attractor Point workflow to create a fading perforation.
- Grid Generation: Establish a point/plane grid mapped to the surface dimensions.
- Edge Control: Use border offsets and point culling to ensure the pattern respects the hardware boundaries.
- Attractor Logic: Implement an Attractor Point to dynamically scale the radius of each perforation.
- Data Remapping: Use the Remap Numbers component to strictly control the minimum and maximum perforation sizes.
- Non-Linear Fading: Use the Graph Mapper to create organic, non-linear fading transitions for a more premium aesthetic.
Pro-Tip: High-density Boolean operations can be CPU-intensive. Process your pattern in segments or use a "Data Dam" in Grasshopper to manage calculation times.
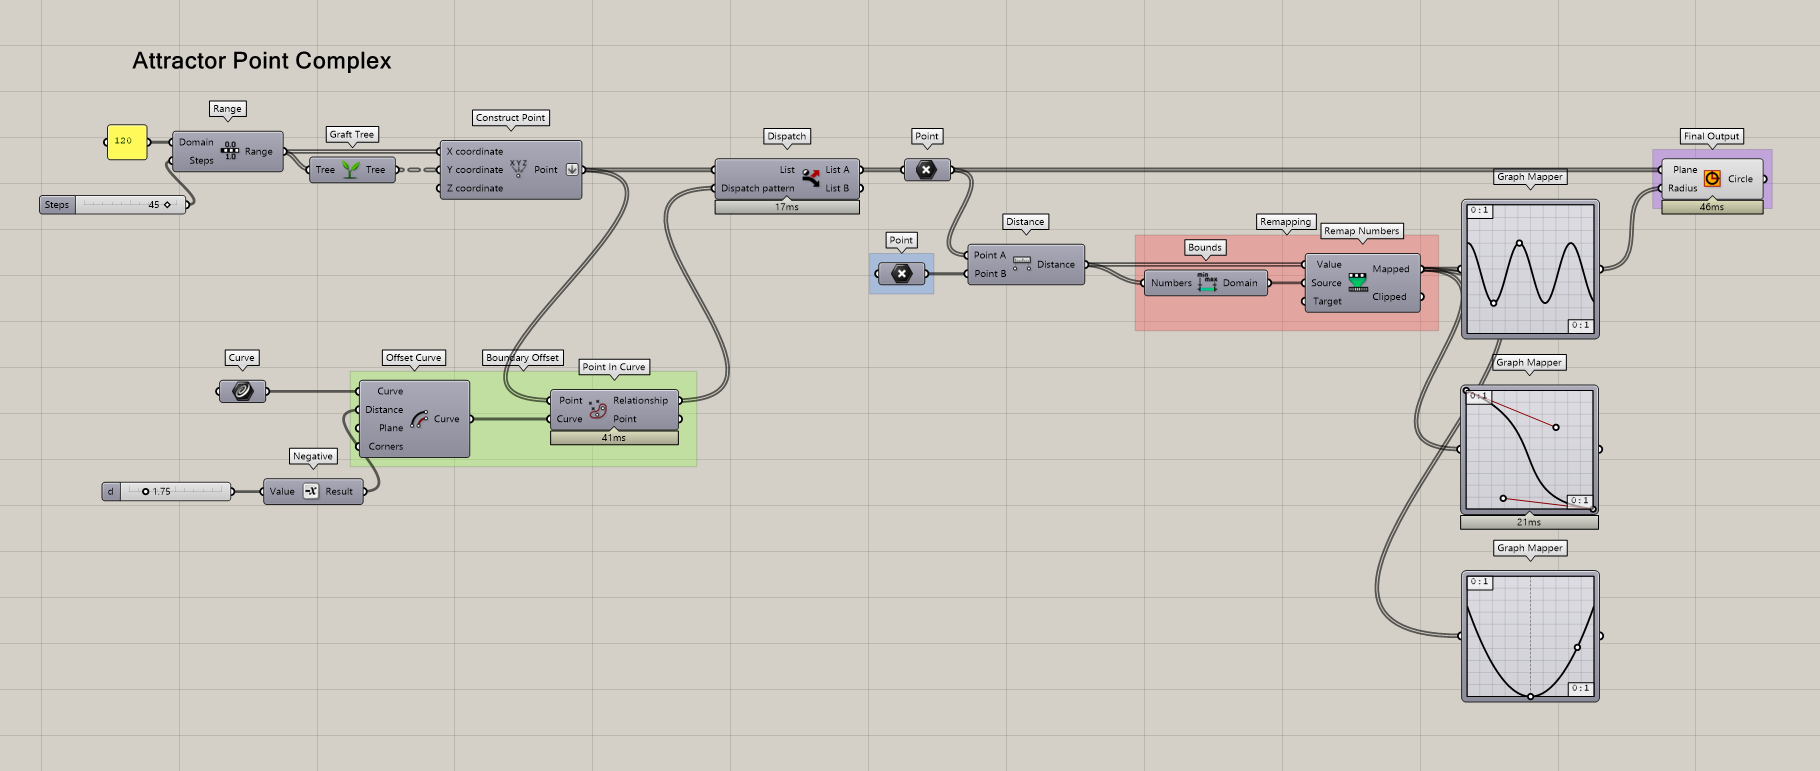
After generating the pattern, perform a Boolean Difference to engrave the texture onto the top shell. Be careful as this operation will take a lot of time to calculate., so you may want to process it in small batches.
💡 Experiment with different Graph Mapper settings to explore unique design variations!
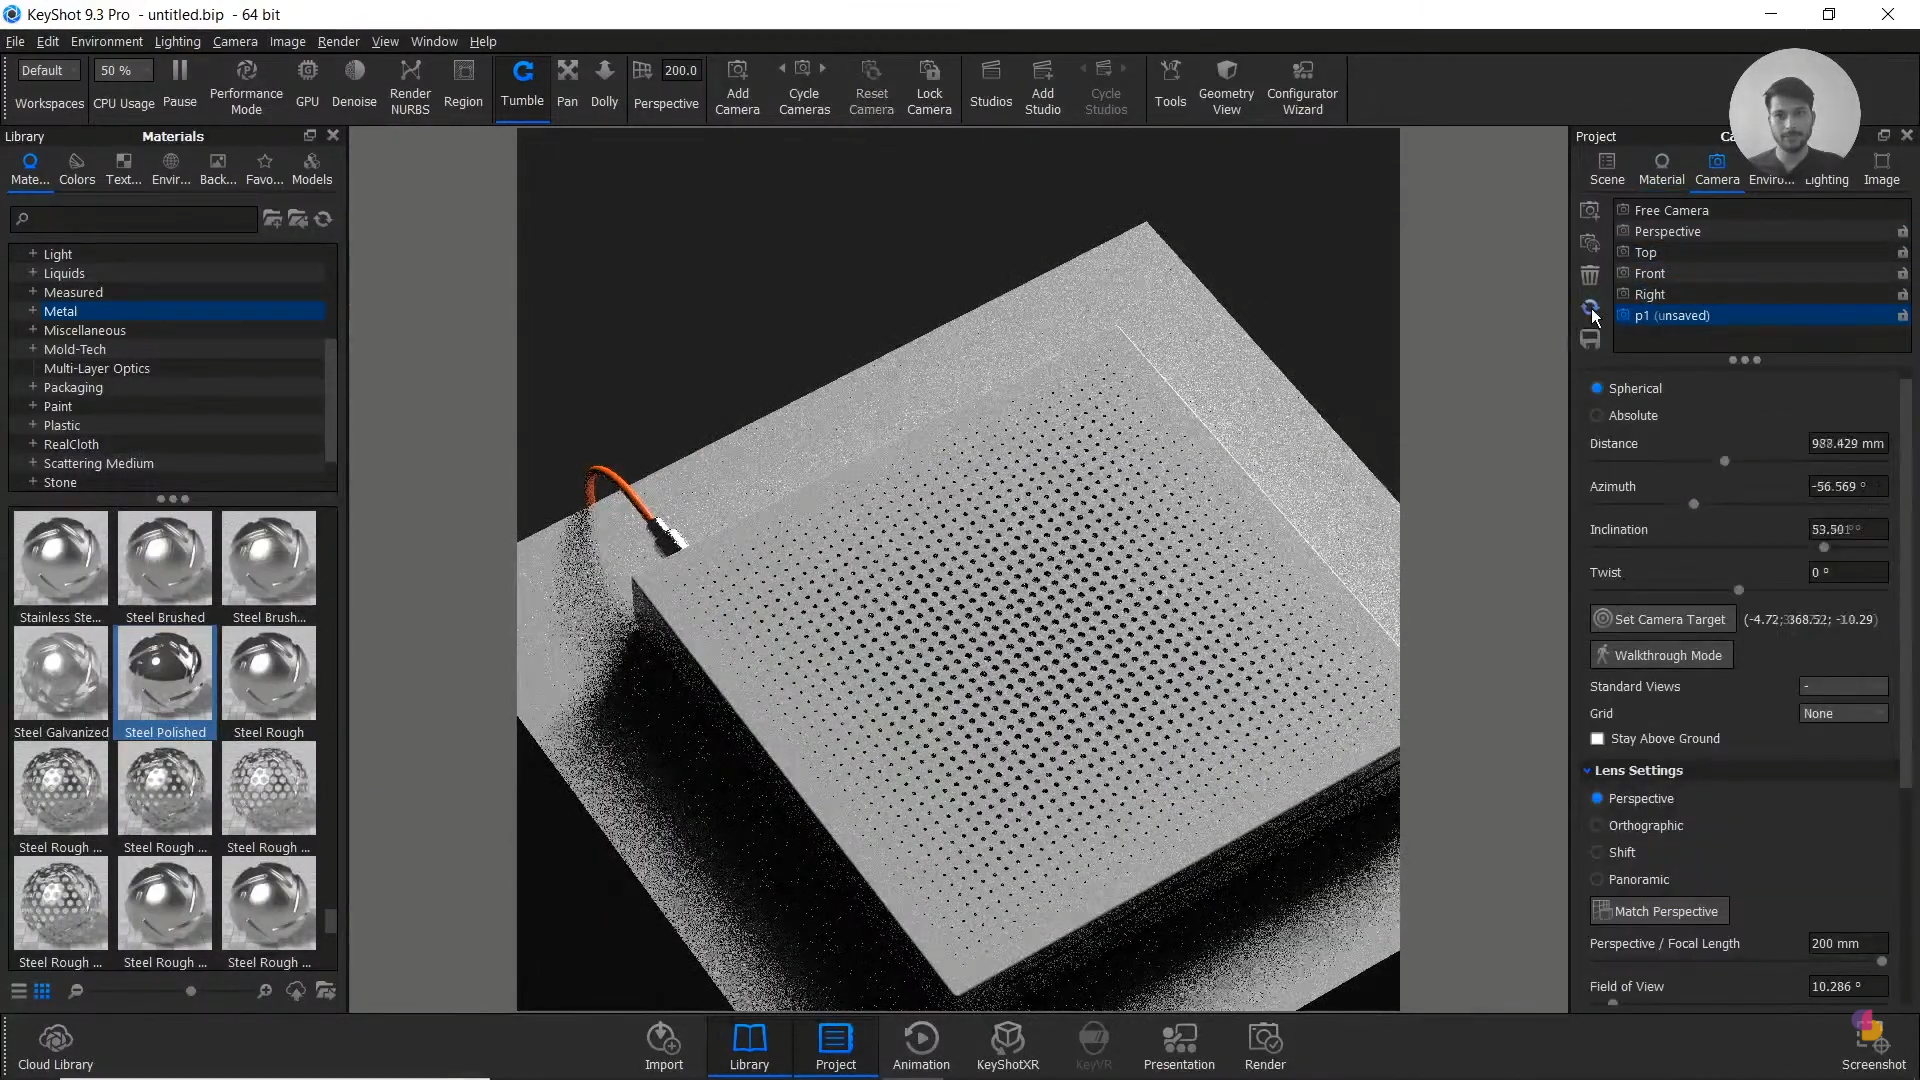
Step 3: Photorealistic Rendering in KeyShot
To finish the project, we transform our CAD geometry into a marketing-ready visual.
- Direct Import: Bring the native
.3dmRhino file into KeyShot to maintain layer and material naming. - Material Application: Select high-fidelity plastics and metals from the KeyShot library.
- Studio Lighting: Use the HDRI Editor to configure a classic 3-point lighting setup to highlight the parametric texture's depth.
- Final Output: Adjust your sampling and hit Render!
Thanks for reading ❤️
