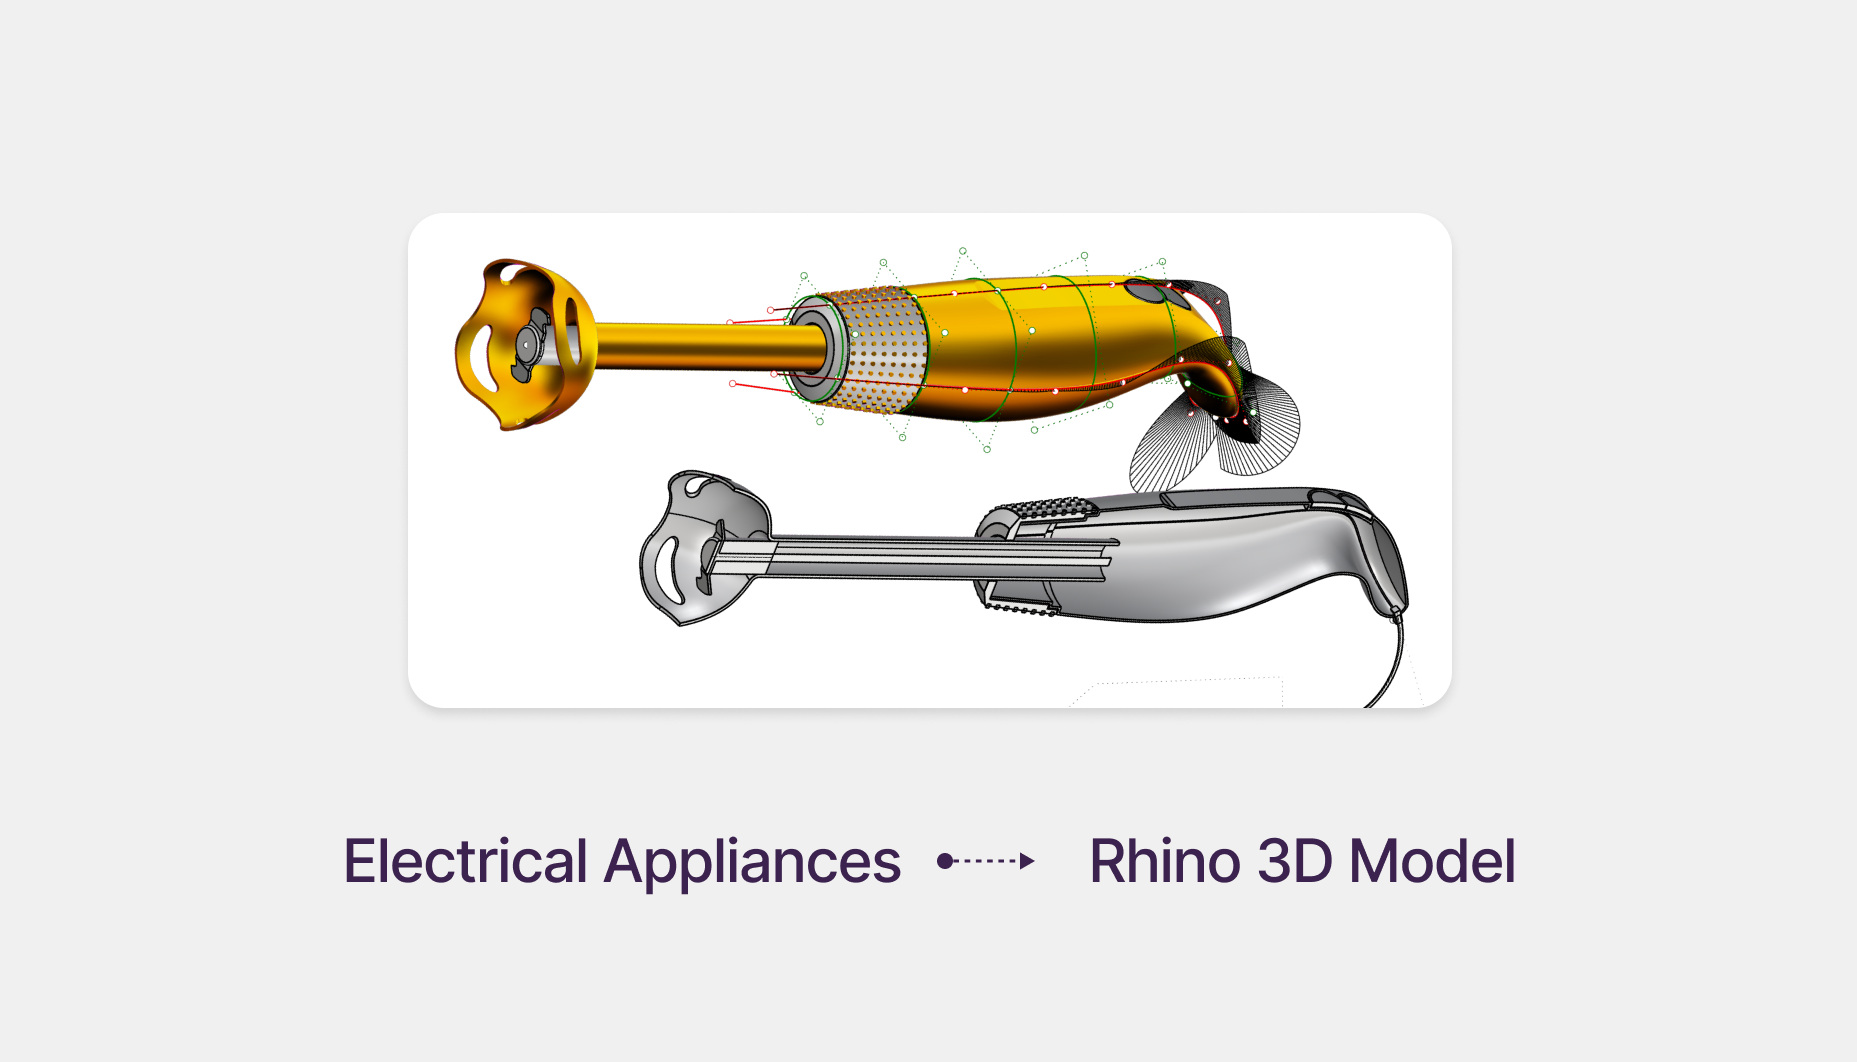
Electrical Appliances in Rhino 3D & Grasshopper

Download Files
Youtube Video
Welcome to this step-by-step guide on modeling a hand blender using Rhinoceros 3D and texturing it with Grasshopper. This tutorial is perfect for designers looking to sharpen their 3D modeling skills and explore techniques for creating complex, organic shapes in industrial design.
Rhinoceros User Webinar in collaboration with McNeel Associates.
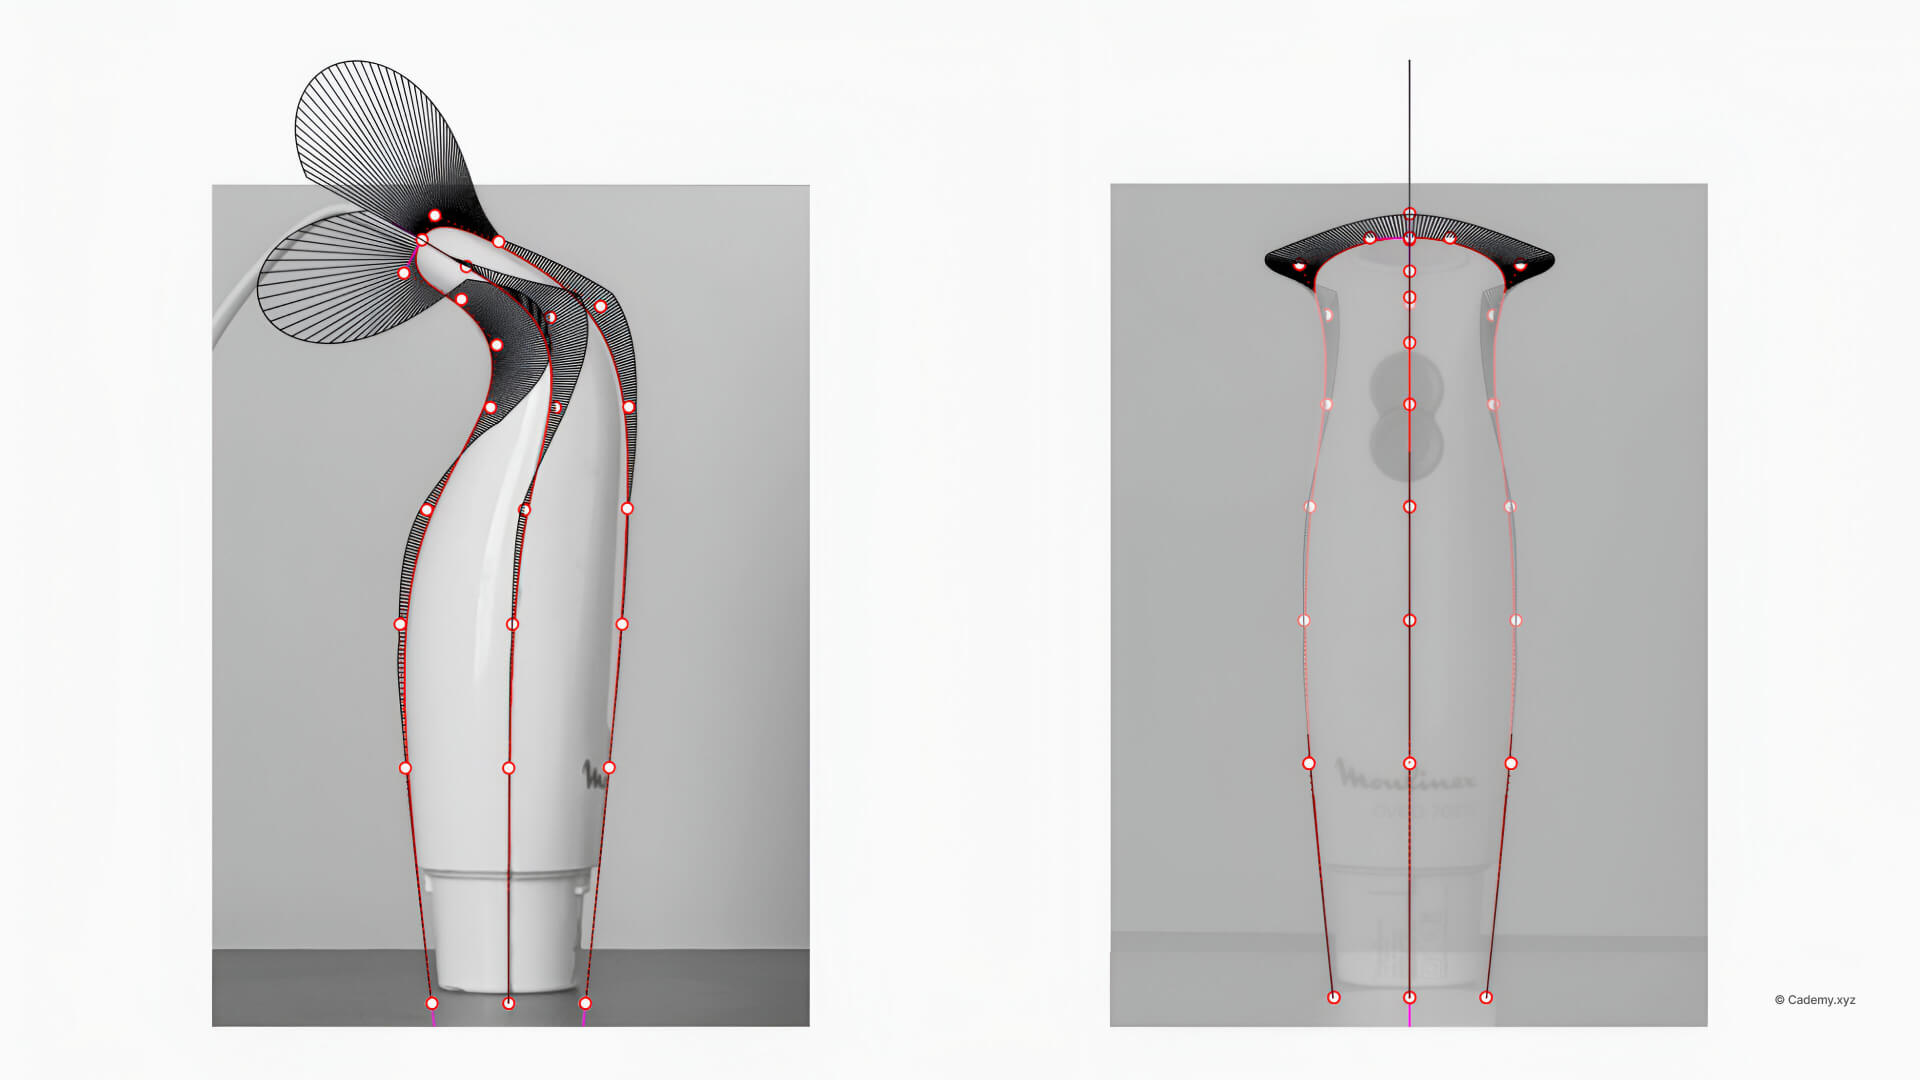
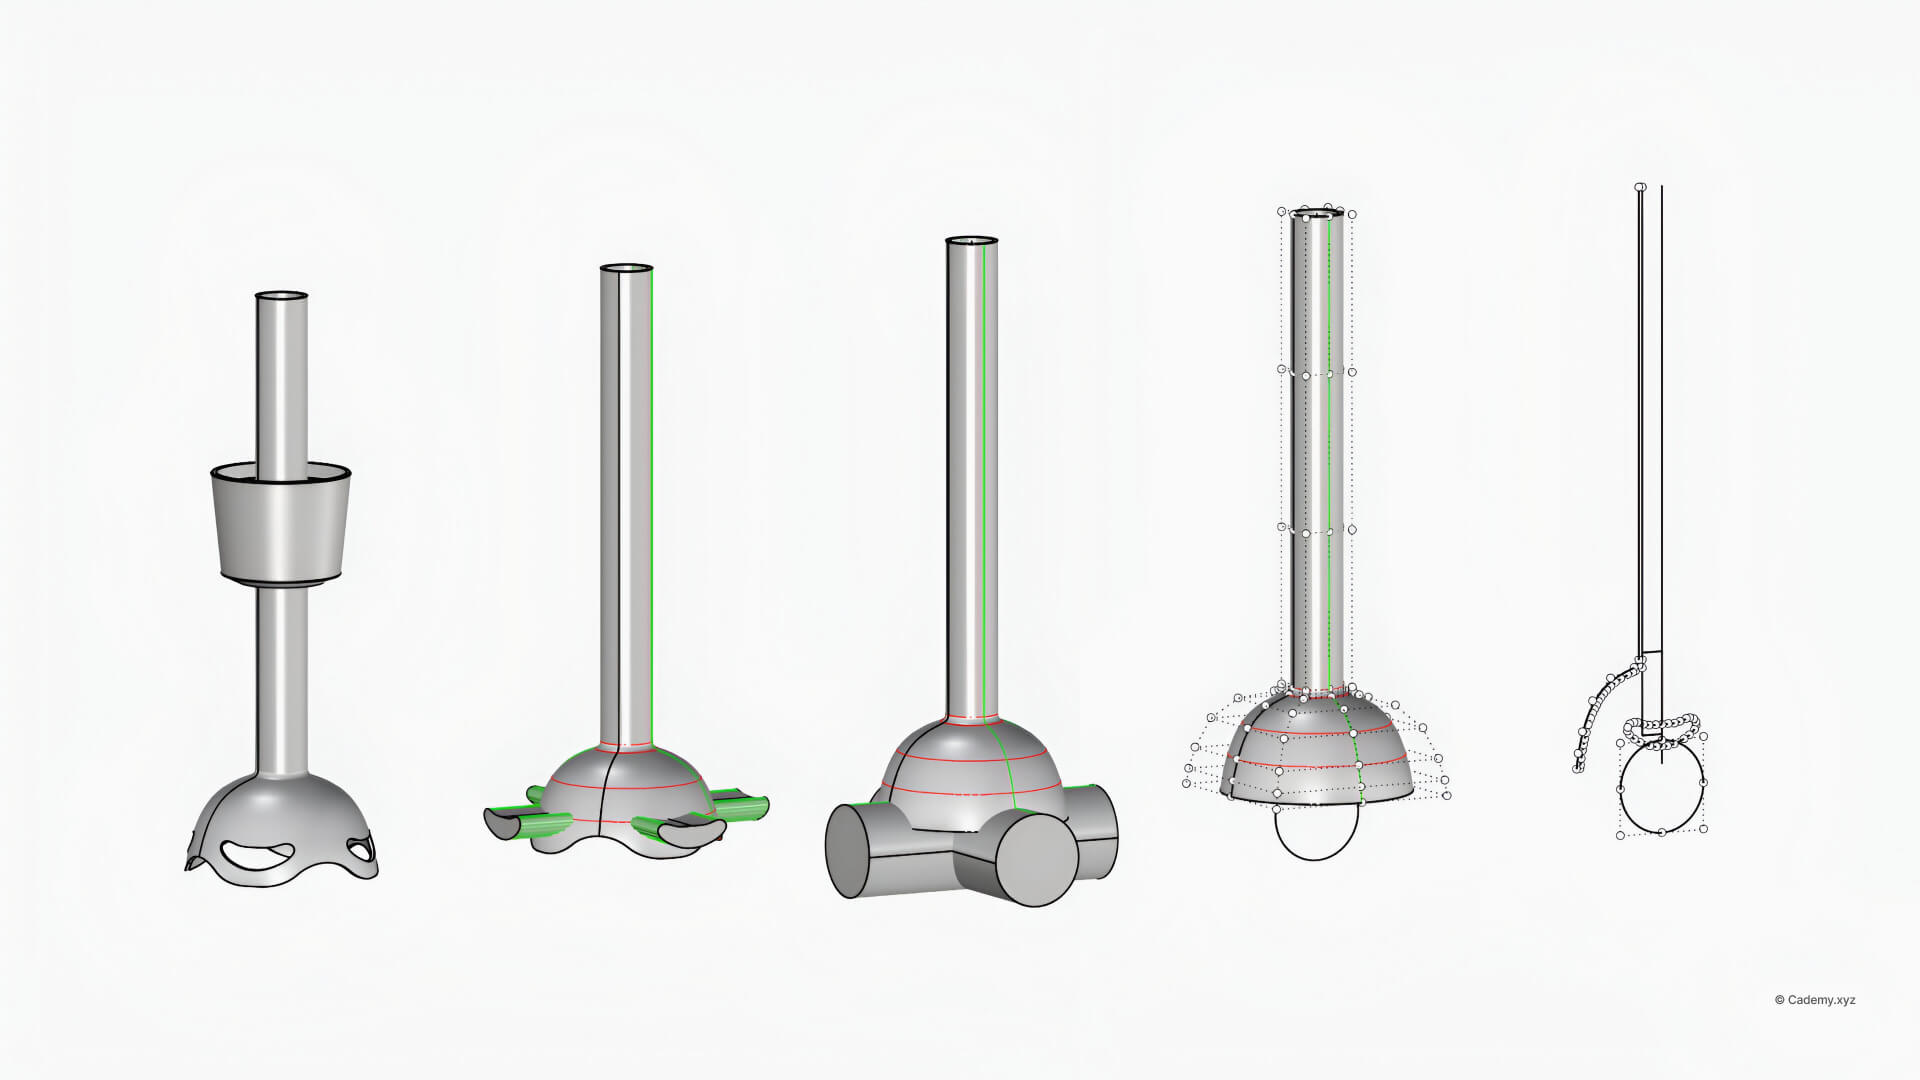
Step 1: Setting Up the Reference Image & Sketching Primary Curves
1. Import side and front reference images.
2. Use a Degree 3 NURBS curve to sketch primary shapes, ensuring smooth curvature flow.
3. Follow Alias’s 10 Golden Rules for surface modeling to guide curve construction.
Learn More About Alias Golden Rules
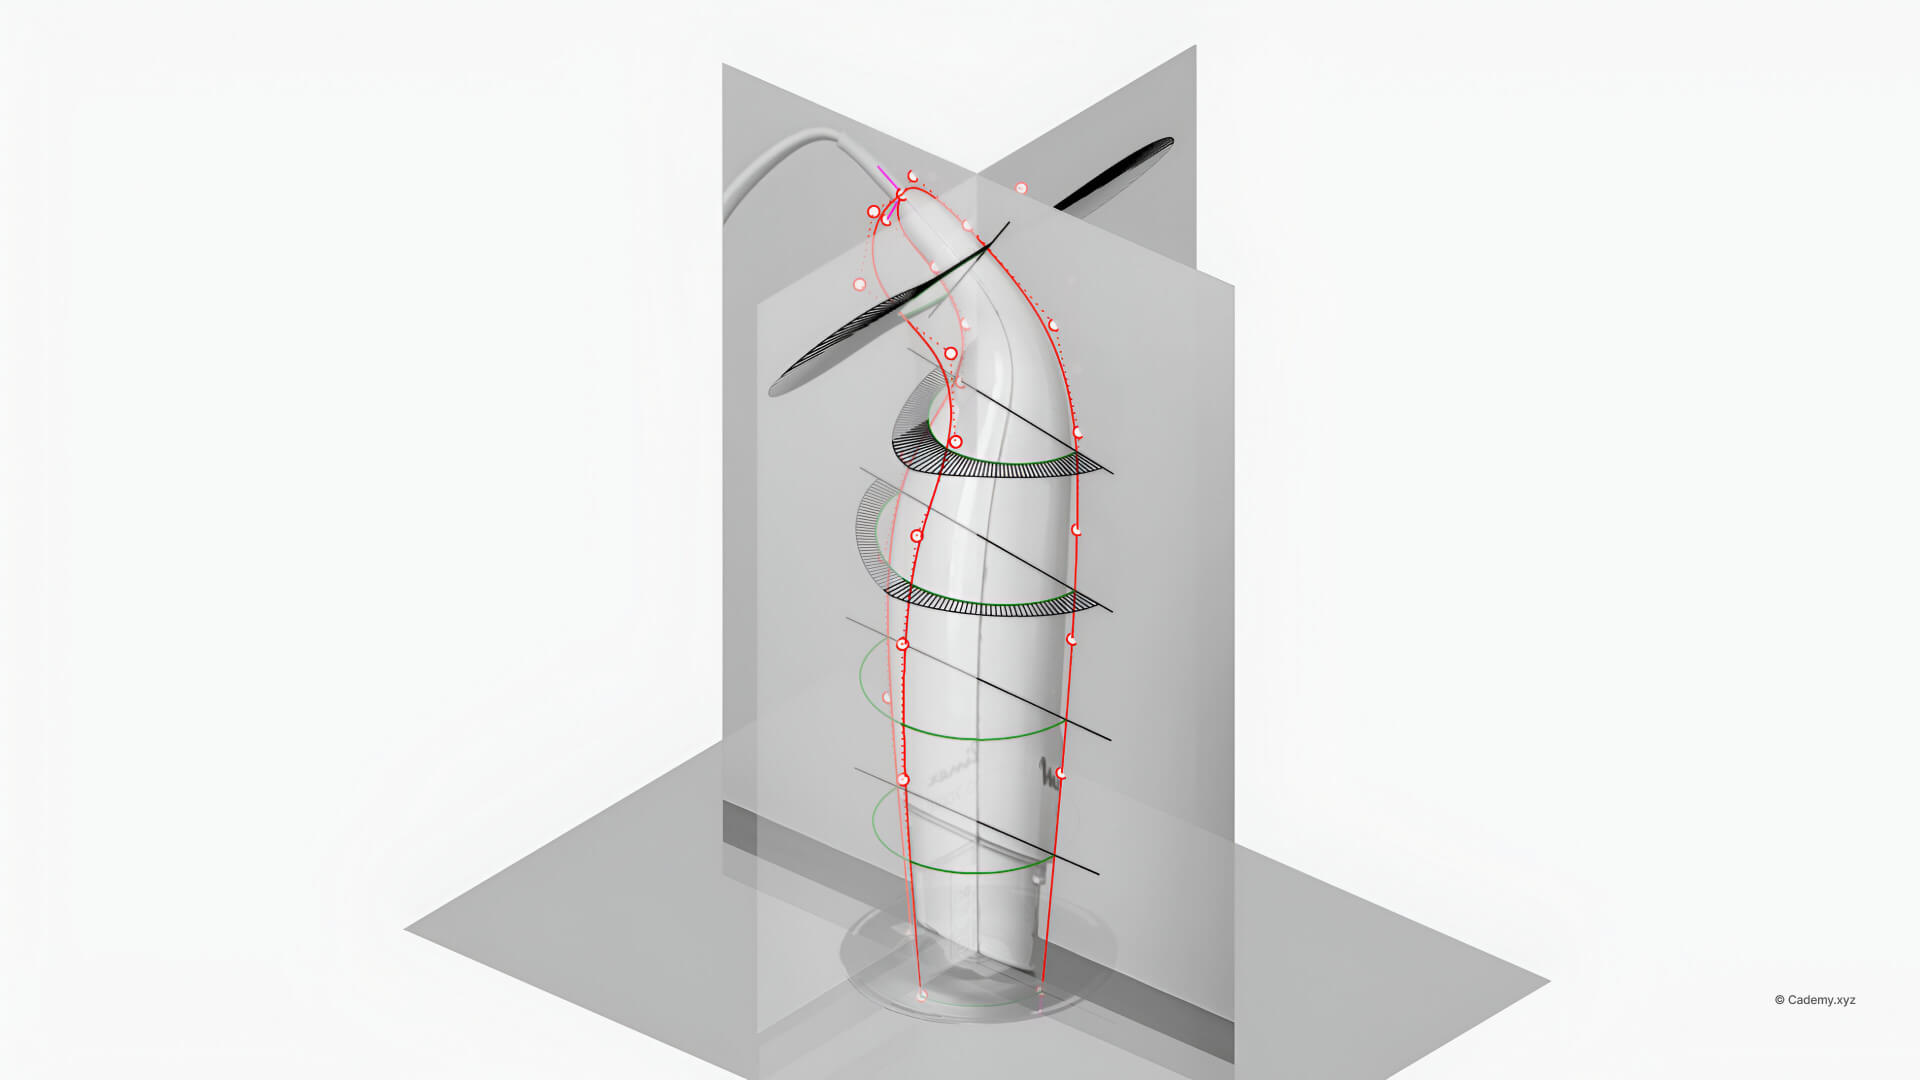
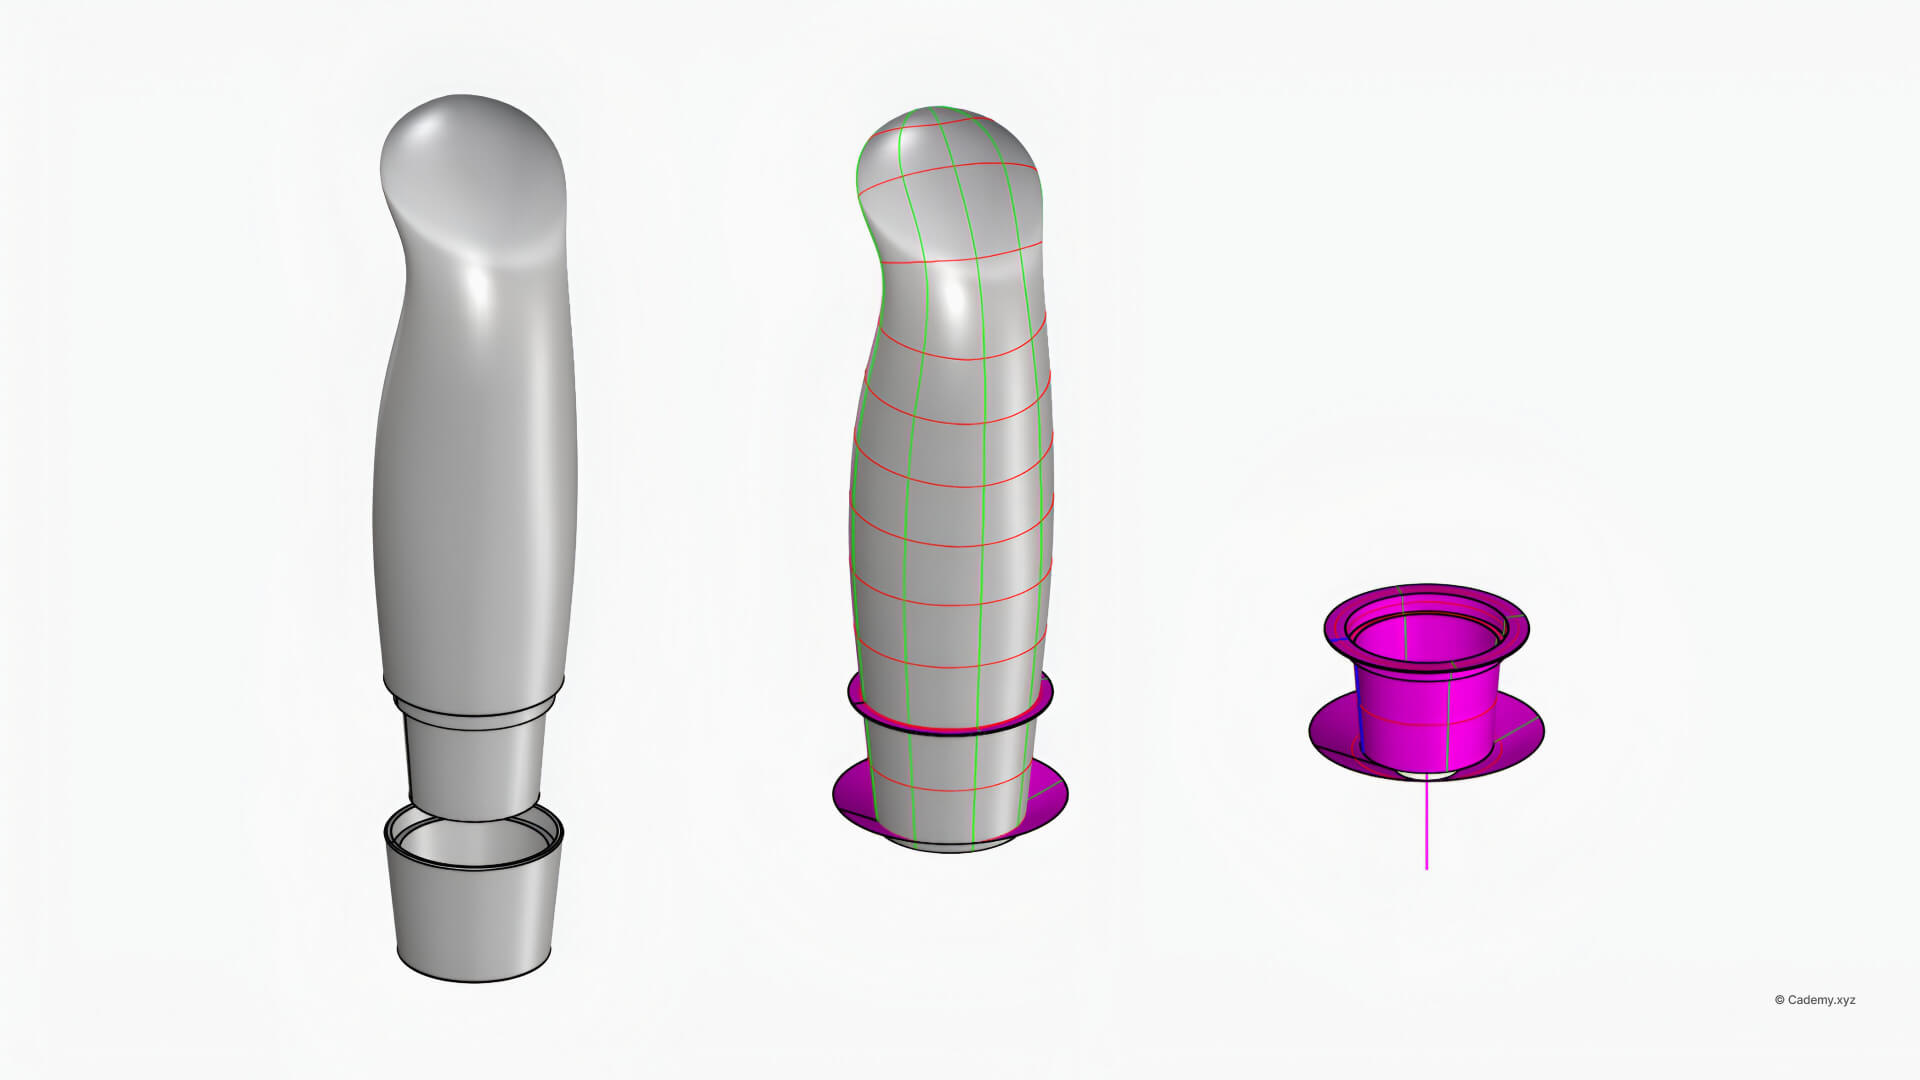
Step 2: Defining Cross-Section Curves
4. Use the CSec command to generate cross-section curves along the primary sketches.
5. Add three circles at the base to maintain a consistent cylindrical form.
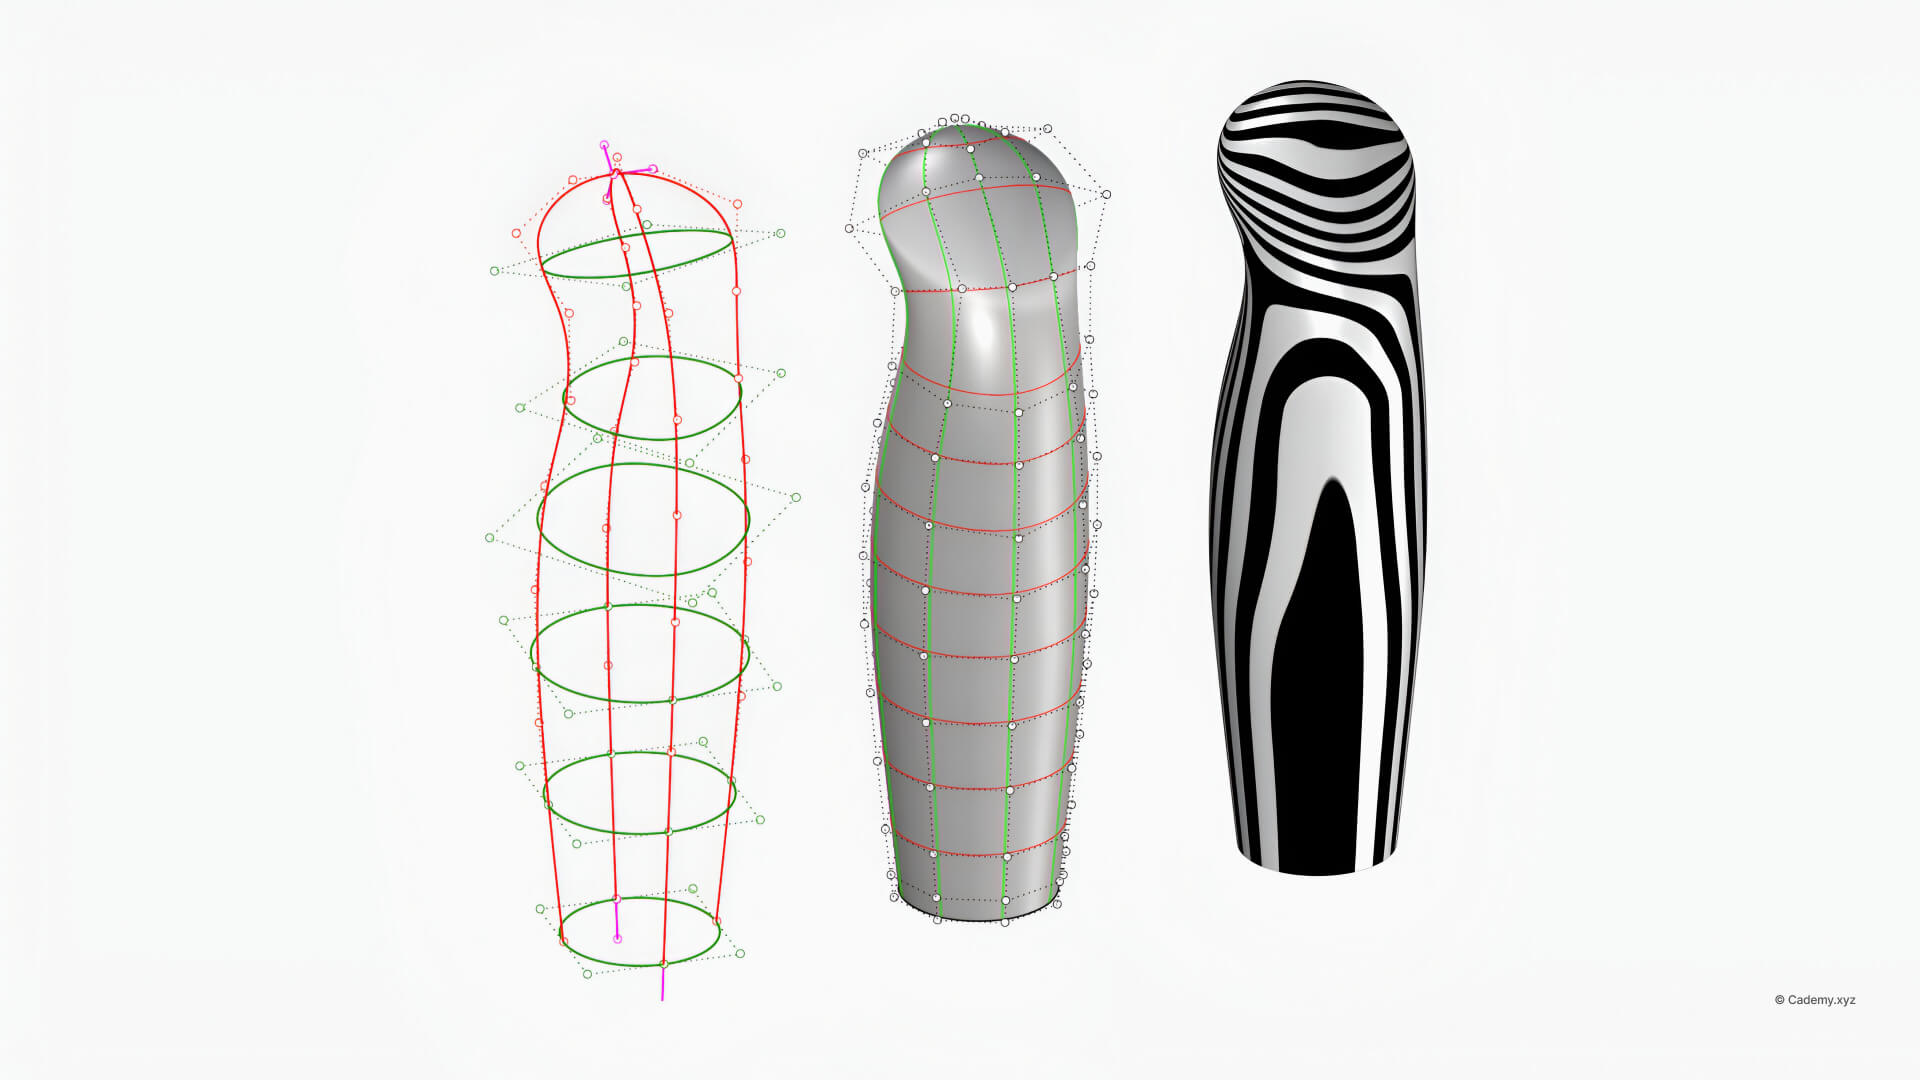
Step 3: Building the Blender’s Body Using Network Surfaces
6. Apply the NetworkSrf command to generate a smooth, continuous surface.
7. Use a loose tolerance (1mm) for better control and refinement.
8. Cap the surface to form a solid polysurface for further modifications.
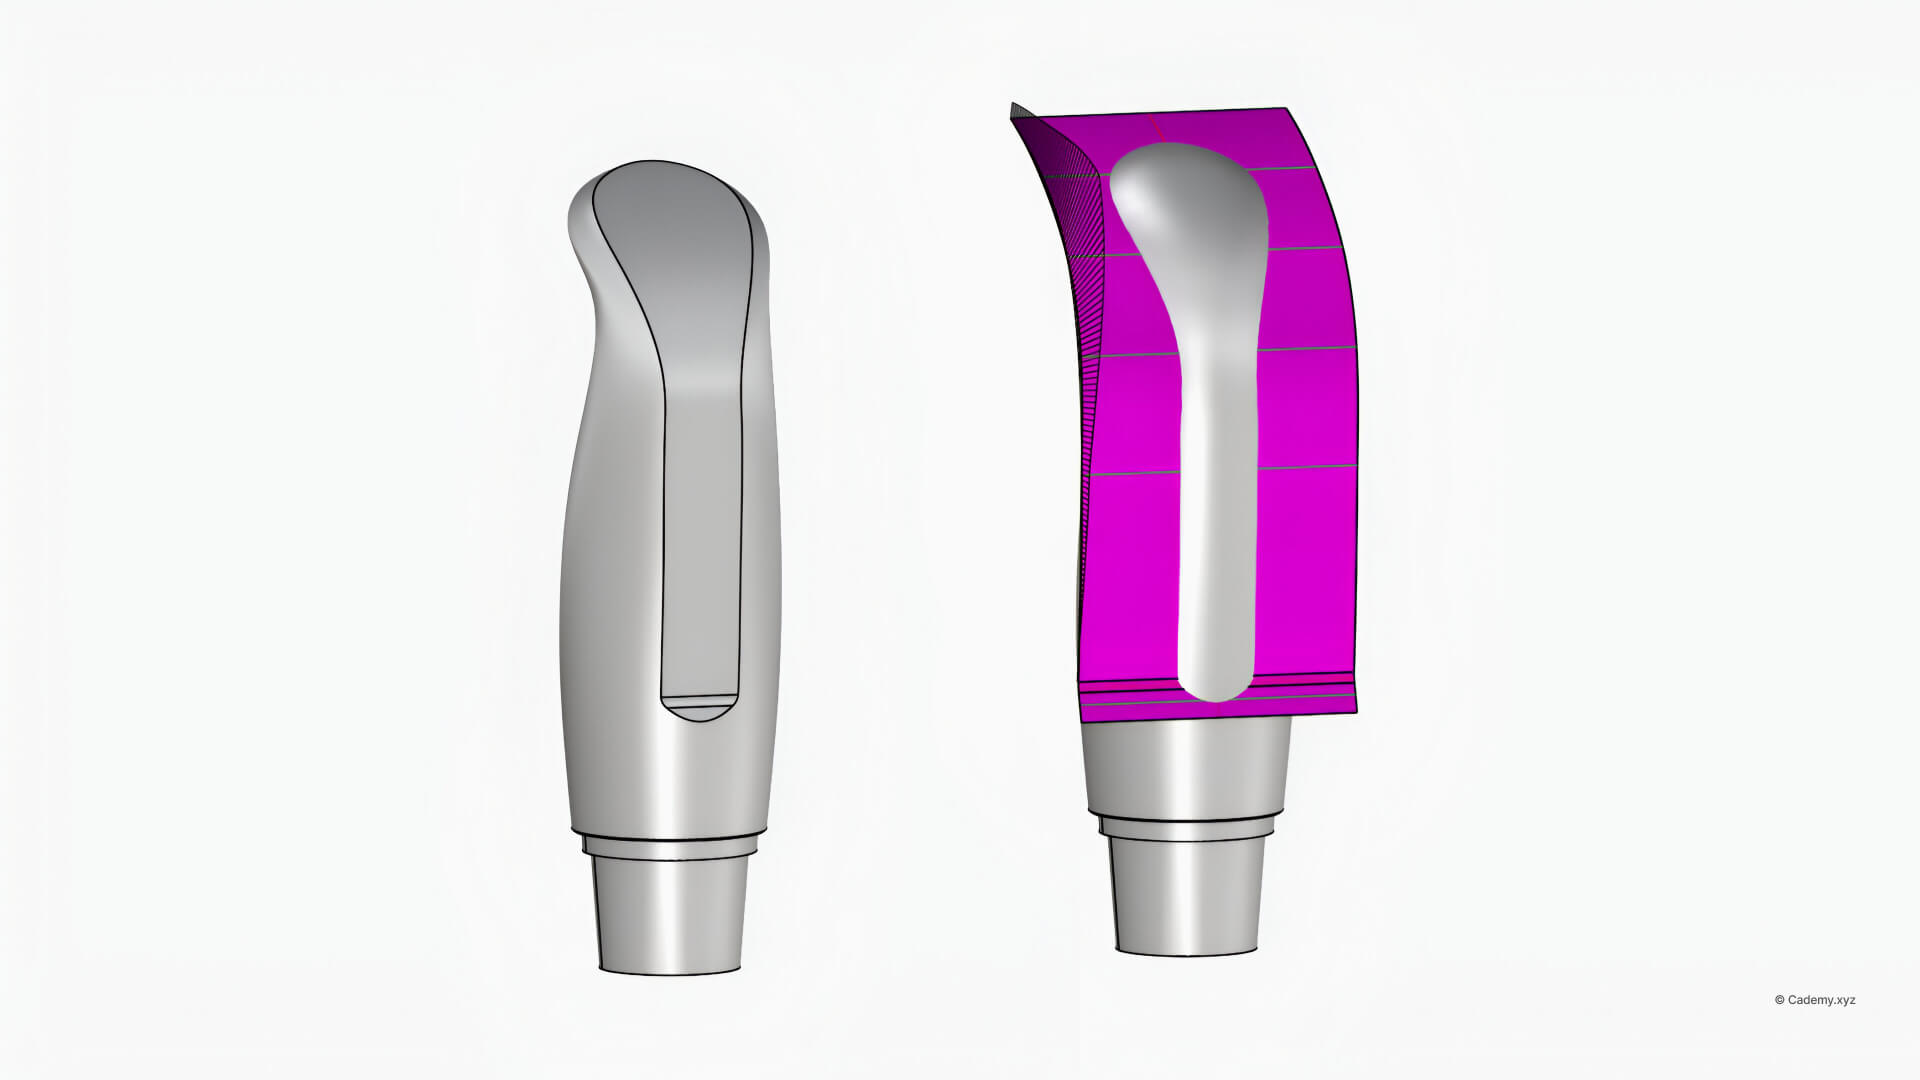
Step 4: Splitting the Blender’s Holder
9. Design a revolved profile using a polyline curve.
10. Offset the curve to introduce a gap for the coupling mechanism.
11. Use Boolean Split to separate the model into two distinct pieces.
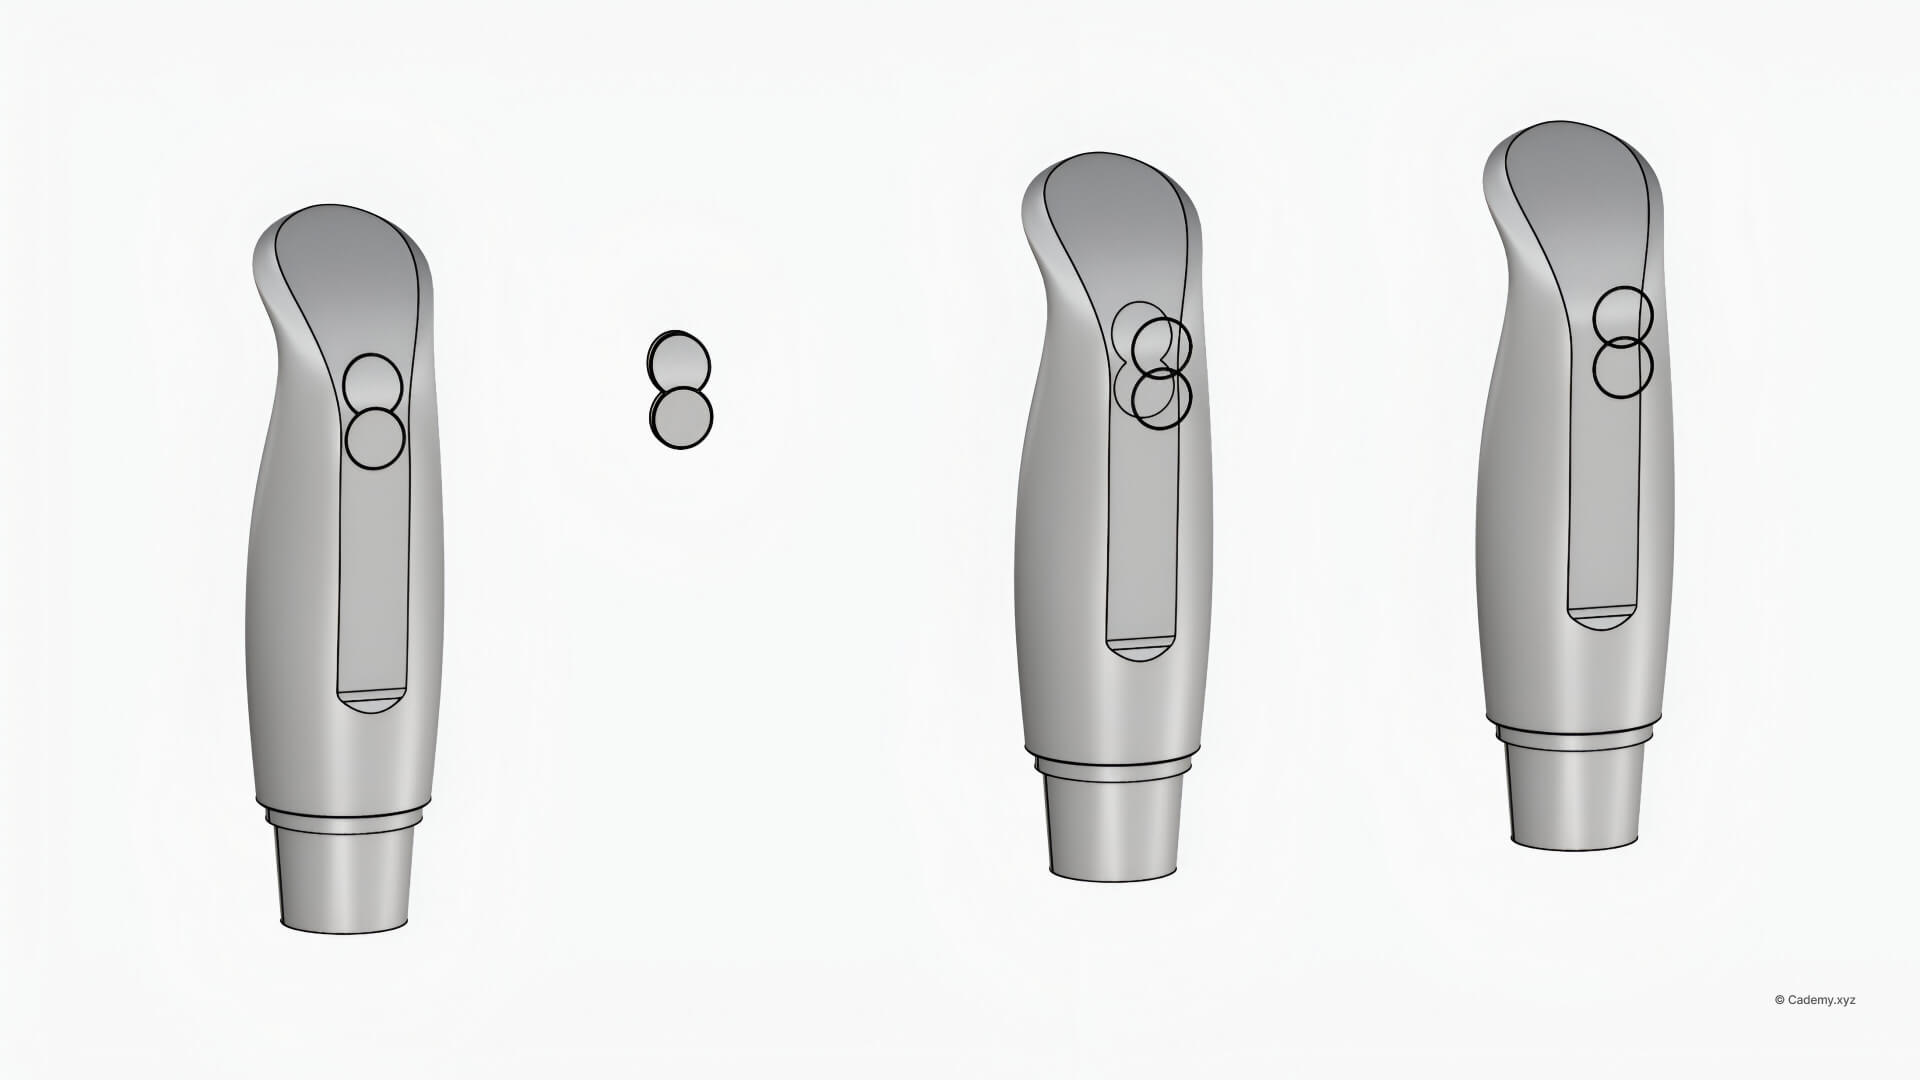
Step 5: Creating the Button Interface
12. Sketch a side-profile curve for the button area.
13. Use intersecting operations to cut out the button recess.
Step 6: Designing the Buttons
14. Project two circular outlines onto the surface.
15. Offset and intersect them to form the button shape.
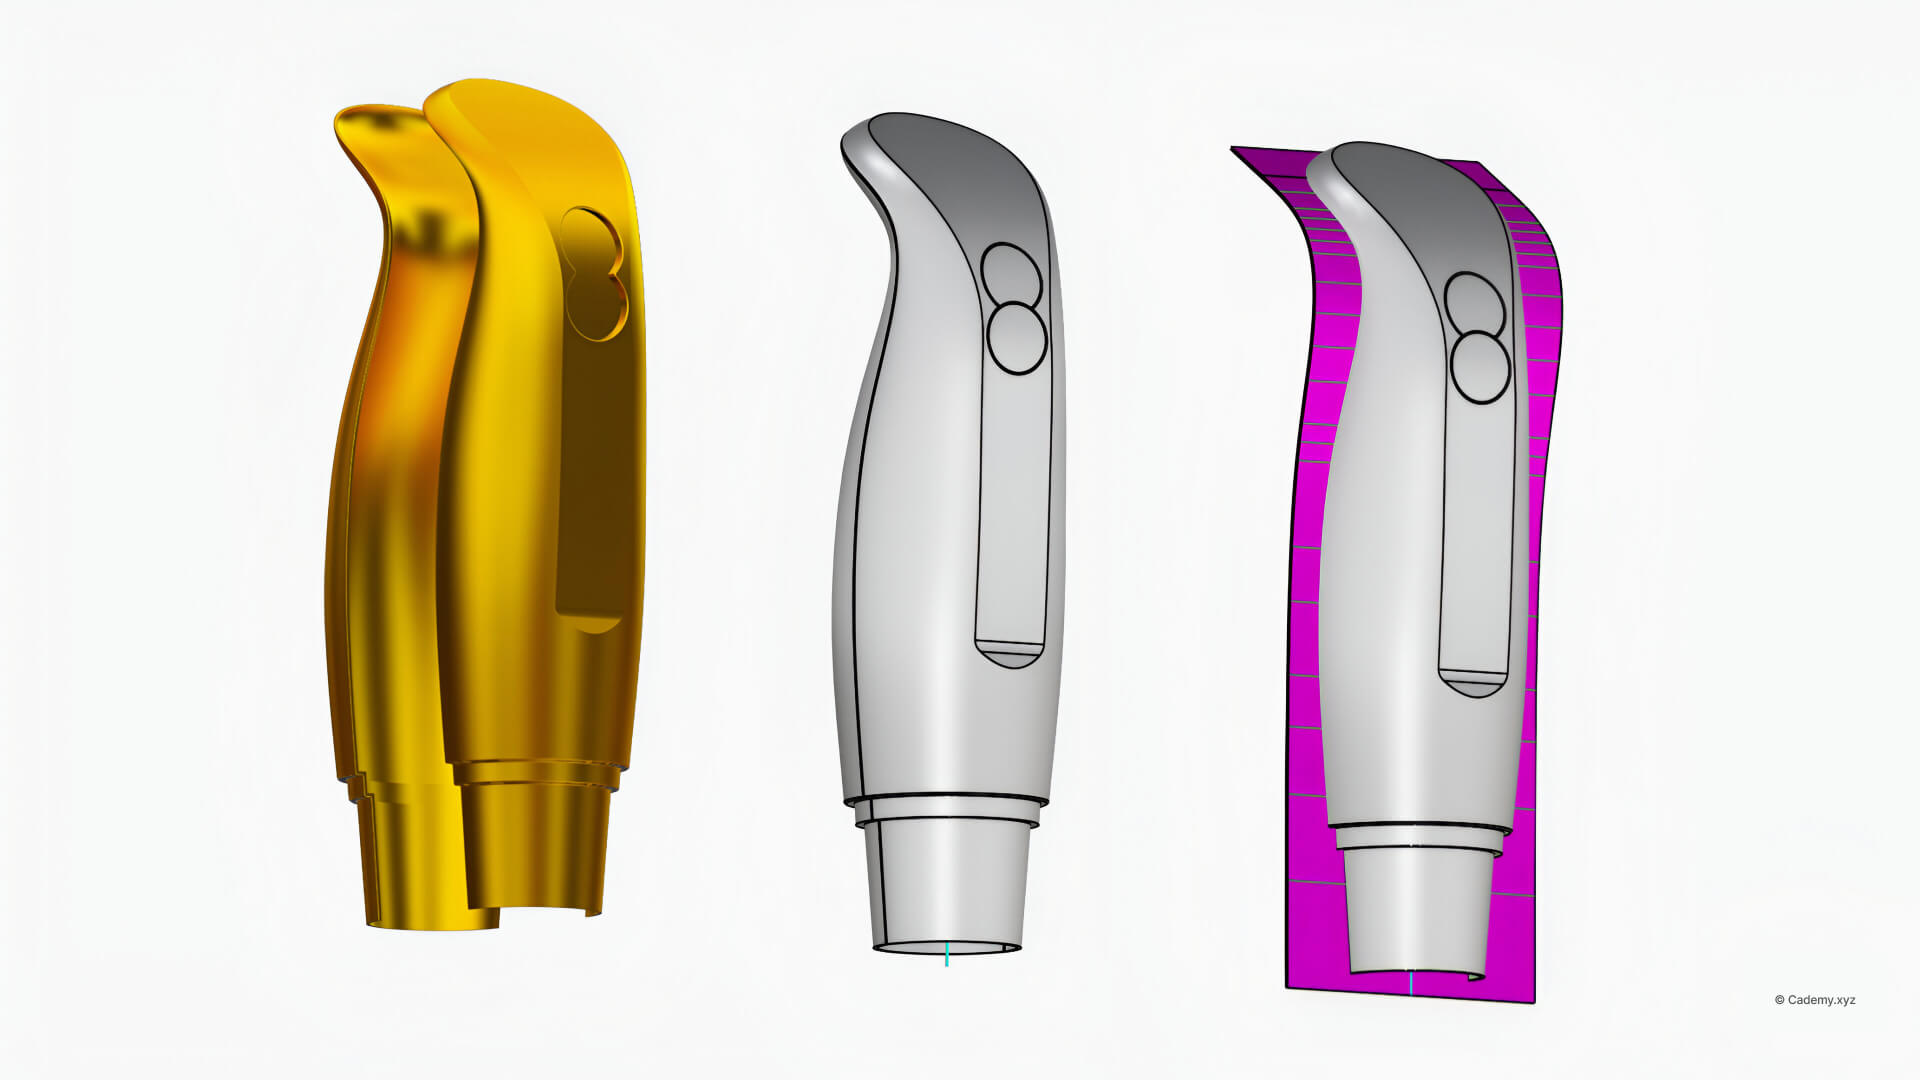
Step 7: Hollowing the Blender Body & Adding Parting Lines
16. Apply the Shell command to hollow the model while maintaining wall thickness.
17. Introduce a parting line at the midsection for accurate manufacturing alignment.
18. Use fillets to refine sharp edges and enhance ergonomics.
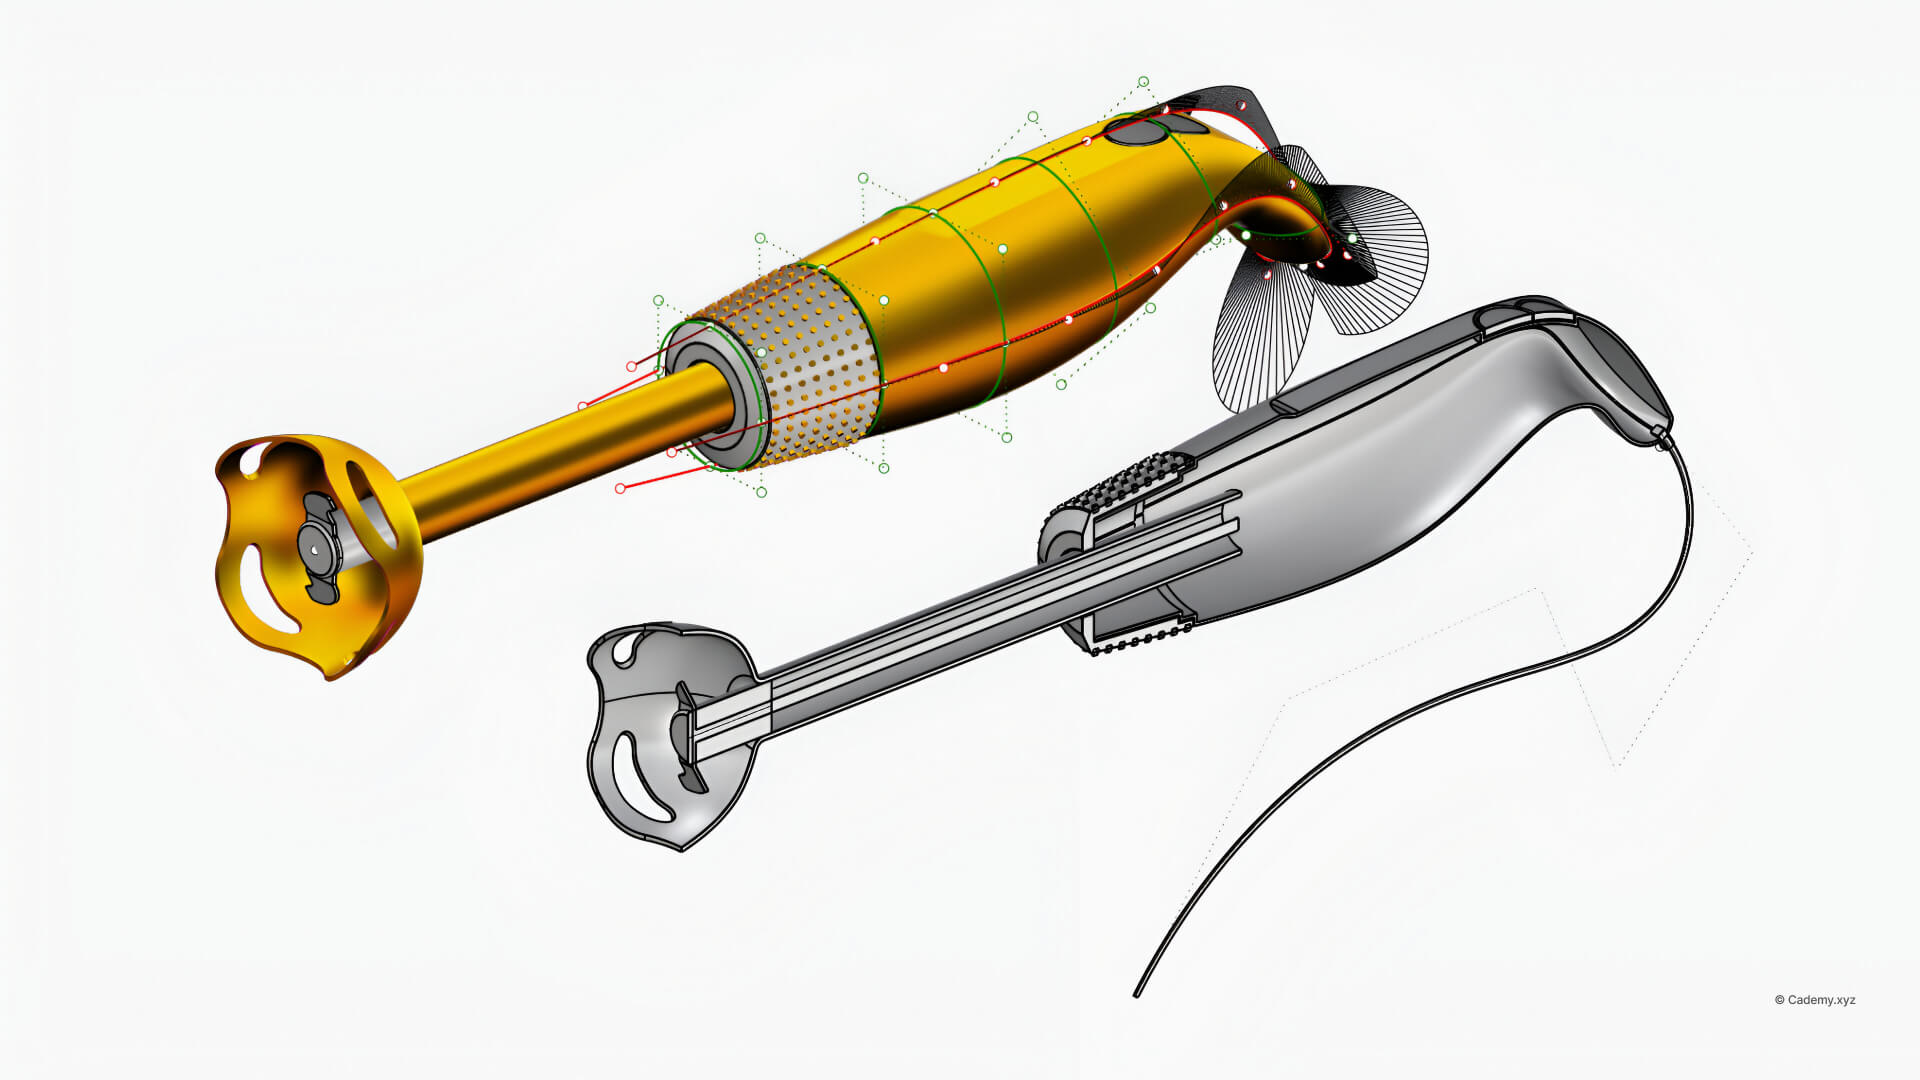
Step 8: Designing the Blade & Bottom Mechanism
19. Create a blade protector and define the revolving mechanism using precise curves.
20. Apply Boolean operations to introduce ventilation holes for liquid flow.
21. Extrude and refine the blade to complete the assembly.
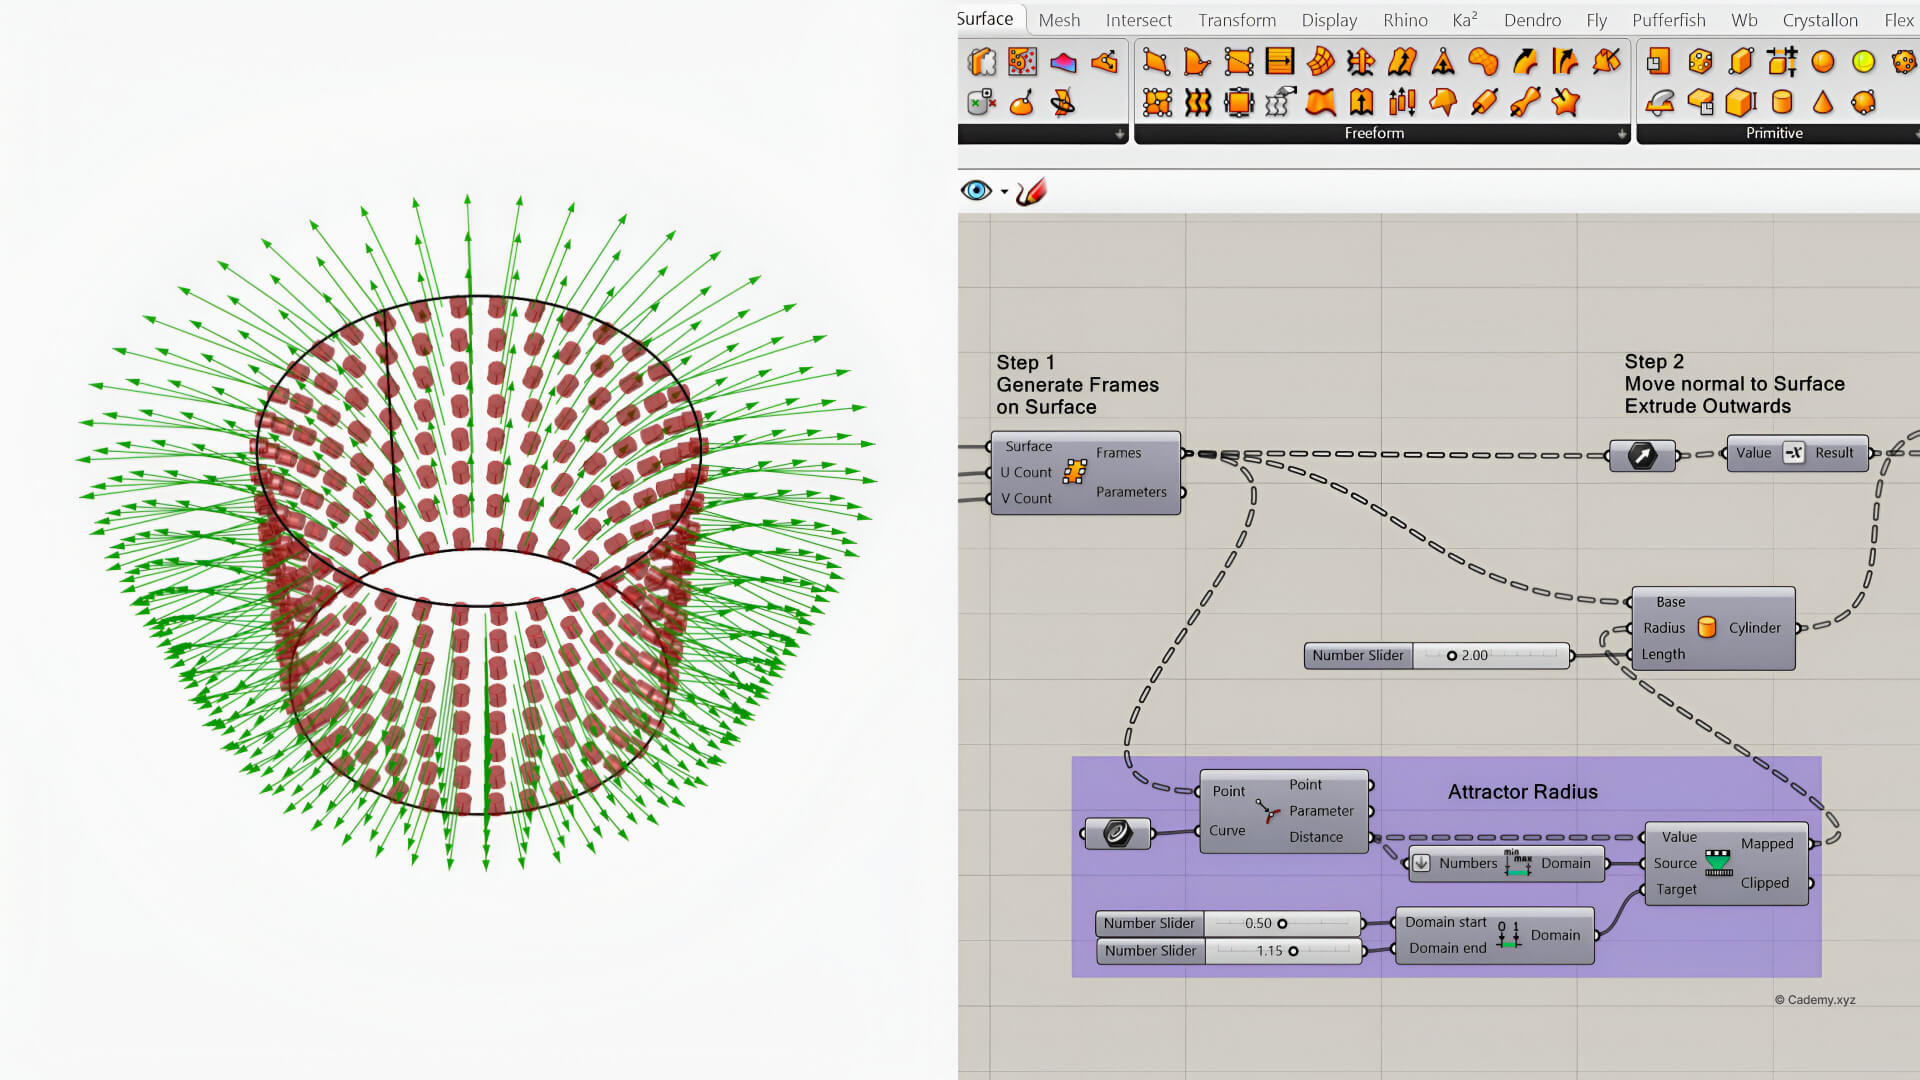
Step 9: Adding Textures with Grasshopper
22. Import the polysurface into Grasshopper.
23. Use Surface Frames to generate perpendicular planes for texture mapping.
24. Implement attractor points to create dynamic fading effects on the texture.
25. Organize and remove duplicates using Flip Matrix and Cull Index commands.
26. Bake the final textured model back into Rhino.
Step 10: Final Assembly & Exporting
27. Reassemble all individual components inside Rhino.
28. Assign layers and colors for better organization.
29. Export the model for 3D printing or high-quality rendering in KeyShot.
Conclusion
This tutorial equips you with essential NURBS modeling techniques in Rhino and introduces Grasshopper’s procedural tools to generate sophisticated textures. Whether you’re creating industrial designs, product prototypes, or detailed concept models, these skills will elevate your work to a professional level.
Don’t forget to download the resource files and share your results.
Thanks for reading ❤️
