Optimize 3D File Size in Rhinoceros and KeyShot Using Blocks

Download Files: cademy.xyz/resources
Managing large 3D files can be challenging, especially when working with high-resolution scans and complex compositions. For Rhino and KeyShot users, optimizing file size is essential for maintaining system performance and improving workflow efficiency.
This guide will show you how to use Rhino’s block instances and the KeyShot Studio 2024 Plugin to significantly reduce file sizes while enabling detailed visual compositions.
The Problem: Large File Sizes and System Performance
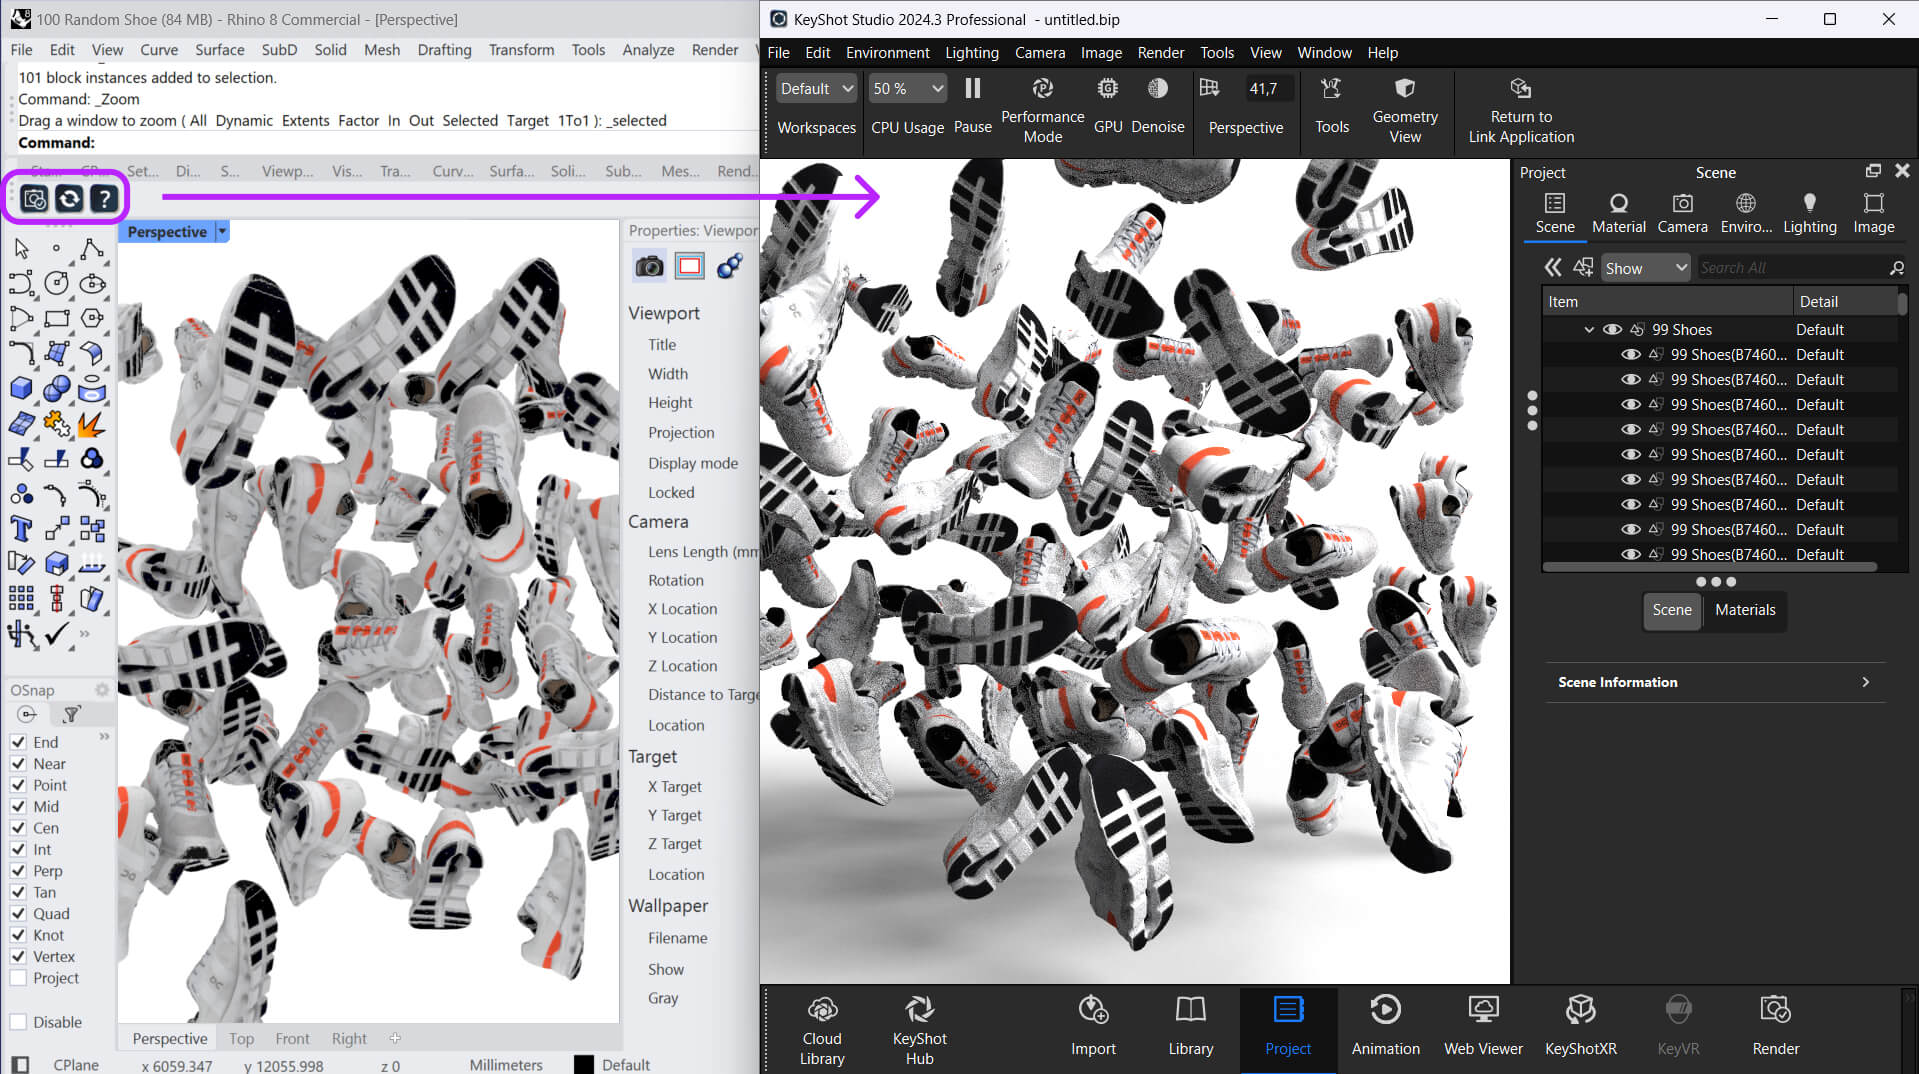
Consider a scenario where a single 3D mesh of a shoe scan is approximately 85 MB. If this scan is replicated multiple times in a scene, file sizes increase exponentially, leading to system lag or crashes. For instance, each duplicate might add an additional 30 MB, quickly becoming unmanageable when working with hundreds of copies.
The Solution: Rhino Blocks & KeyShot Studio Plugin
To tackle this issue, we’ll use:
-Rhino Blocks – To create and distribute lightweight instances of 3D models.
-KeyShot Studio Plugin – To maintain real-time updates between Rhino and KeyShot while optimizing scene complexity.
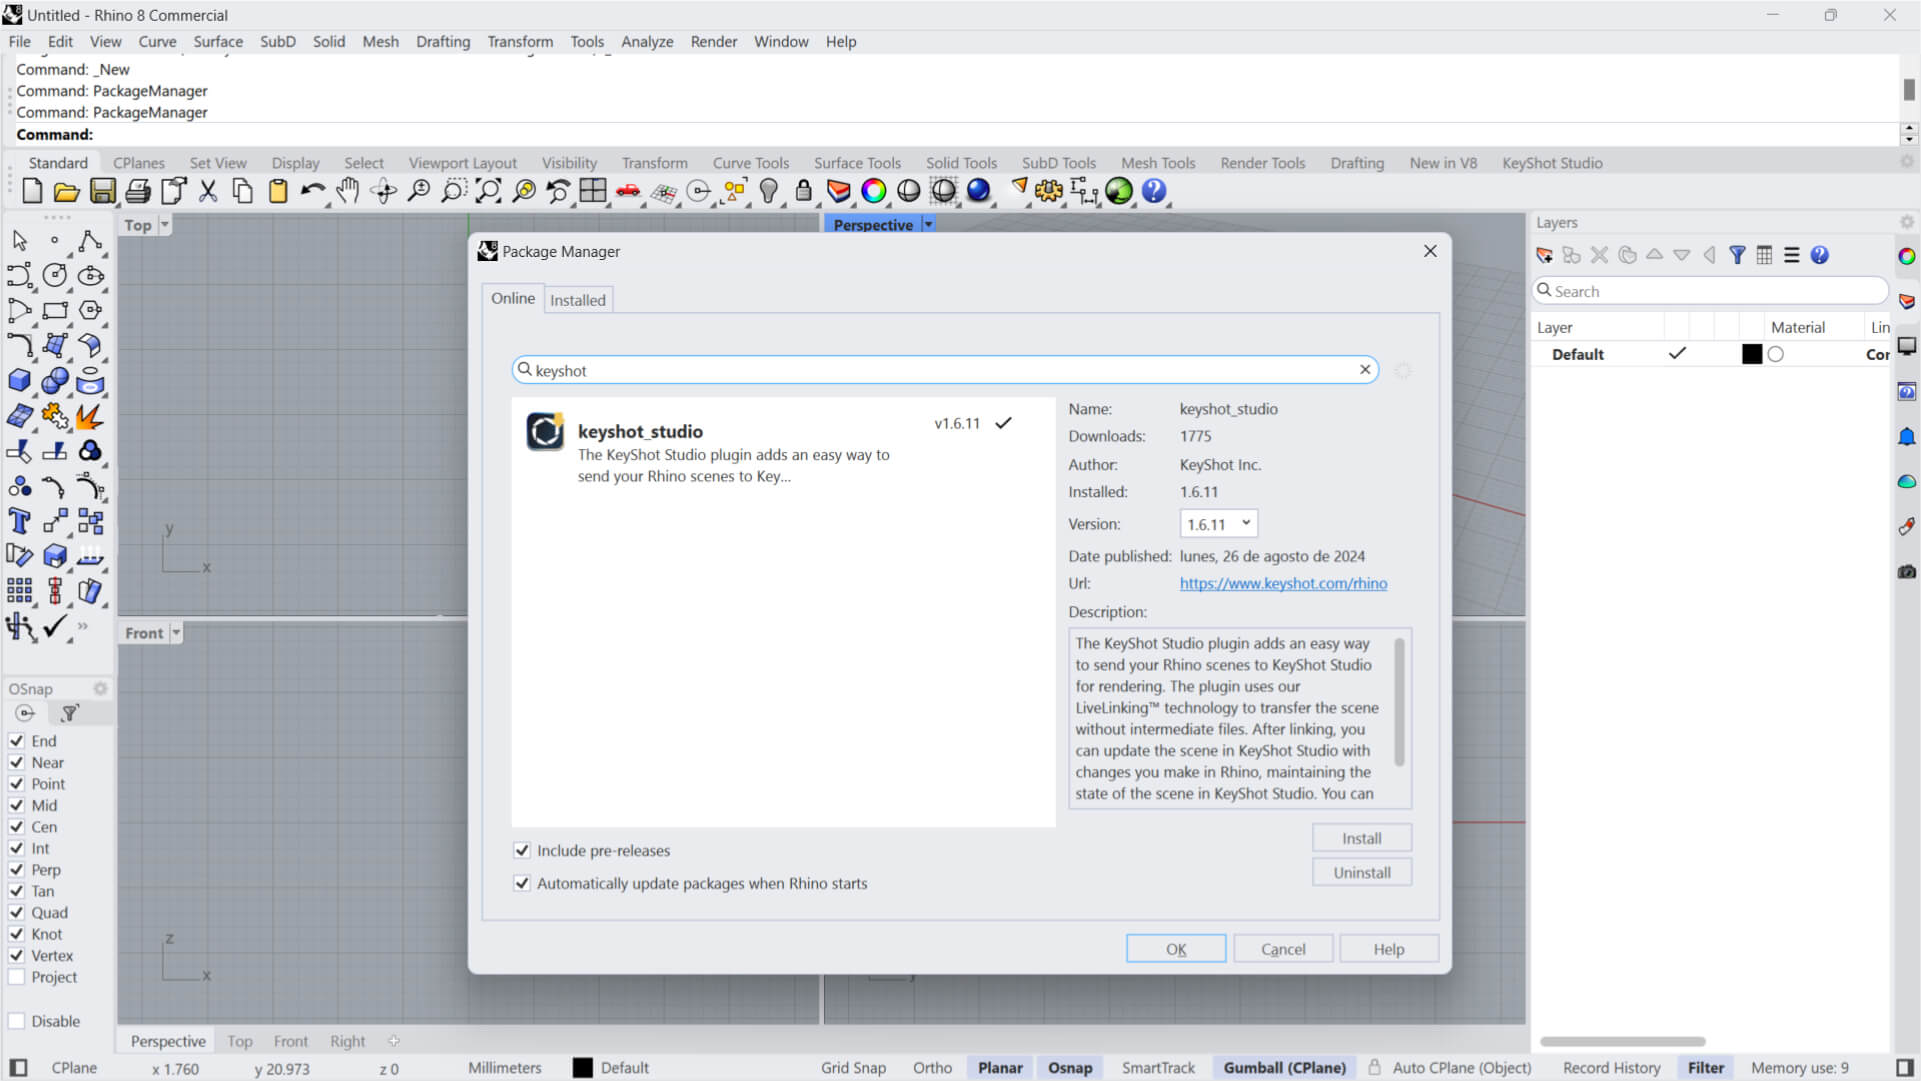
Step 1: Install the KeyShot Plugin for Rhino
1. First, download and install the KeyShot Studio Plugin from the Rhino Package Manager. This plugin enables seamless integration between Rhino and KeyShot, allowing direct exports and live updates.
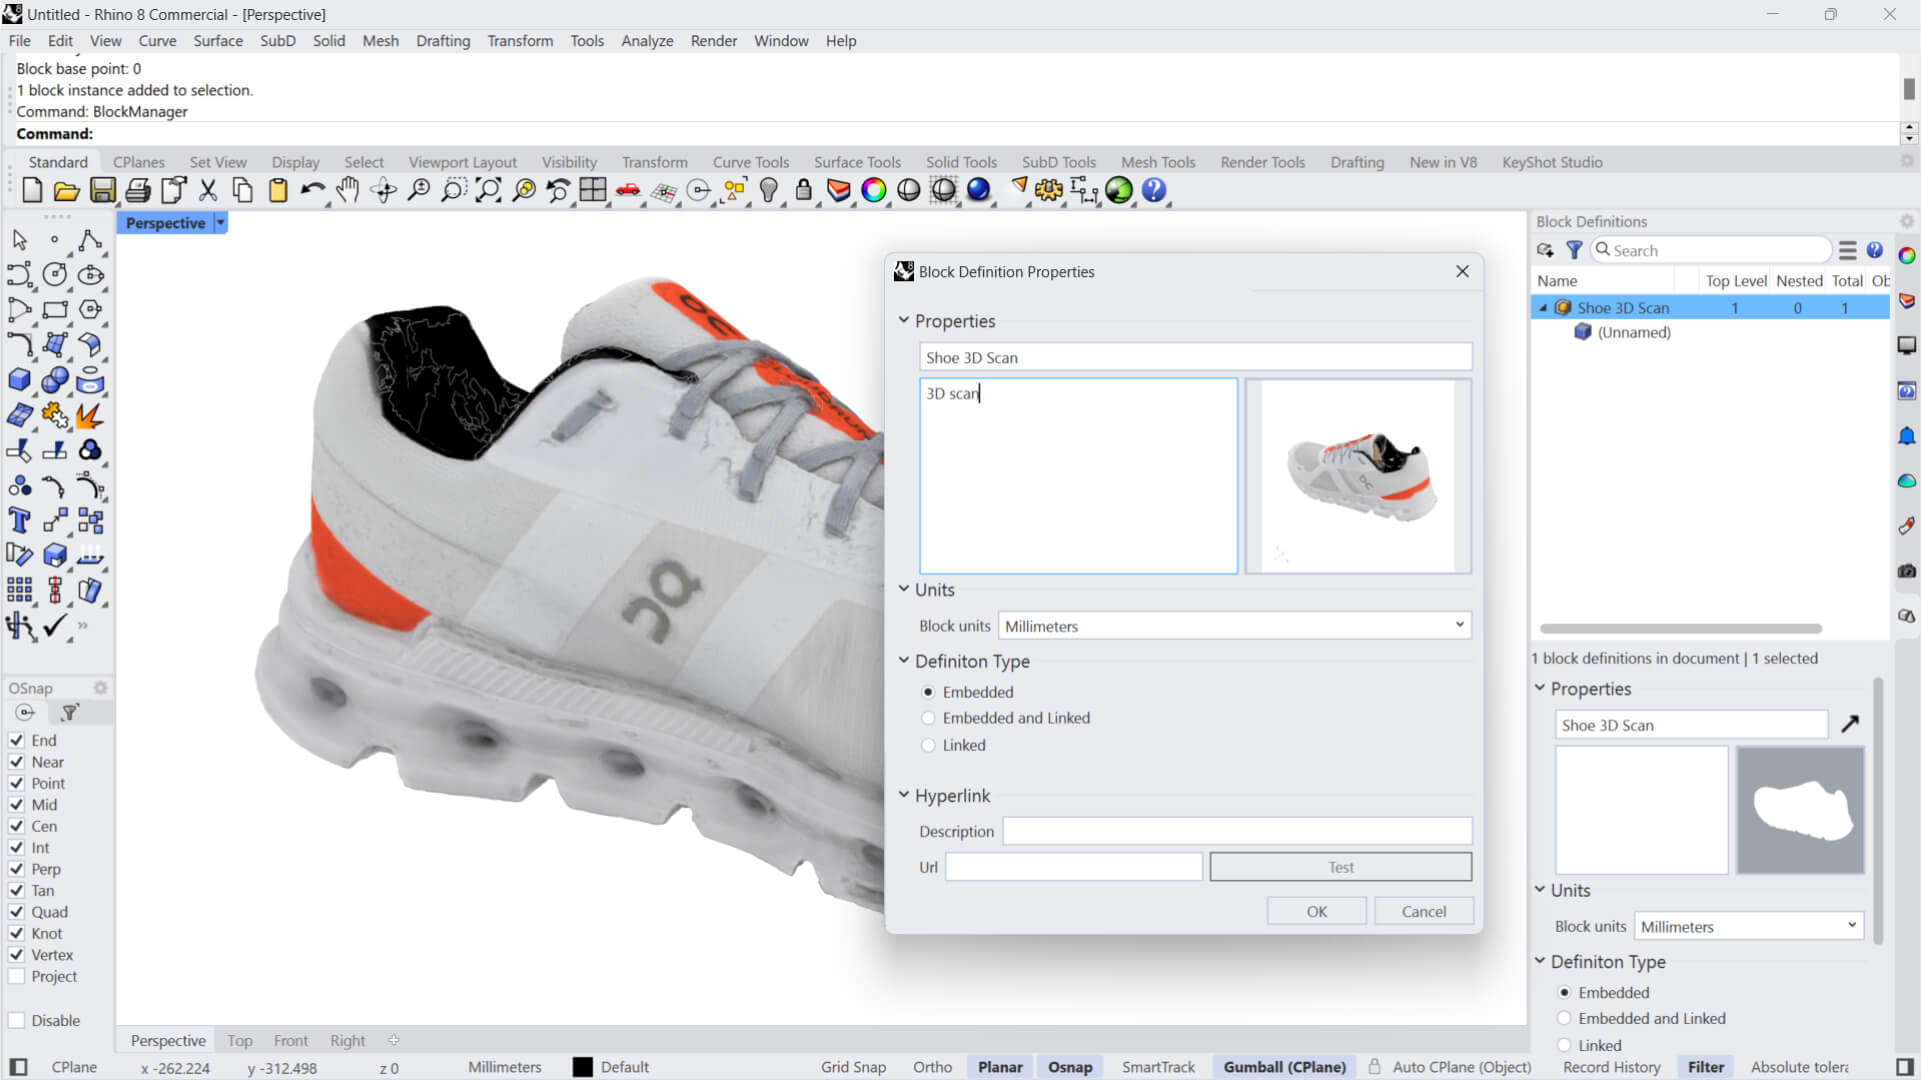
Step 2: Convert Scans to Blocks in Rhino
2. Import your 3D shoe scan into Rhino (.obj format).
3. Convert the imported scan into a block instance to encapsulate the scan as a single reference point.
4. This method keeps the file size consistent at 85 MB, no matter how many instances you create.
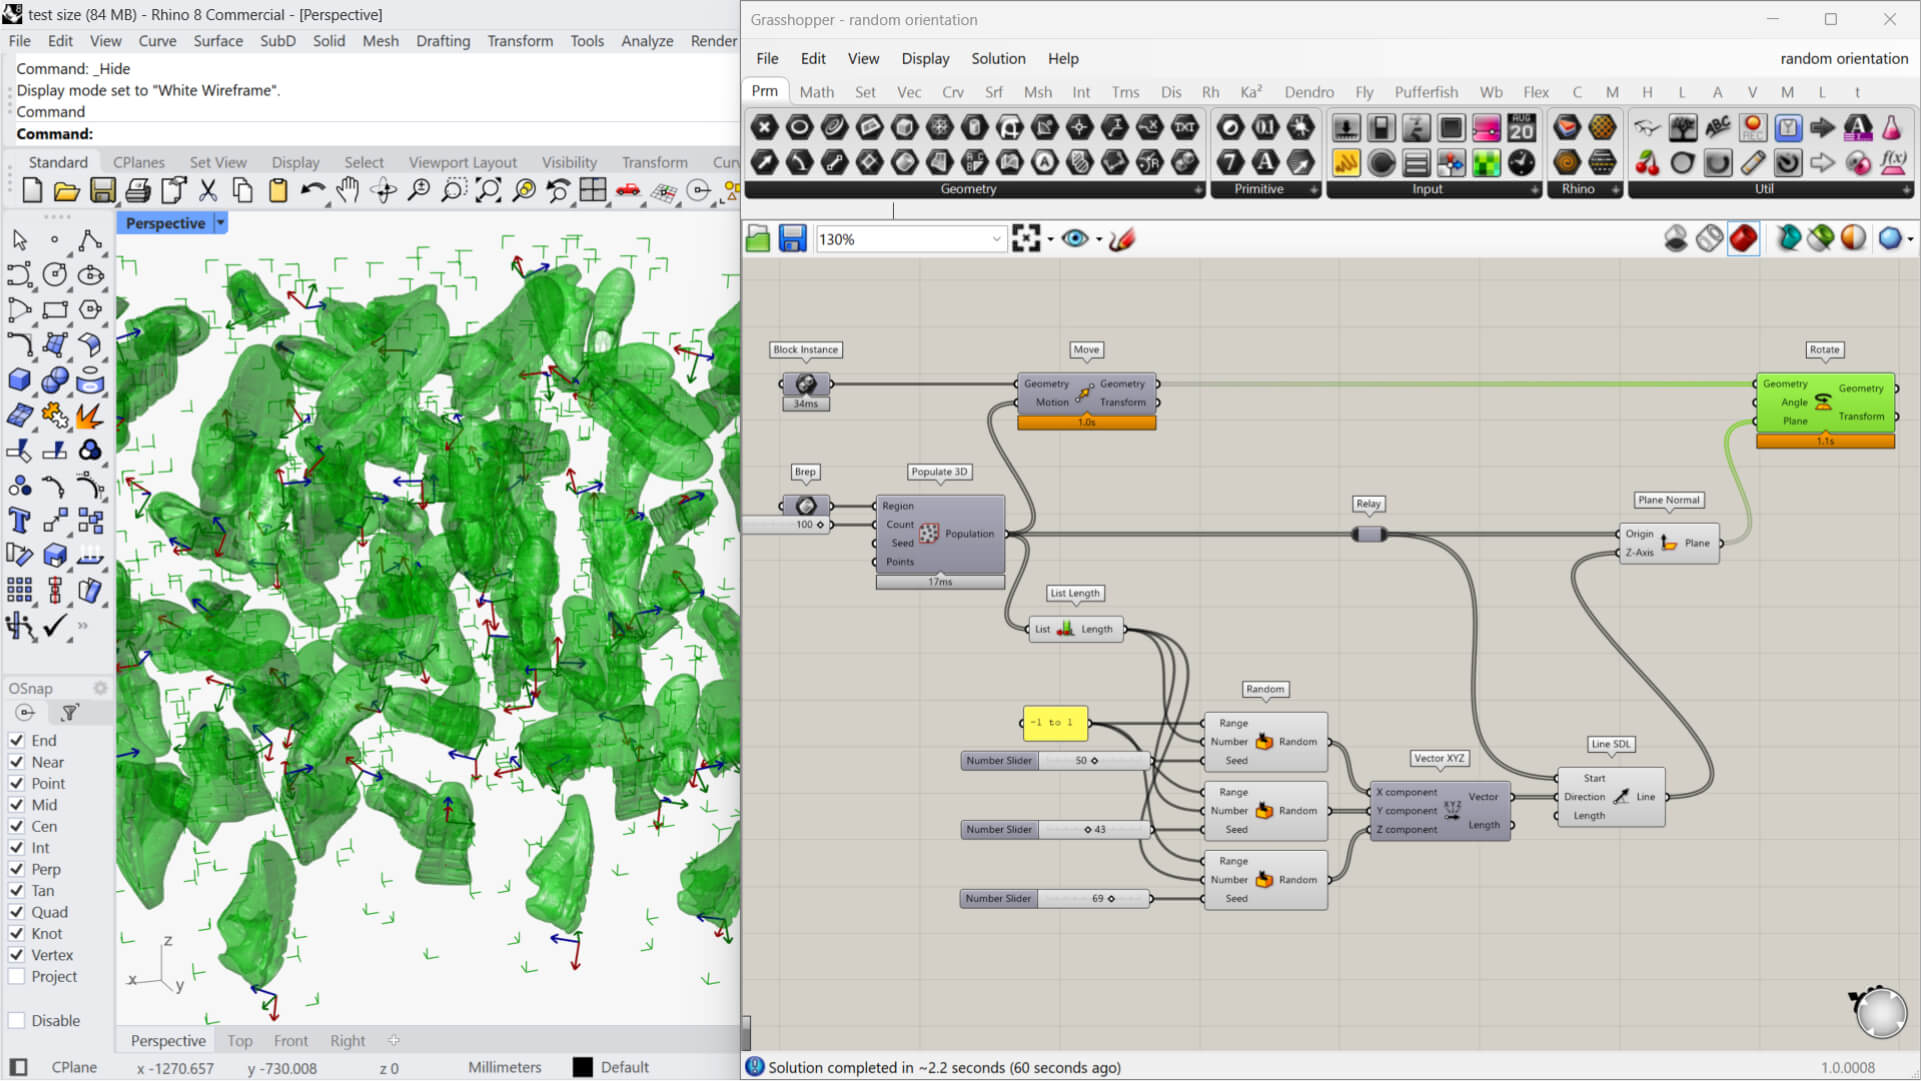
Step 3: Distribute Blocks
5. Use Rhino’s Array tool or Grasshopper to create multiple instances efficiently.
6. This method ensures a constant file size instead of exponential growth, as seen with traditional duplication.
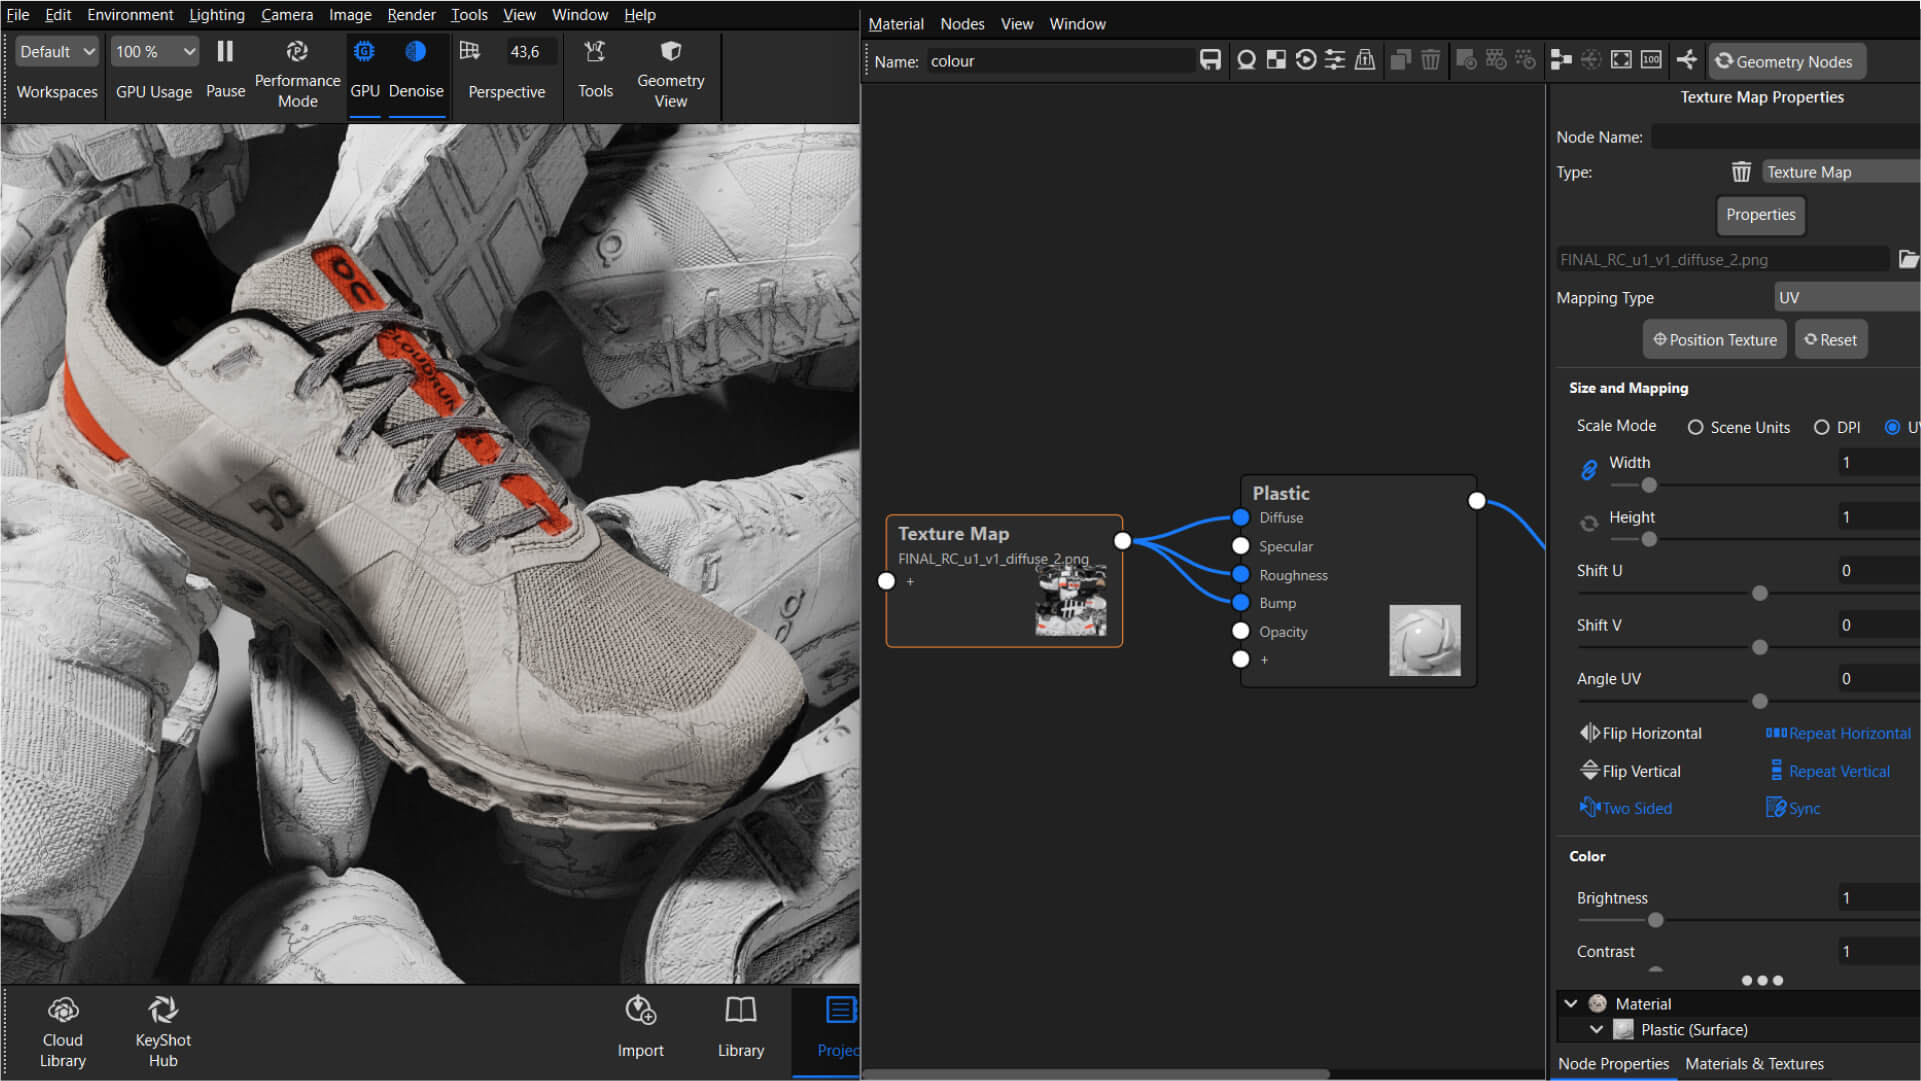
Step 4: Export to KeyShot
7. Use the KeyShot Plugin to export your scene with block instances.
8. KeyShot recognizes these instances as references, ensuring optimal performance while maintaining scene complexity.
Step 5: Set Up Materials, Lighting, and Simulation in KeyShot
9. Apply realistic materials to block instances to enhance detail.
10. Configure HDRI lighting and use physical light sources (plane lights, area lights) for realistic illumination.
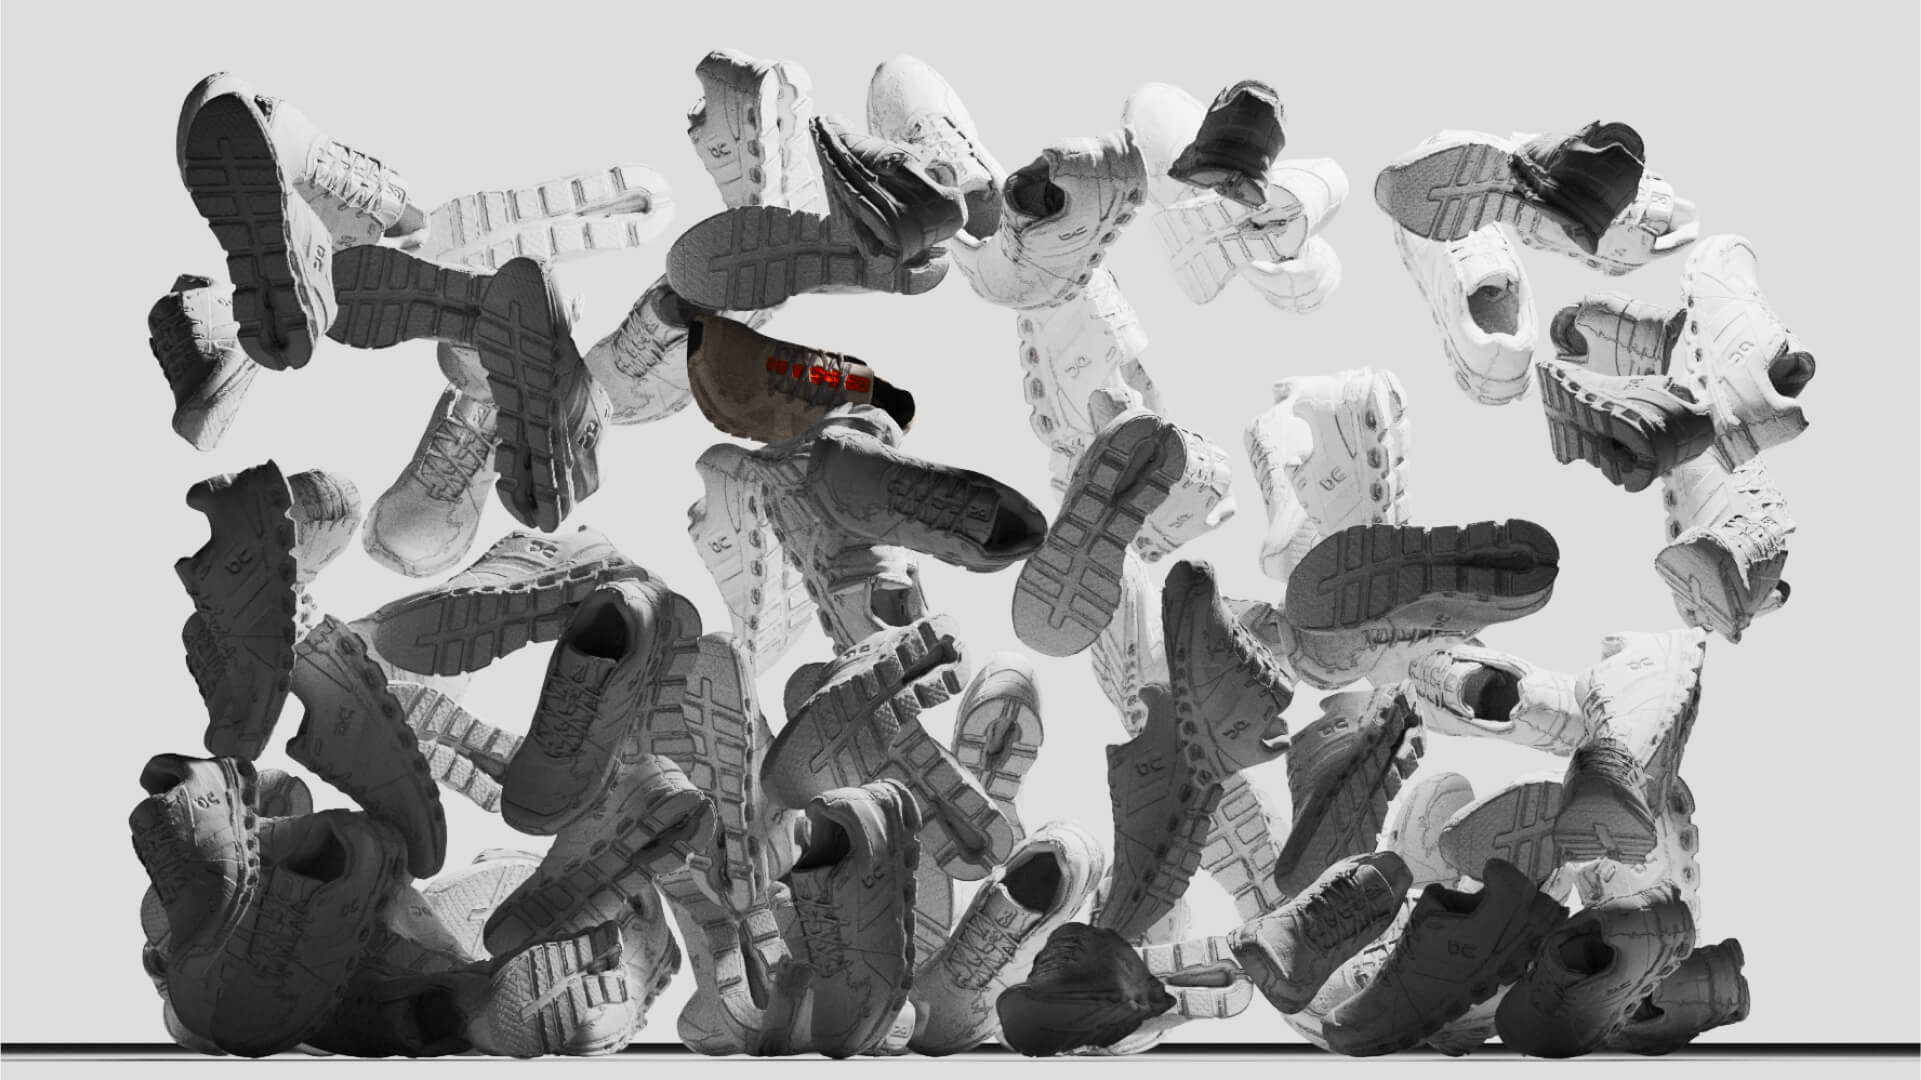
11. Use KeyShot’s physics simulation to achieve natural object placement.
Step 6: Rendering and Animation
12. Render high-quality stills or create animations with optimized performance.
13. Thanks to Rhino Blocks and KeyShot instances, even highly complex scenes render efficiently.
Conclusion
By leveraging Rhino’s block instances and the KeyShot Studio 2024 Plugin, designers can efficiently handle hundreds of 3D scans without compromising system performance or design quality. This method ensures faster workflows, reduced lag, and high-quality visual presentations.
Don’t forget to download the resource files and share your results.
Thanks for reading ❤️
