Tutorials
Oct 3, 2023
The Grasshopper Donut Tutorial: Start Learning Parametric Design

The Grasshopper Donut Tutorial: Your First Step into Parametric Design
The Iconic Beginner's Guide to Grasshopper 3D & Rhino
Inspired by the famous Blender Donut, we’ve created the definitive free Grasshopper 3D course entry point. If you’ve ever wanted to learn parametric design but didn't know where to start, this is it. In this step-by-step tutorial, you’ll learn the core logic of algorithmic modeling by building a digital donut—complete with organic glaze and procedural sprinkles.
Download Files
What’s included in this lesson:
- Perfect for Beginners: No prior Grasshopper experience required.
- Core Logic: Learn how to use math, randomness, and data lists.
- Project Files: Download the starter and final scripts to follow along.
What you will learn in this module:
- Algorithmic Foundations: Understanding how to use circles, frames, and lofts to create responsive 3D geometry.
- Procedural Randomization: Using "Jitter" and "Random" components to make digital models look natural and organic.
- The Power of Scattering: Mastering the Populate Geometry component to distribute thousands of objects (sprinkles) in seconds.
- Custom Python Scripting: A gentle introduction to using Python for advanced geometric control like glaze thickness.
- Real-Time Iteration: Learning how a single slider can change the glaze, sprinkle count, and donut size instantly.
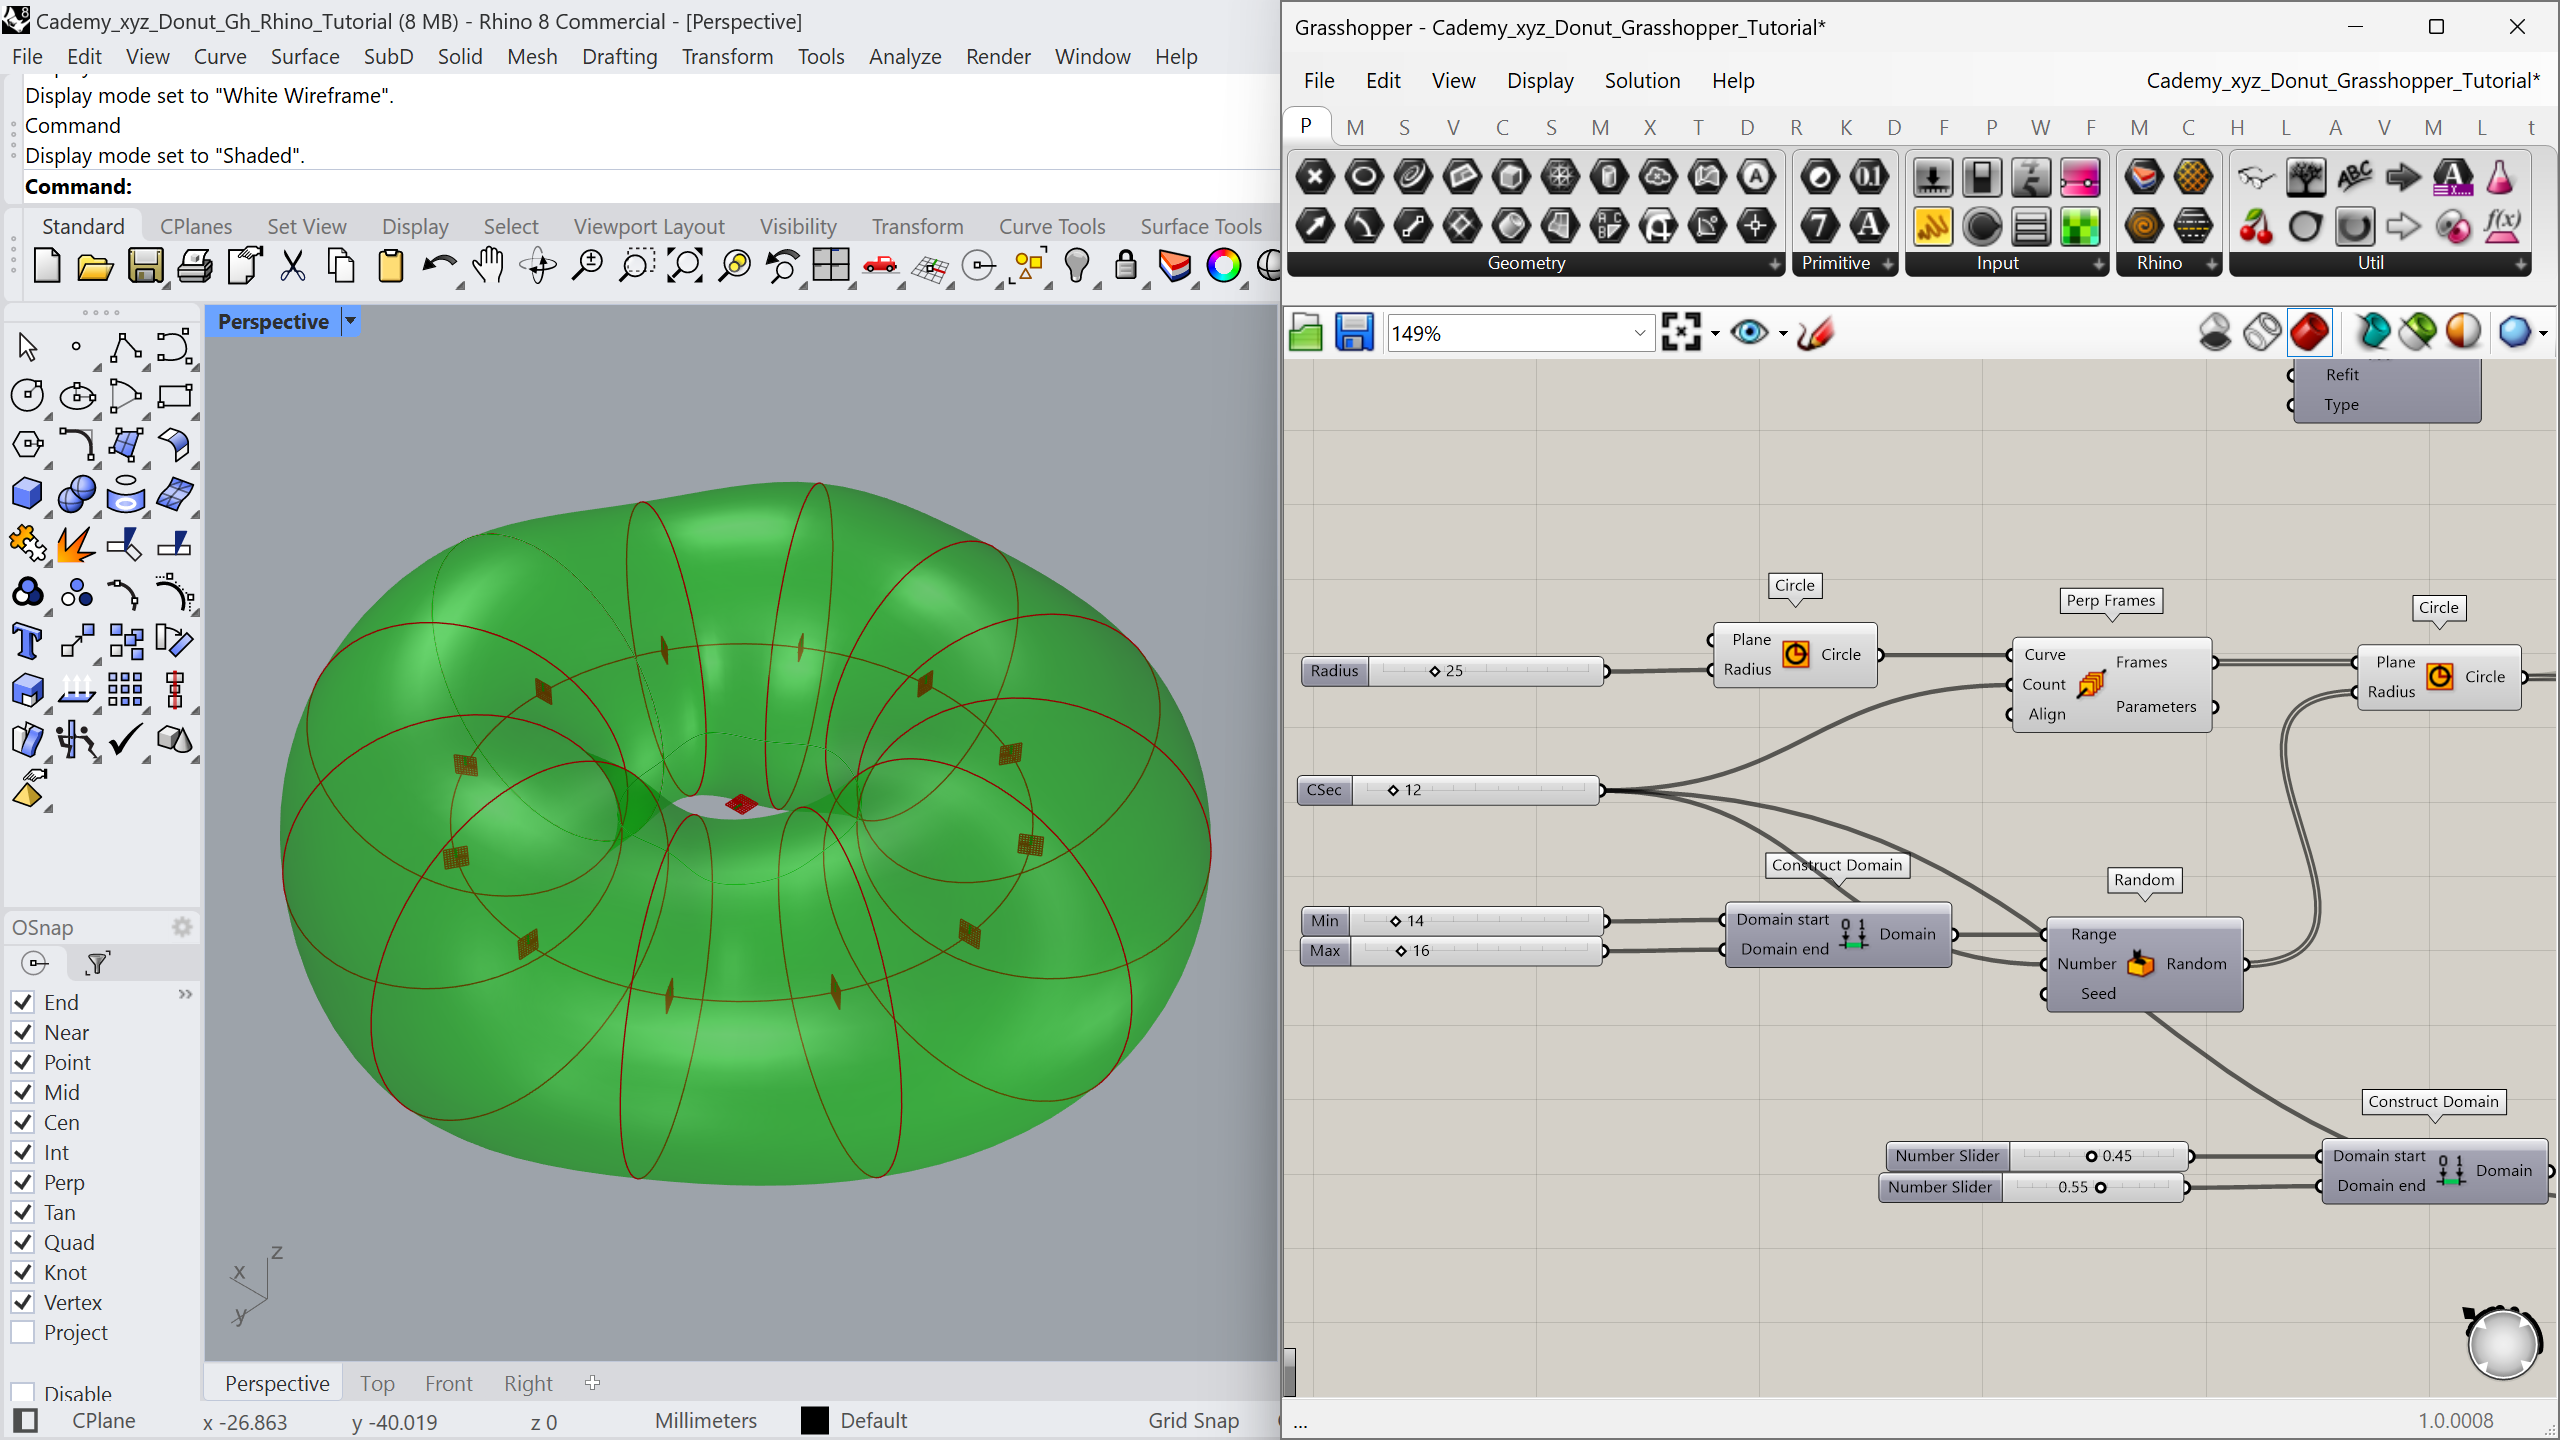
Step 1: Setting Up Grasshopper and Constructing the Donut Base
- Launch the Grasshopper plugin within Rhino 3D to begin your free course journey.
- Define a base circle and use the Division component to establish evenly spaced frames.
- These frames act as guides for the donut's cross-sectional profiles.
- Add a Random component to the radii of the profiles to create an organic, handmade look.
Step 2: Crafting the Glaze with Procedural Logic
- Split the donut’s lofted surface to define the "icing" area.
- Generate random points along the path to create a wavy, natural glaze boundary.
- Use the Evaluate Curve component and a simple Python script to control the glaze's thickness.
- This step teaches you how to add volume and depth to a surface algorithmically.

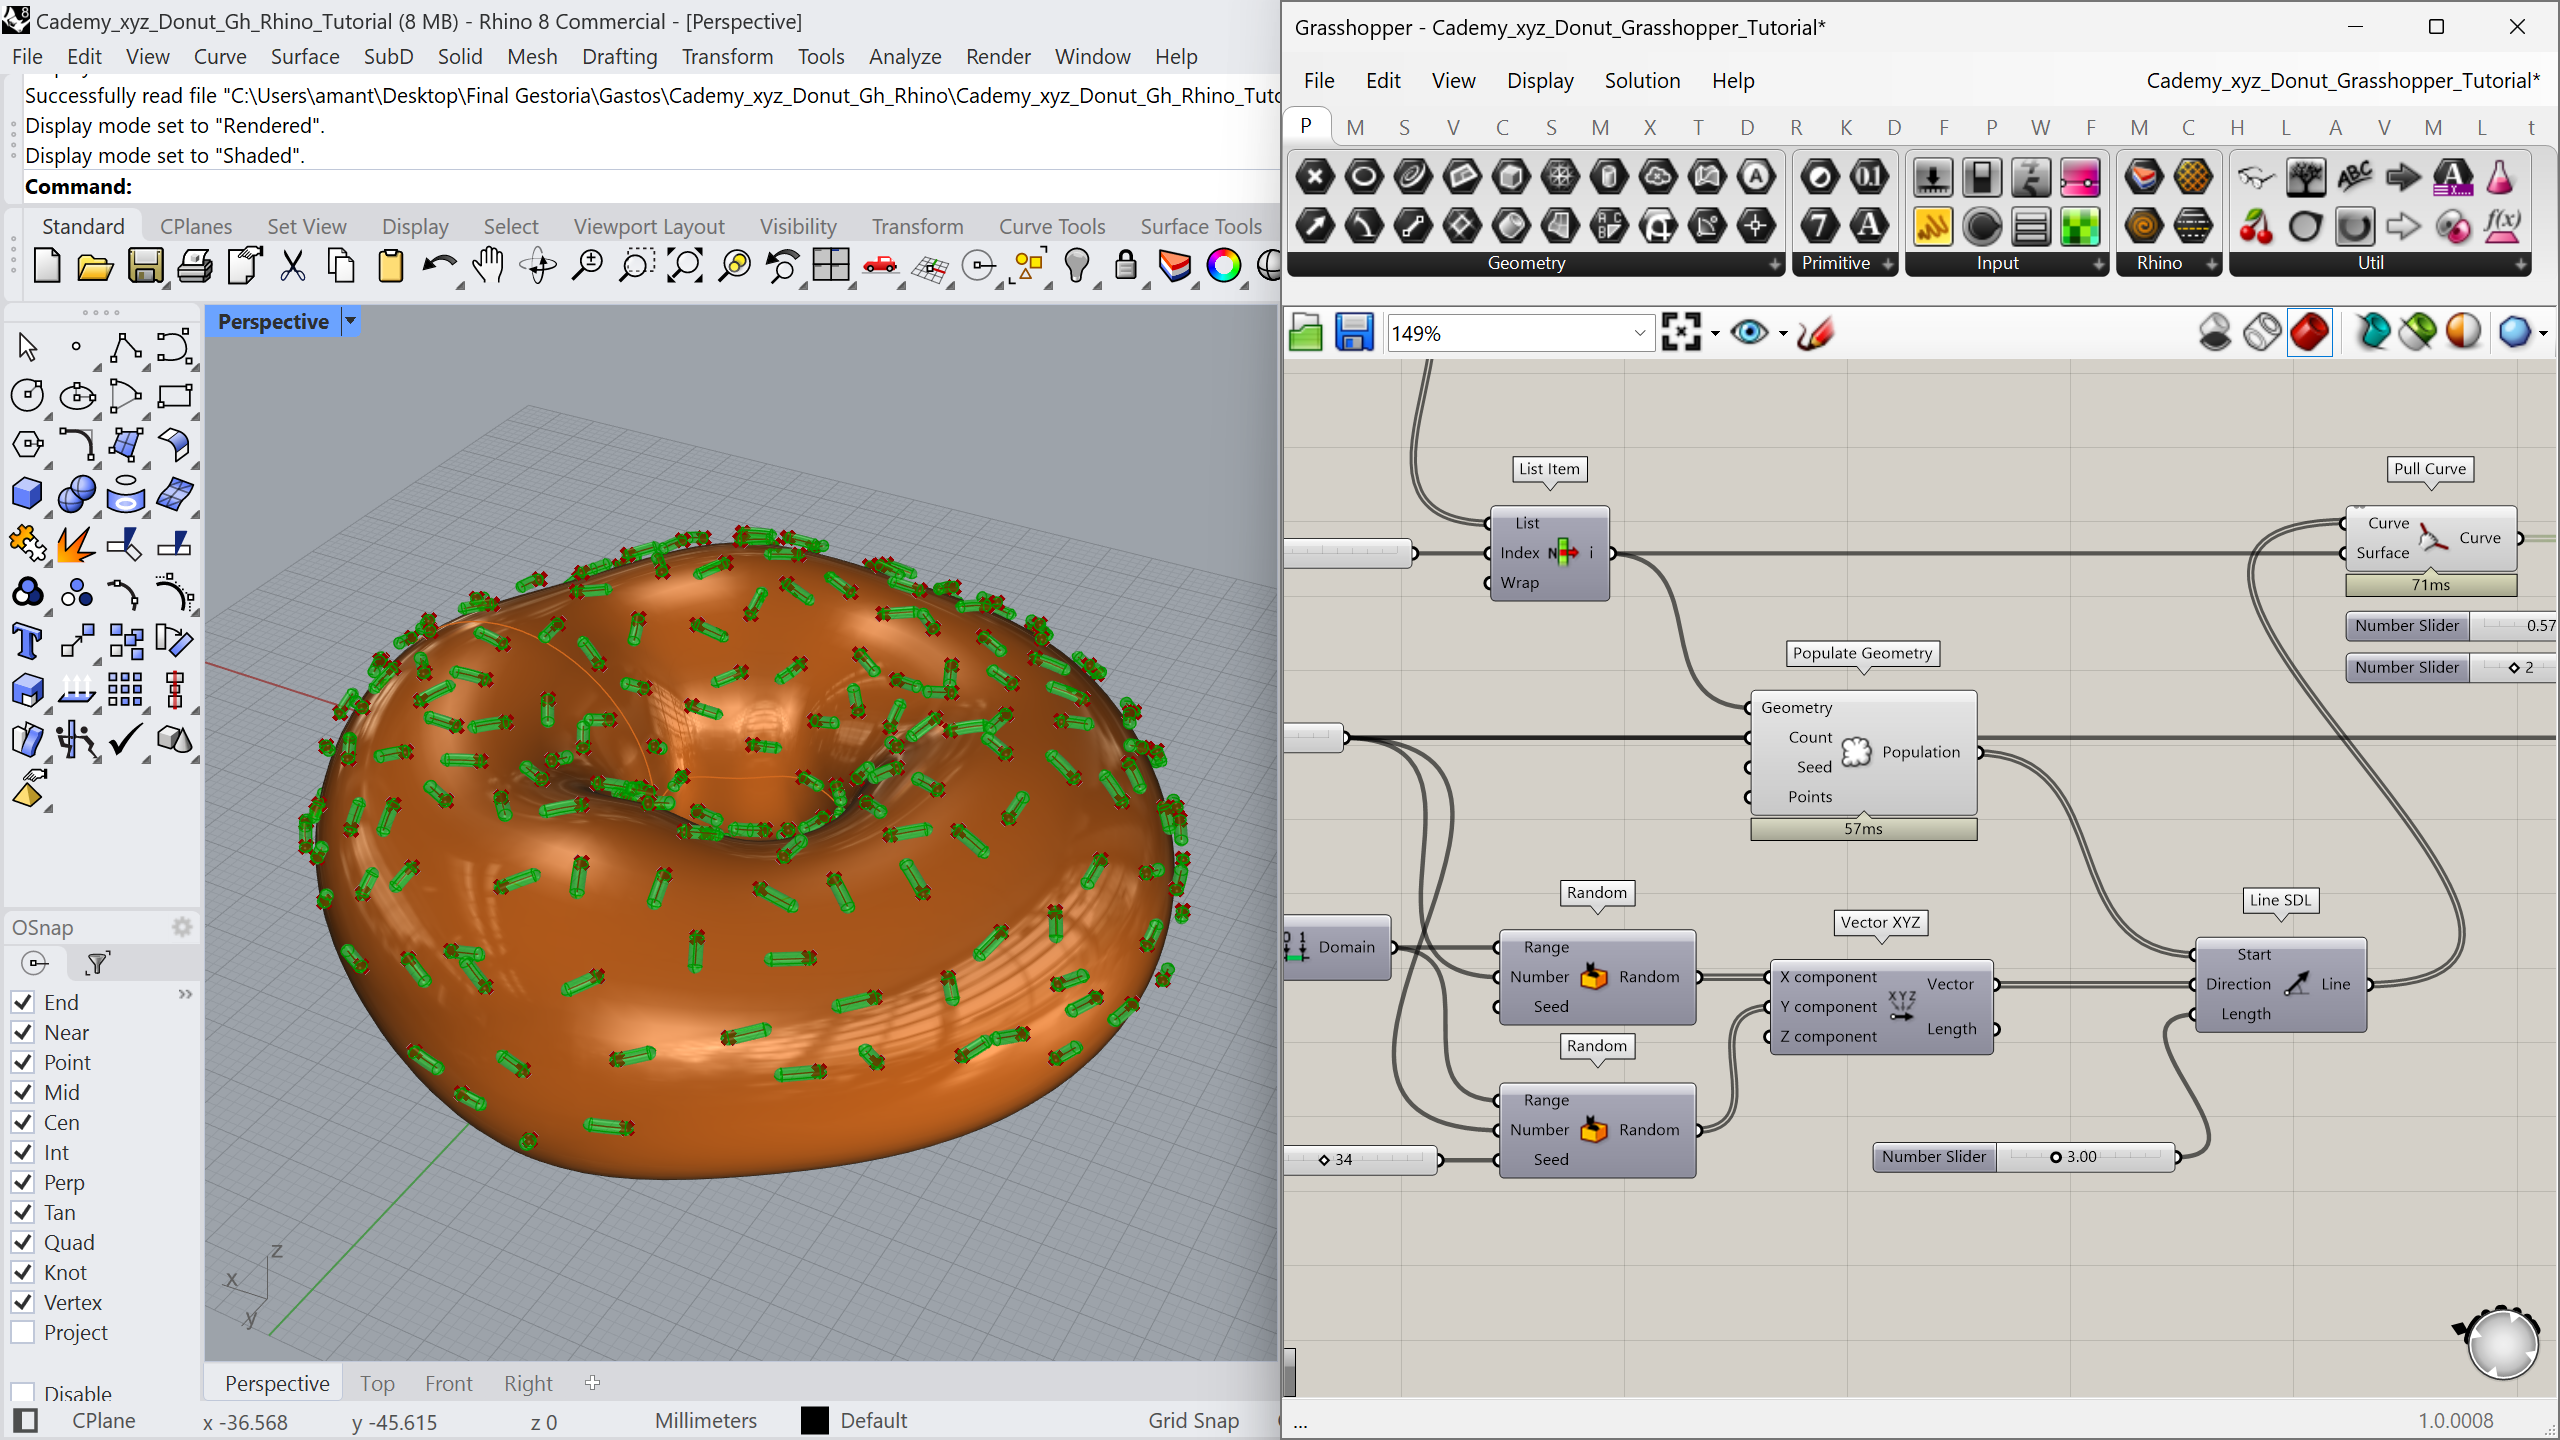
Step 3: Bringing the Donut to Life with Sprinkles
- Extract the top surface of the glaze using the Deconstruct Brep component.
- Use Populate Geometry to scatter hundreds of points across the surface instantly.
- Use these points as anchors for sprinkles created with the Line SDL component.
- Randomize the orientation and length of the lines to achieve a realistic, non-uniform look.
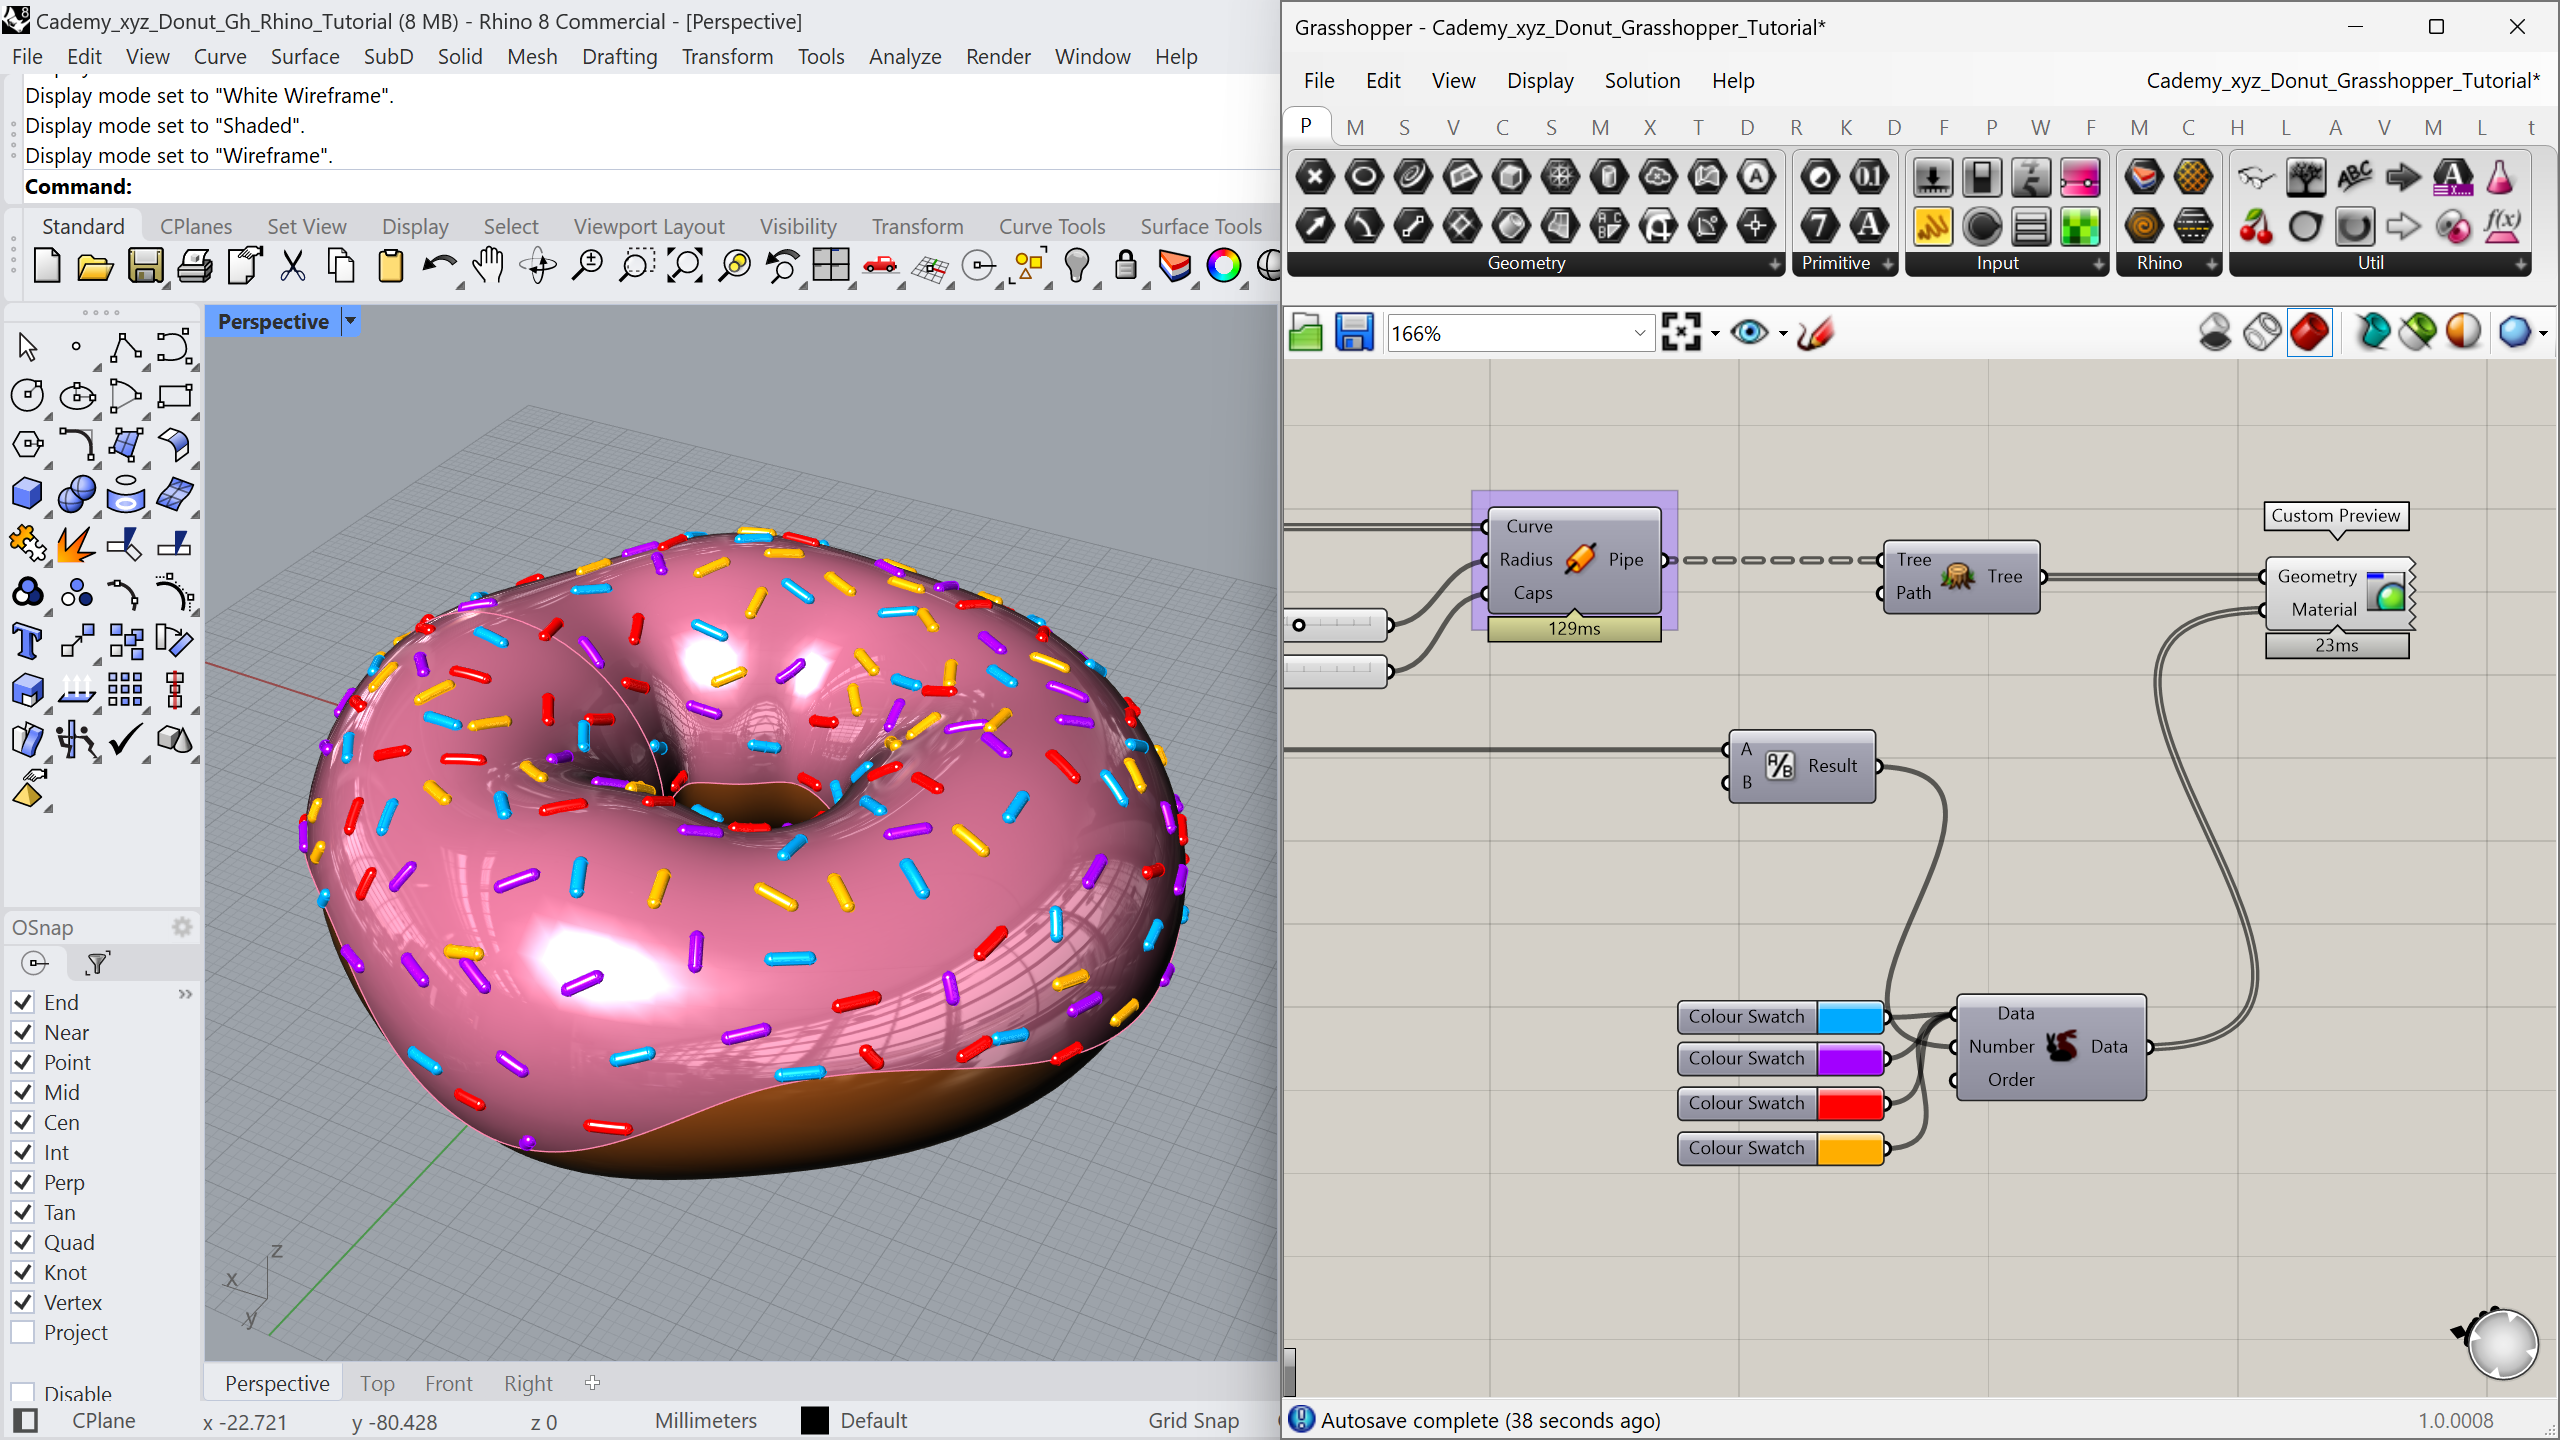
Step 4: Visualizing and Perfecting the Aesthetics
- Use the Custom Preview component to assign colors and materials directly in Grasshopper.
- Play with the sliders to watch the glaze melt, the sprinkles multiply, and the donut change shape in real-time.
- This workflow demonstrates why parametric design is the most powerful tool for modern industrial designers and architects.
Why Start Your Journey with the Grasshopper Donut?
Mastering Grasshopper 3D unlocks a new world of professional possibilities. Beyond this donut, the logic of scattering, remapping, and surface manipulation applies to high-end architectural facades, footwear design, and automotive surfacing. This tutorial is your first step toward becoming a parametric expert.
Software & Requirements
- Software: Rhinoceros 3D + Grasshopper (No plugins required!).
- Level: Absolute Beginner.
Thanks for reading ❤️
