Fast SubD modeling workflow in Rhinoceros 3D

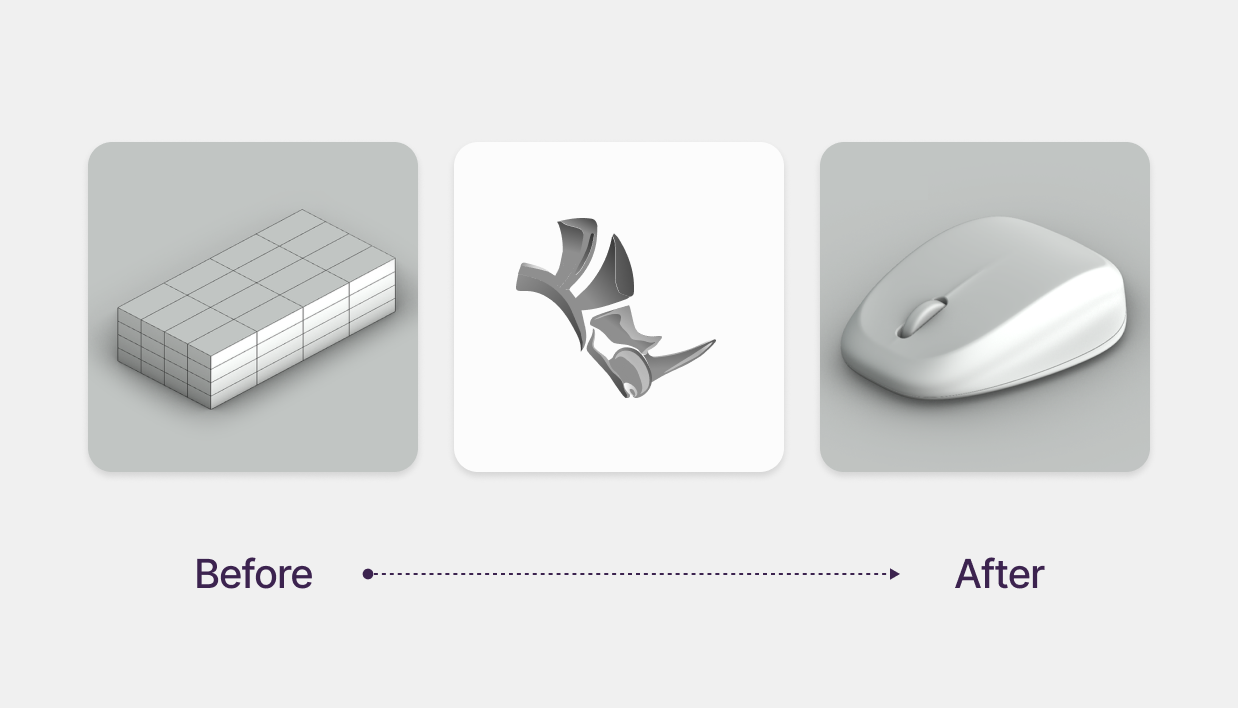
Rhinoceros 3D is a powerful tool for 3D modeling, offering a hybrid workflow combining NURBS, Mesh, and SubD modeling. With SubD tools, you can quickly create complex organic shapes like a computer mouse.
However, if you're new to SubD modeling, it can feel confusing at first. If you follow these steps, you’ll be able to model anything with practice.
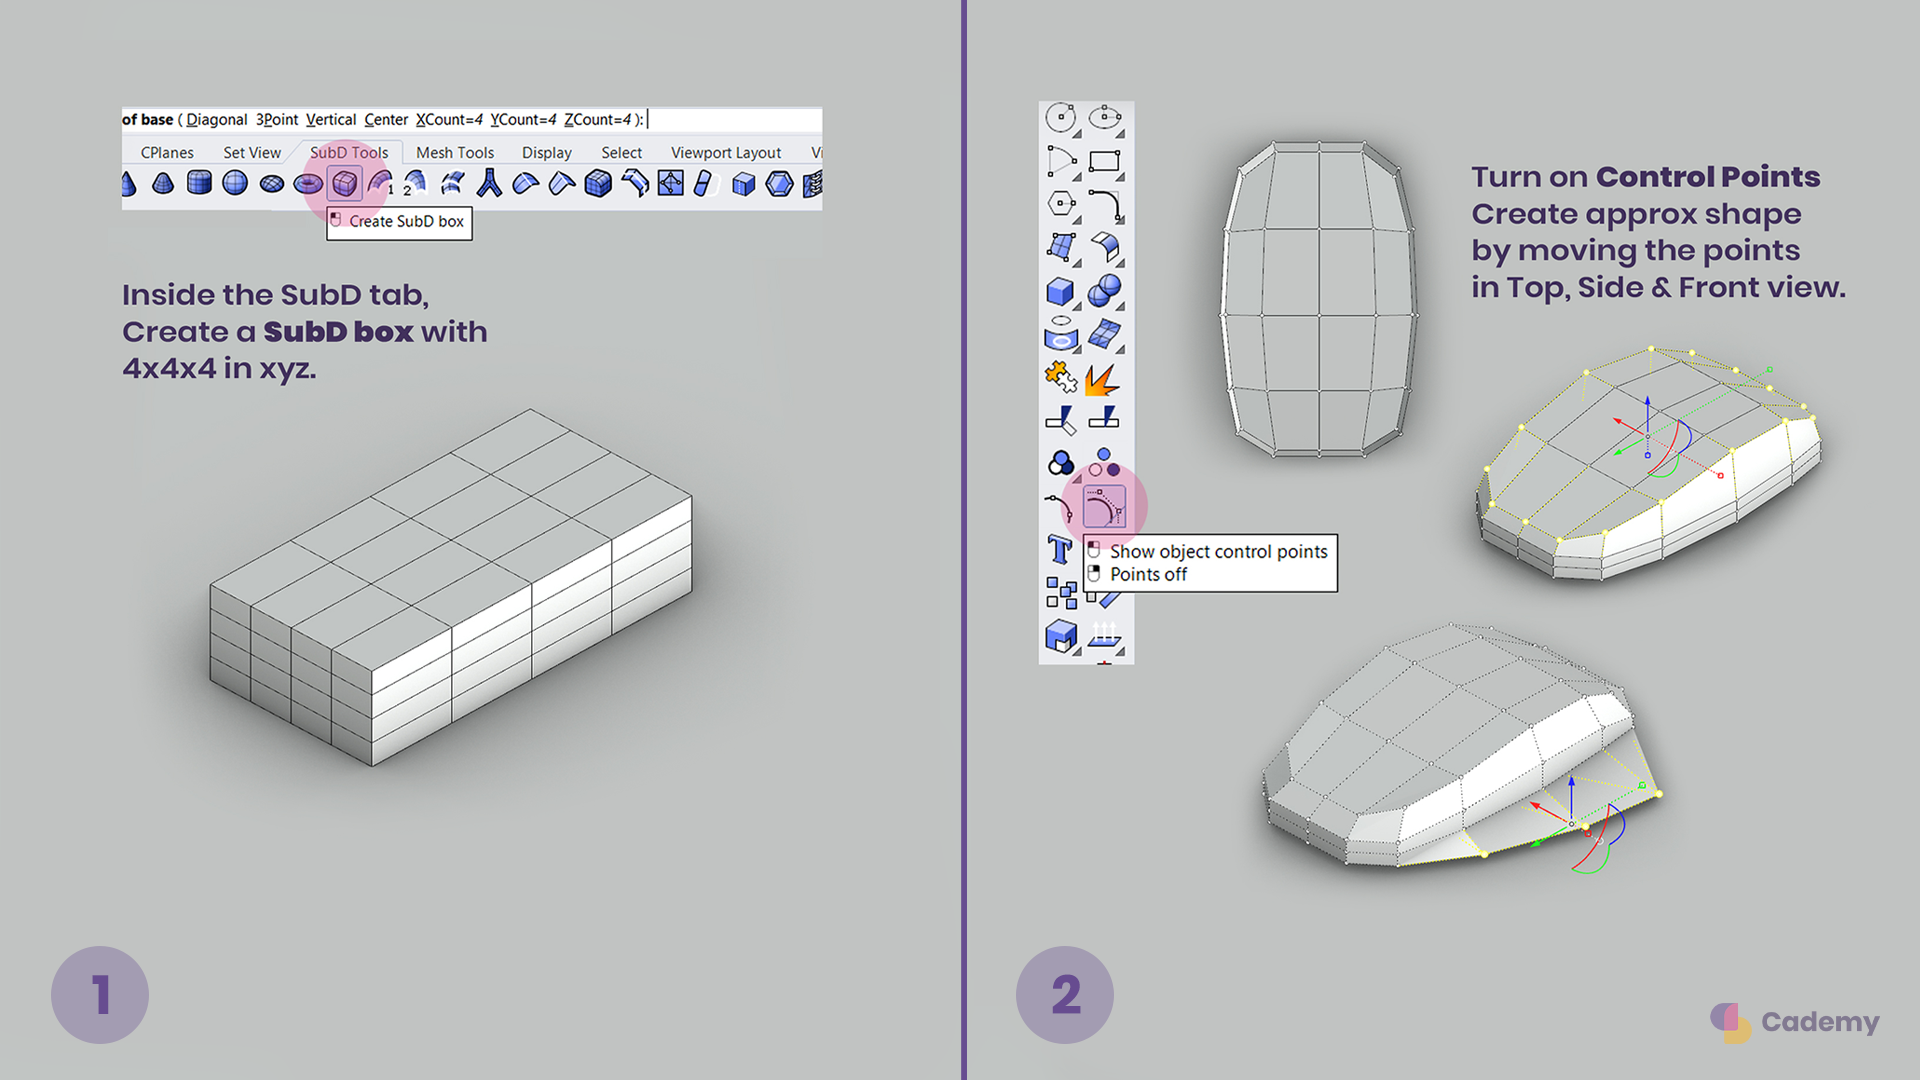
Step 1: Create the Base SubD Geometry
1️. Start by creating a Mesh Box or SubD Box with dimensions 4x4x4 in the X, Y, and Z directions.
2️. Scale the box to fit the general size of your model.
3. Press TAB to toggle between LowPoly and SubD mode for better visualization.
Step 2: Shape the Basic Form
4. Turn on Control Points to manipulate the SubD geometry.
5. Move the control points to gradually shape the base into a rough mouse form.
6. Refine the shape by adjusting vertices and edges.
💡 Tip: Press TAB to quickly switch between LowPoly mode (for precise adjustments) and SubD mode (to see the smoothed version).
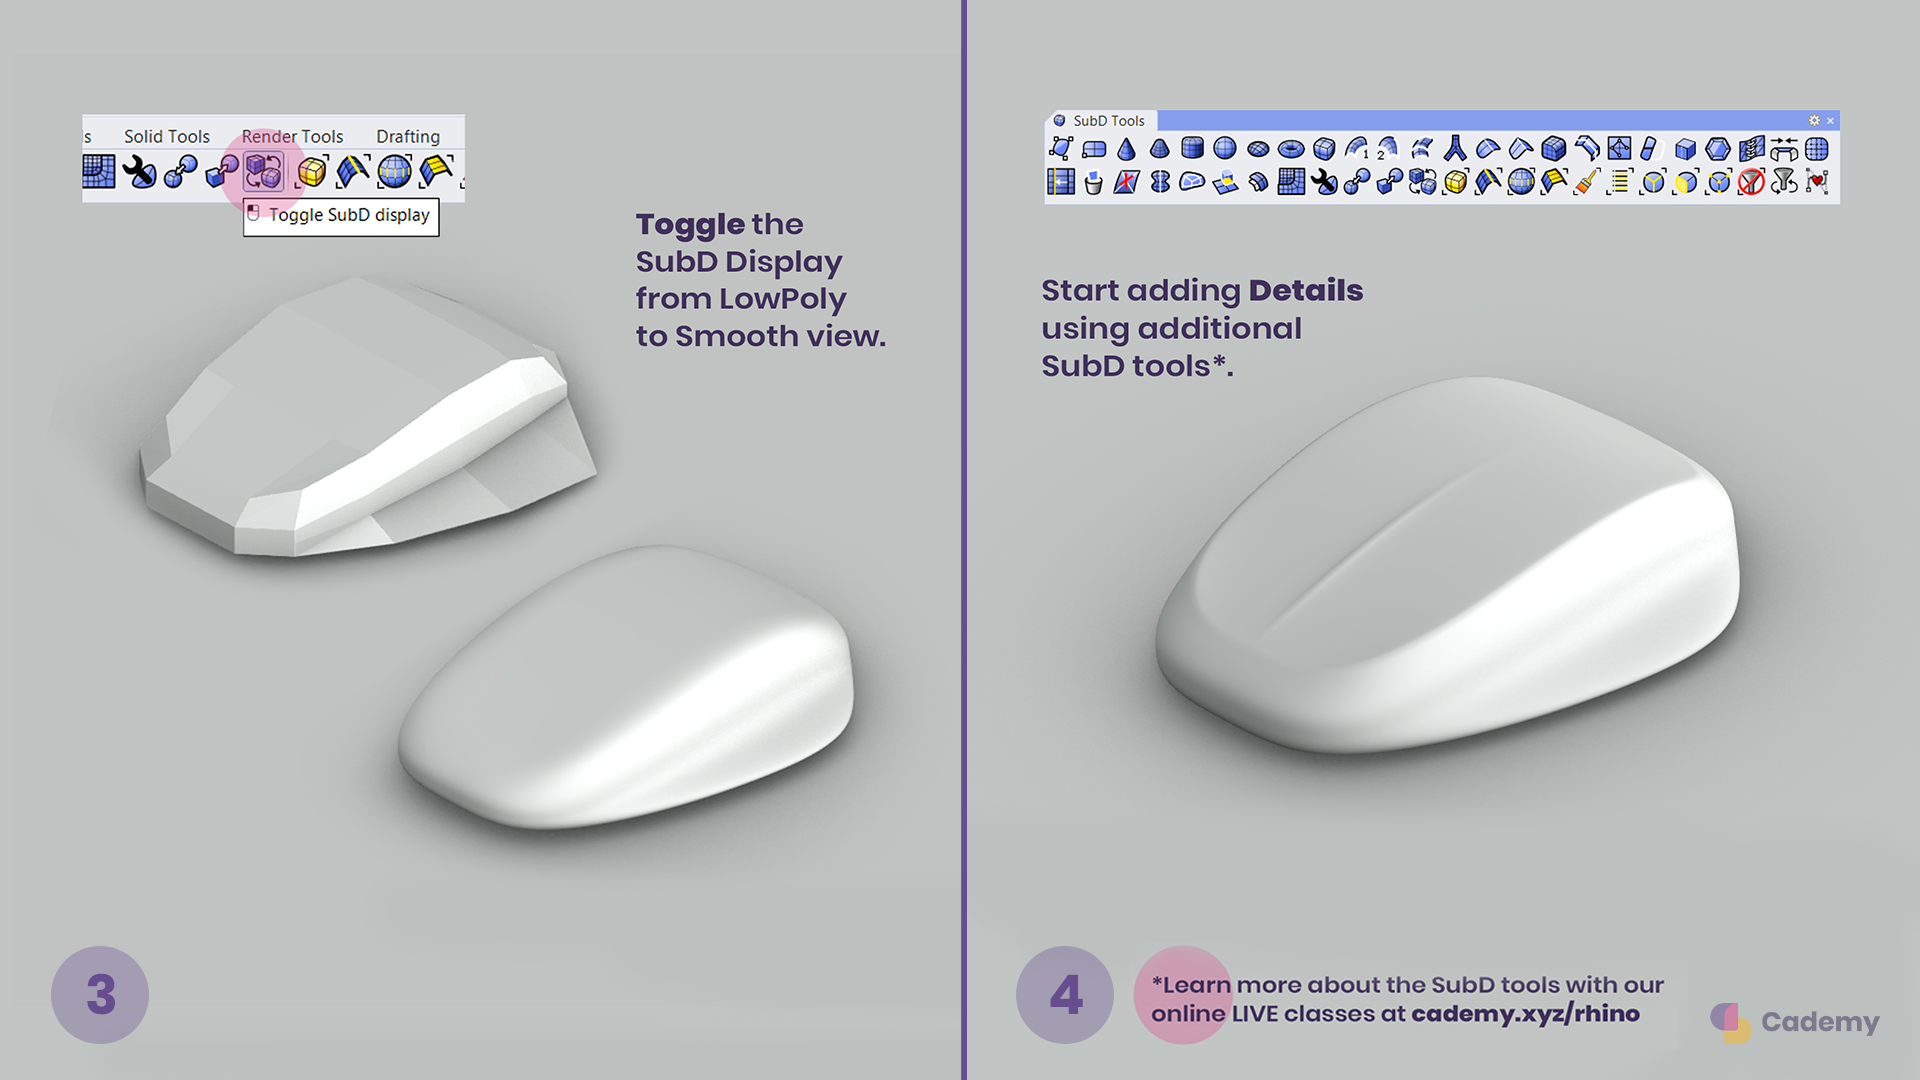
Step 3: Add Details to the SubD Model
7. Start refining the SubD surface by adding key details.
8. Experiment with SubD operations like extruding, beveling, and creasing.
9. If you’re new to SubD, you can learn more about these tools in our Rhino Course.
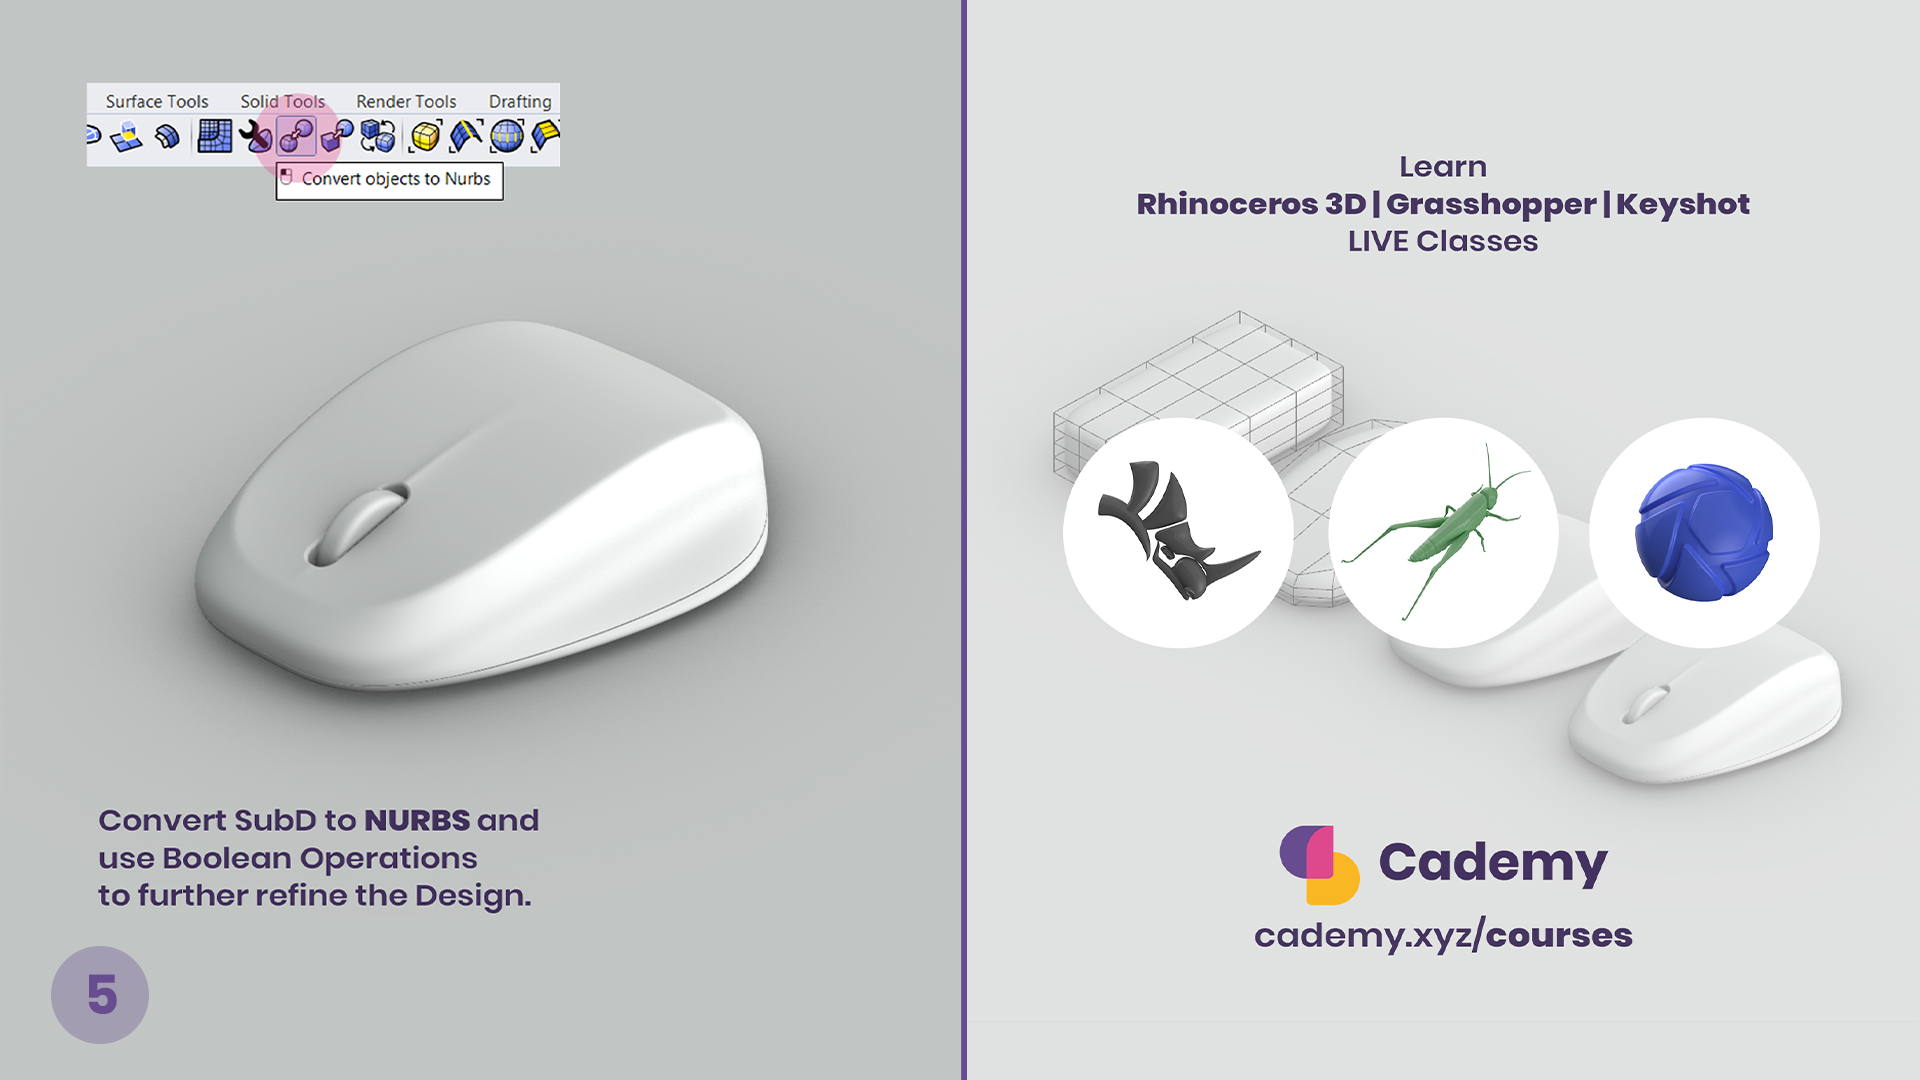
Step 4: Convert to NURBS for Finalization
1️0. Once the shape is complete, convert the SubD model to NURBS.
11. Perform Boolean operations to add precise cutouts or fillets.
12. Prepare the file for prototyping, rendering, or manufacturing.
Step 5: Final Adjustments & Export
13. Double-check the geometry for any imperfections.
14. Apply additional refinements like smoothing or filleting edges.
15. Export the model for rendering, 3D printing, or manufacturing.
This workflow was inspired by Blender artist Cooner Pelletier, and we hope it helps you explore SubD modeling in Rhino.
Thank you for reading ❤️
