How to Adjust the Zebra Analysis in Rhinoceros 3D


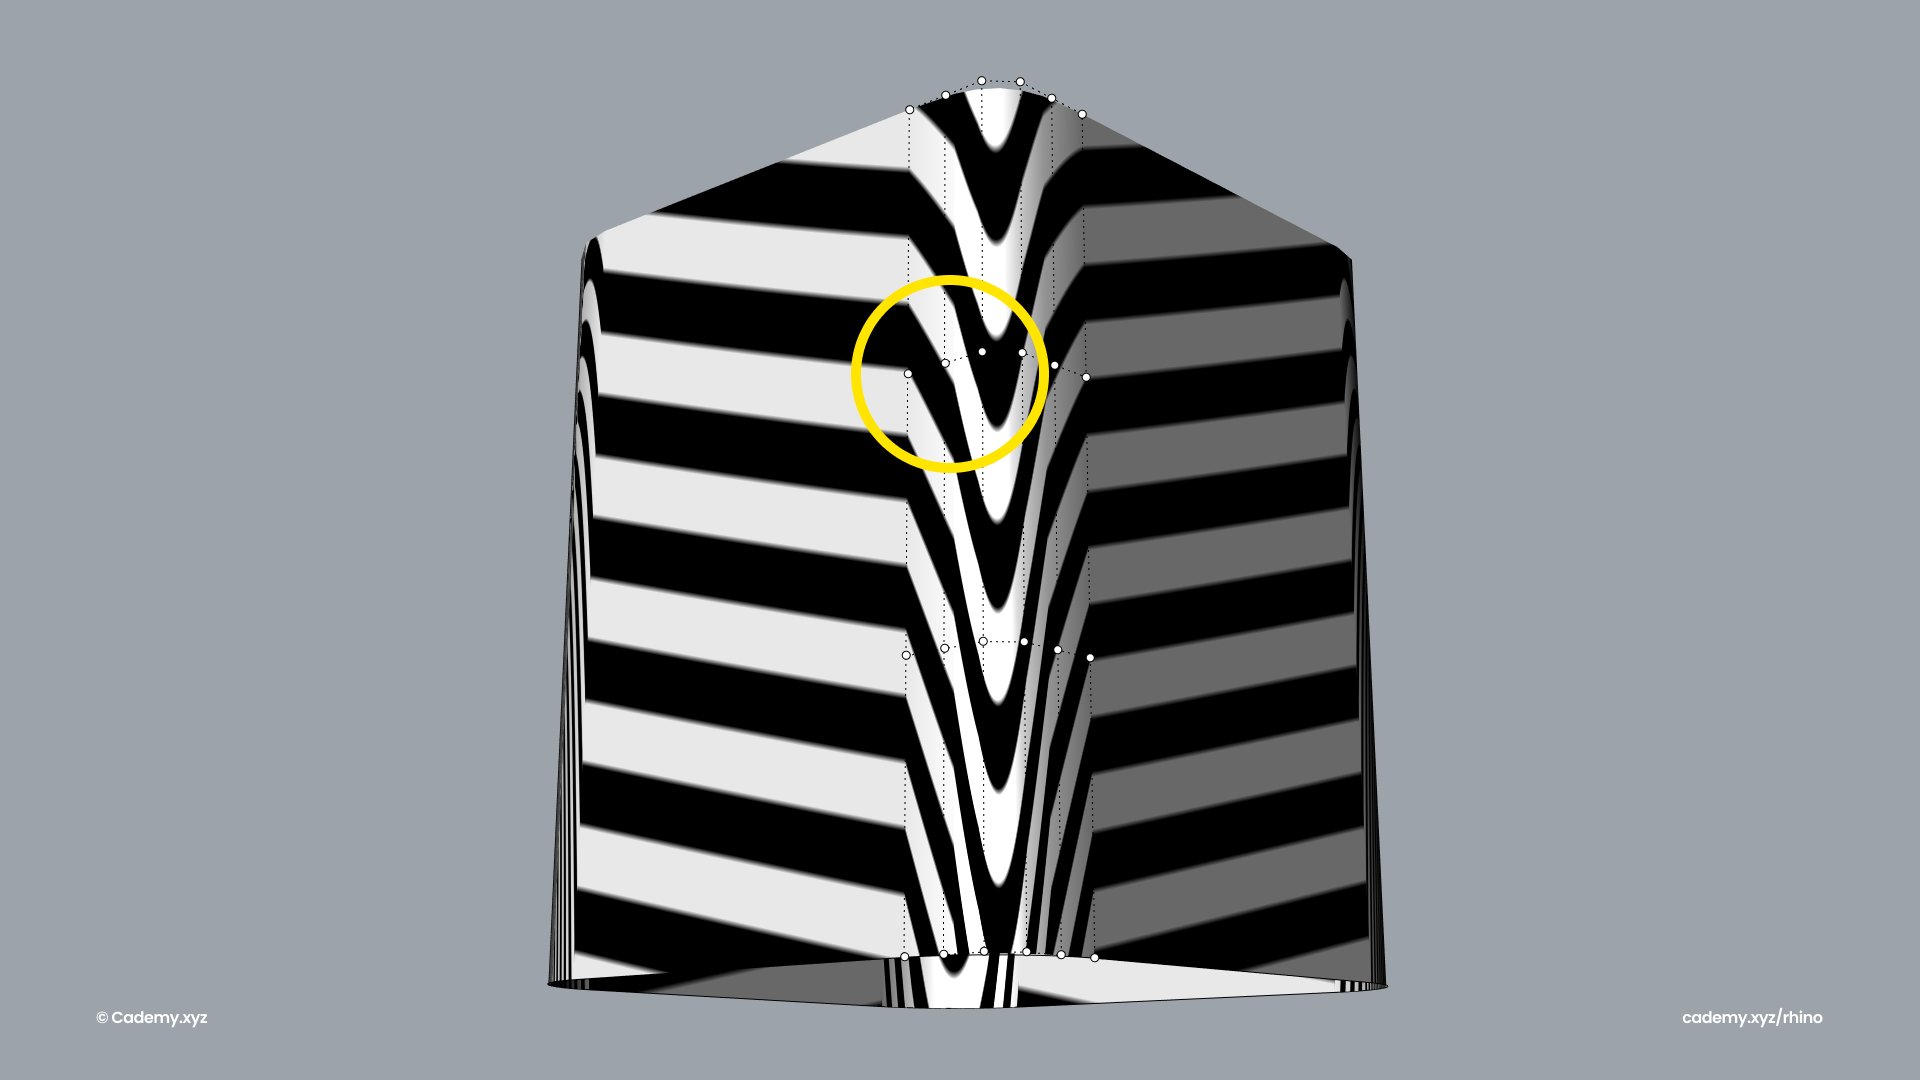
Zebra analysis is a powerful visualization tool in Rhinoceros 3D that helps evaluate surface continuity and smoothness. By displaying alternating black and white stripes on a surface, it provides insight into how the surface curves in different directions.
The stripes run perpendicular to the curvature, changing direction where the curvature shifts, making it an essential tool for detecting surface irregularities.
Improving Zebra Stripe Quality
If the Zebra stripes in Rhino appear jagged or inconsistent, it may be due to low-resolution mesh settings. Follow these steps to enhance the accuracy and smoothness of the analysis:
1. Select the Adjust Mesh Option in Zebra Analysis
Navigate to the Zebra analysis tool and choose the Adjust Mesh option
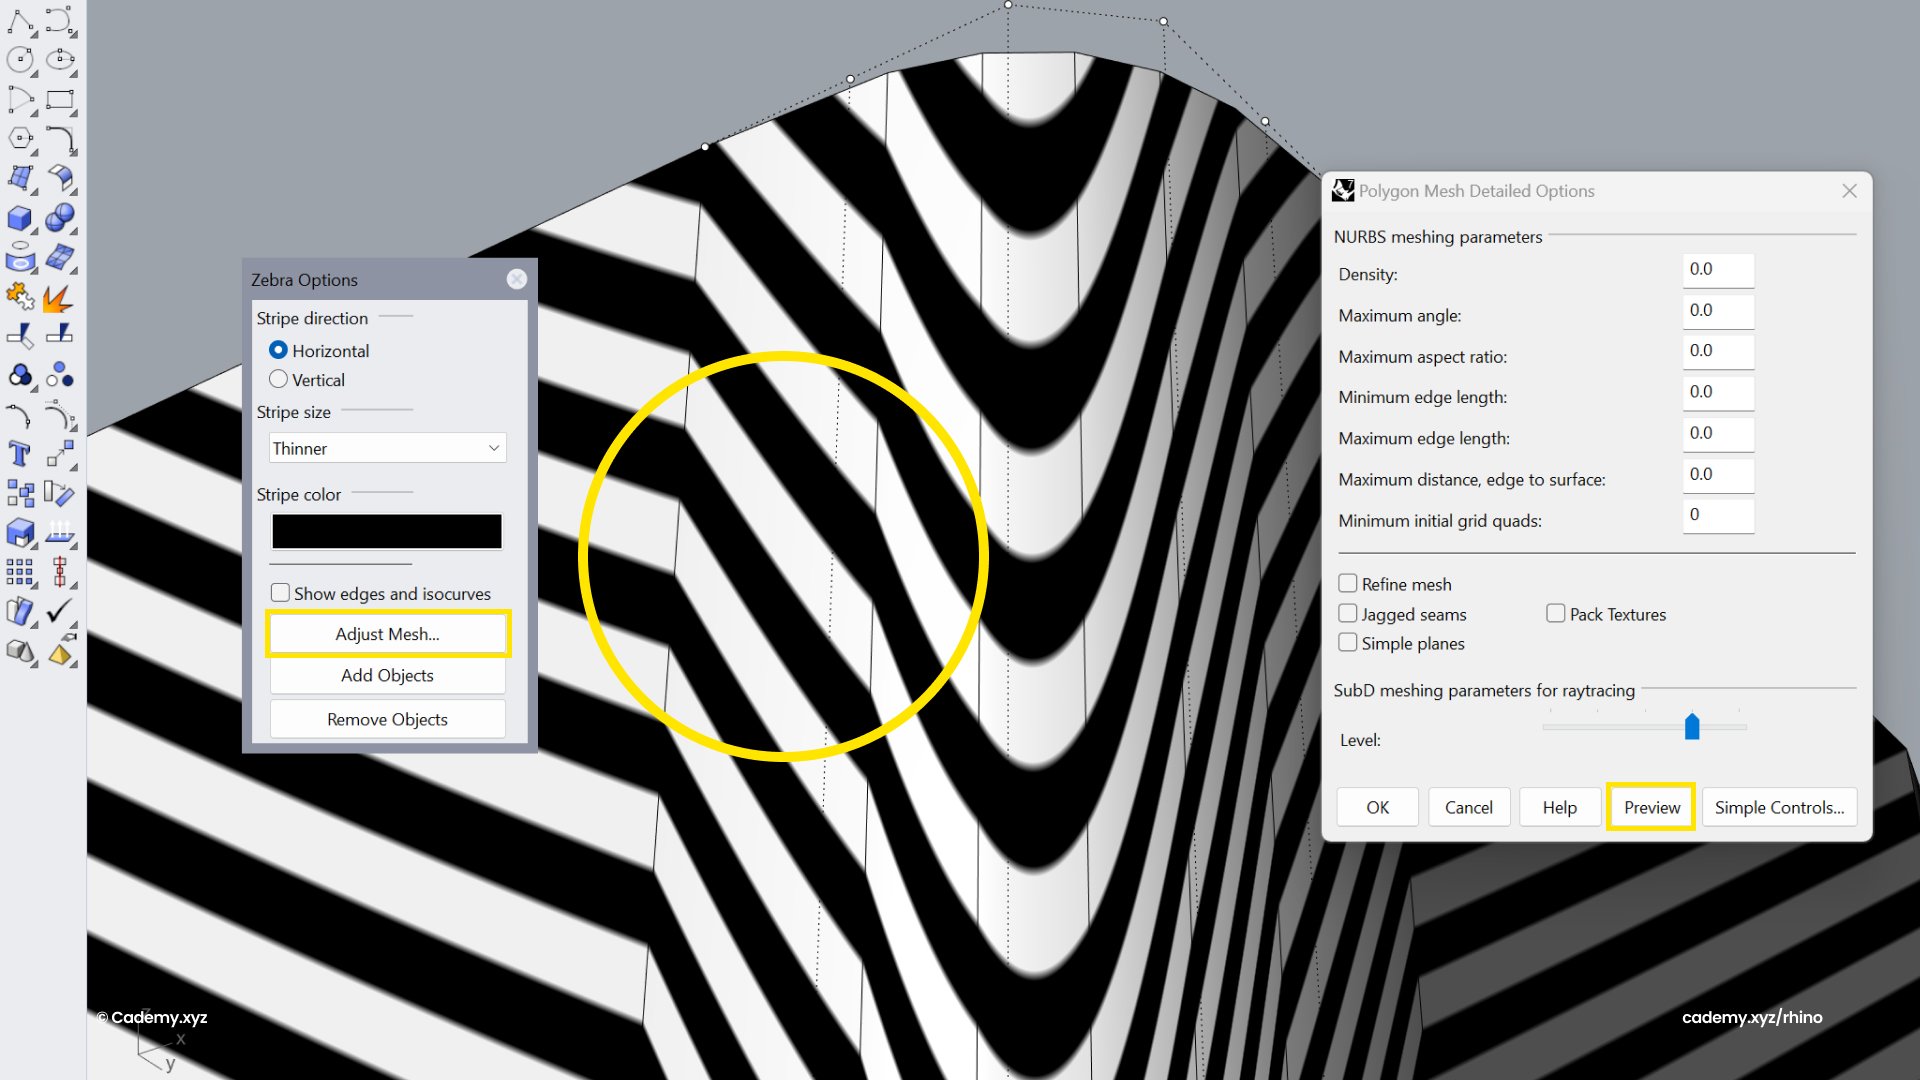
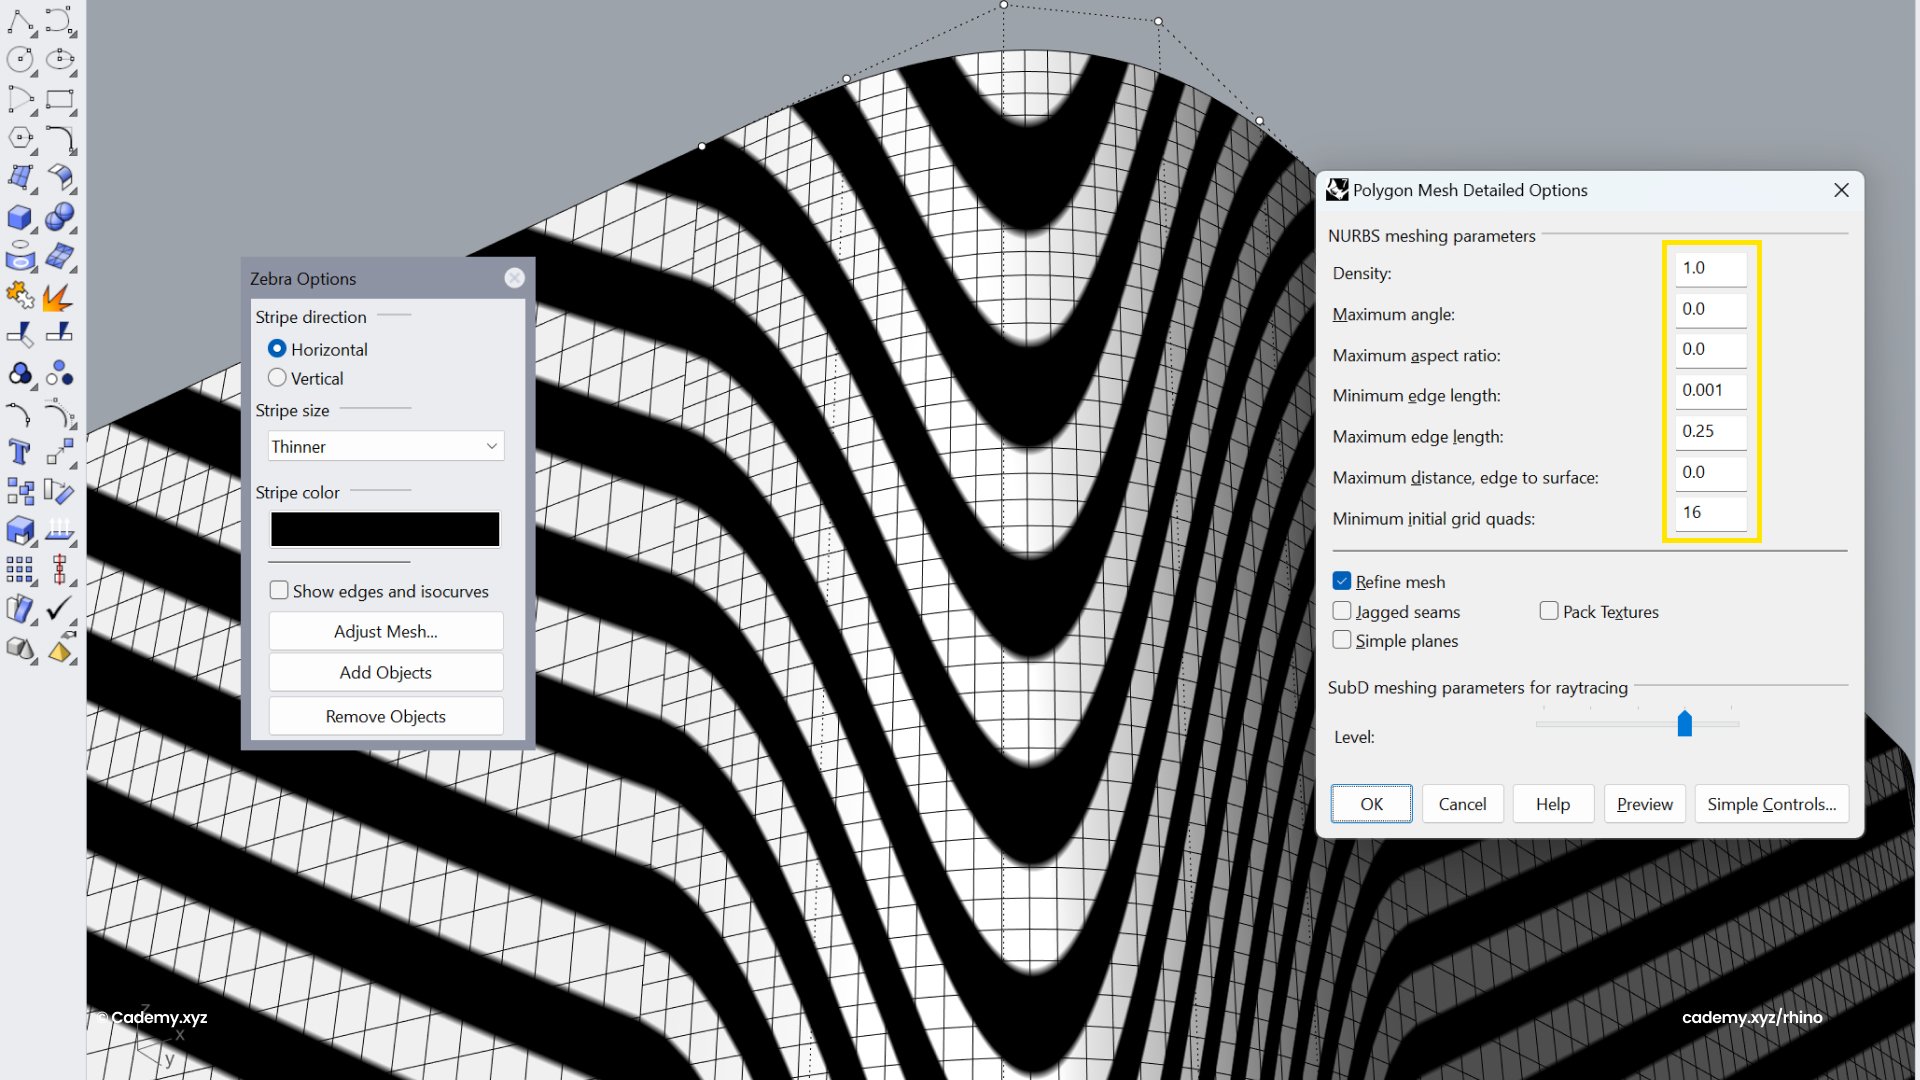
2. Modify the mesh settings
- Density: Controls the number of mesh polygons used for rendering the Zebra stripes. Higher values produce smoother stripes but may impact performance.
- Refine: Subdivides mesh polygons to improve stripe accuracy, though it may increase complexity and slow down processing.
- Max Angle: Determines the maximum angle between adjacent faces in the mesh. Smaller angles result in smoother surfaces but can make the mesh more complex.
- Maximum Edge Length: Sets the maximum allowable edge length for each mesh face. A lower value increases mesh density and precision but may affect performance.
3. Apply the Settings
Once you’ve fine-tuned the mesh settings, Zebra analysis should display high-quality, smooth stripes for better surface evaluation.
Troubleshooting Zebra Analysis Issues
Bug Fix: Sometimes, Zebra analysis appears accurate in the preview but disappears after confirming the settings. If this happens:
- Try exploding and rejoining the surfaces.
- This forces Rhino to recalculate the mesh, typically resolving the issue and restoring accurate Zebra analysis.
By following these steps, you can achieve a more precise Zebra analysis in Rhinoceros 3D, allowing for better evaluation of surface quality and continuity.
Thanks for reading ❤️
